


Subscribe to:
Post Comments (Atom)
Featured Post
HPE MSA 2040 configuration step by step
HPE MSA 2040 configuration Default IP range for HP SAN storage MSA 2040 is 10.0.0.1/2 You need to connect your laptop and storage with...

-
 HPE MSA 2040 configuration Default IP range for HP SAN storage MSA 2040 is 10.0.0.1/2 You need to connect your laptop and storage with...
 -
When you are powering on the VM and getting below error what do you need to do? Error code Module ‘Monitorloop’ power on failed Failed to ...
-
 CRITICAL: This node is not healthy because the root volume is low on space (<10MB). The node can still serve data, but it cannot part...
 -
 Hi Friends, Here I am going to share some steps that will be required during ESXI host add in Vcenter 6.0. I have one Vcenter server wi...
 -
Command to check vpxa, hostd service status | start stop the vpxa & hostd service Login to ESXi host using putty session Go to /etc/in...
-
X enApp 6.5 Installation and Configuration Steps
-
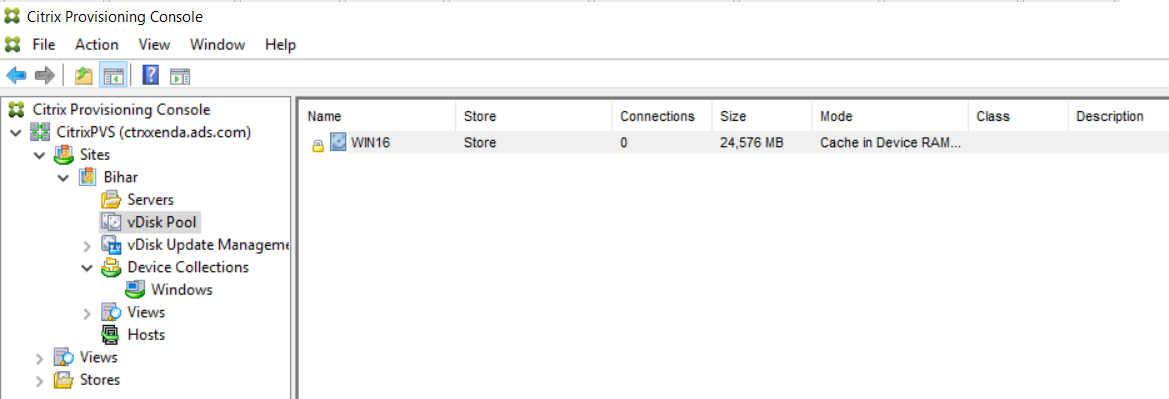
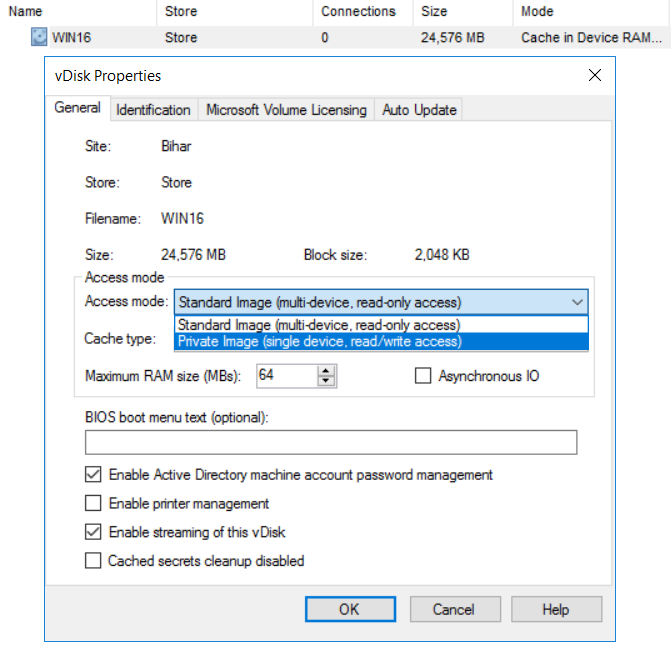
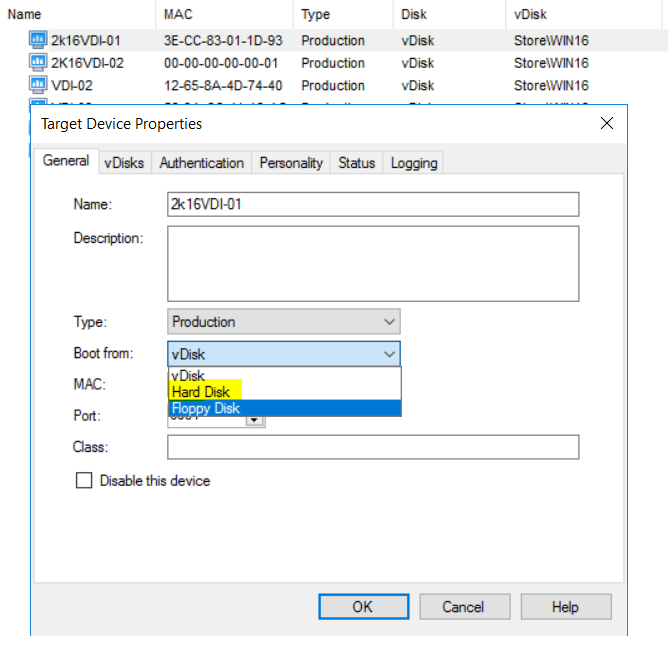
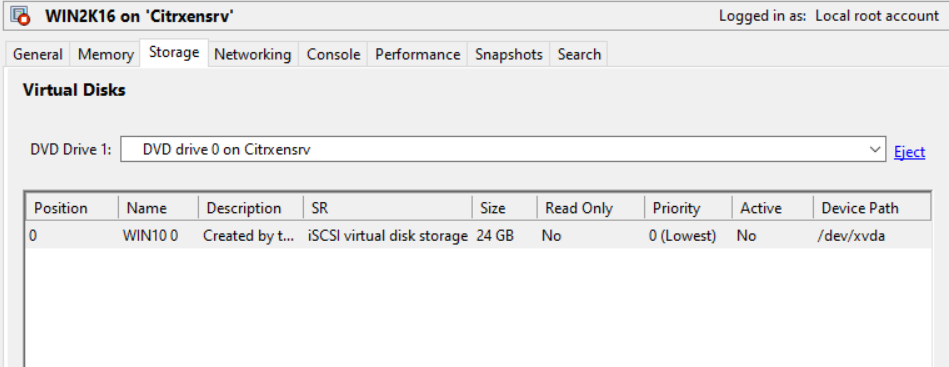
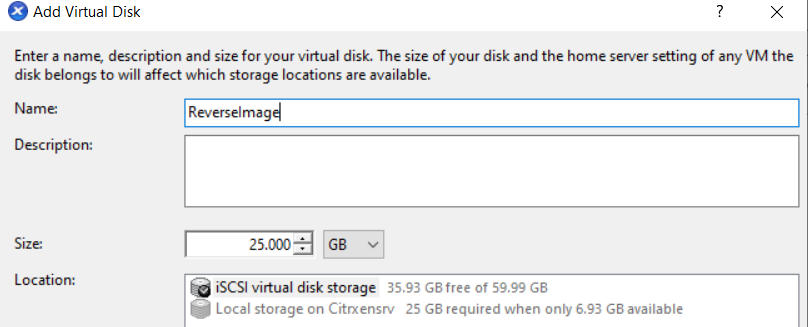
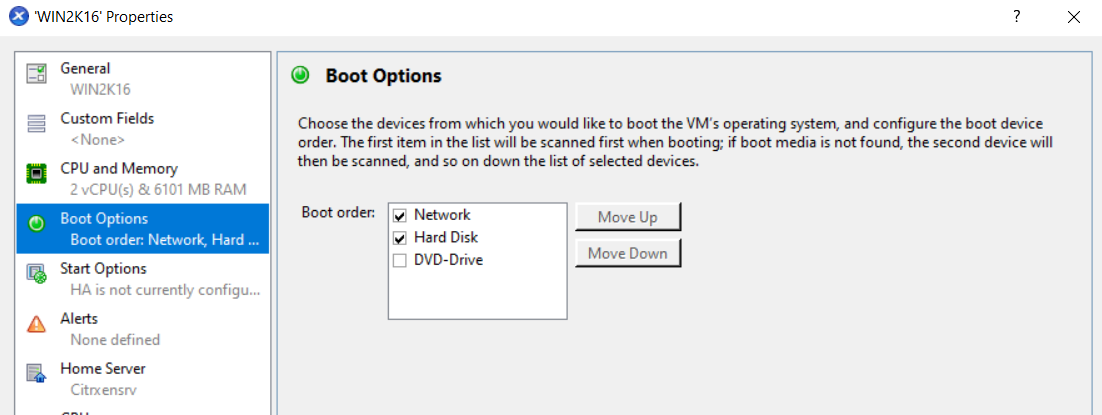
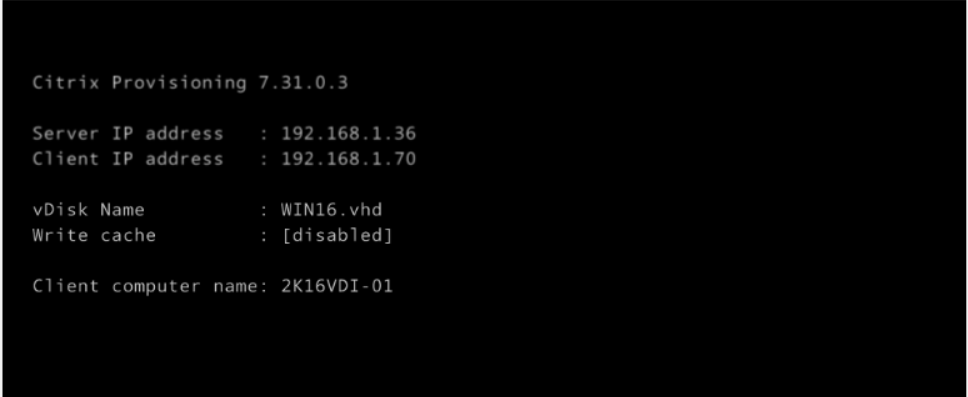
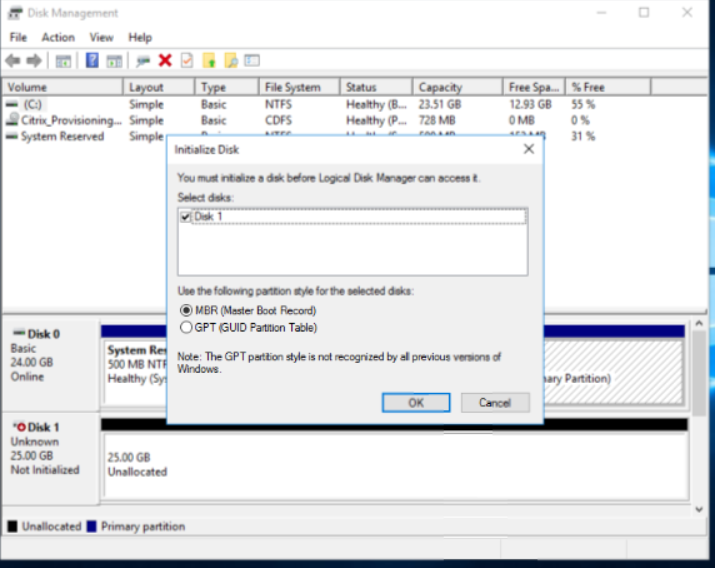
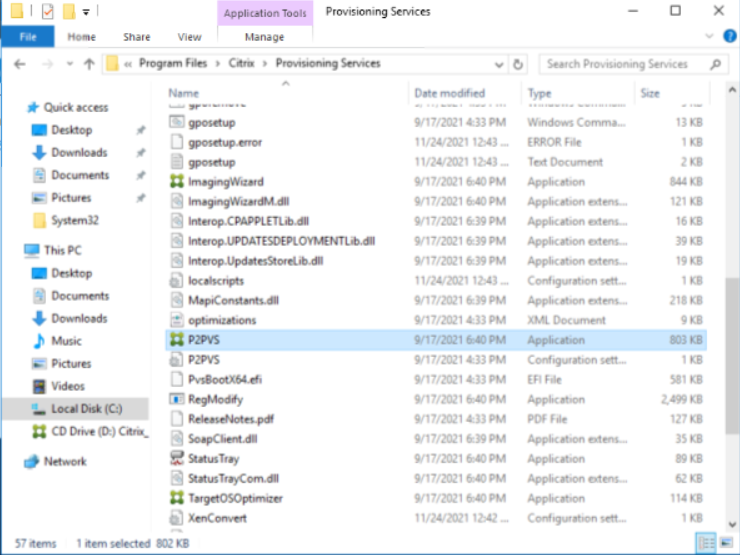
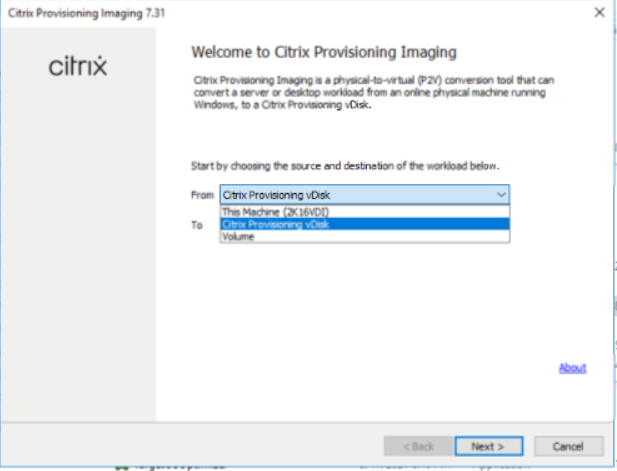
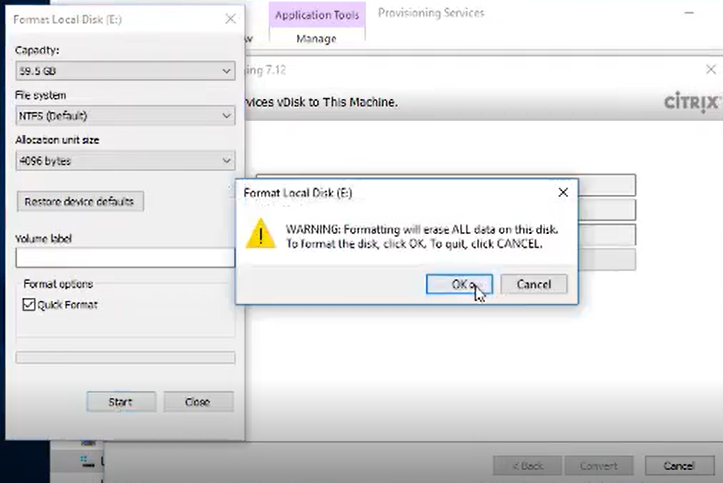
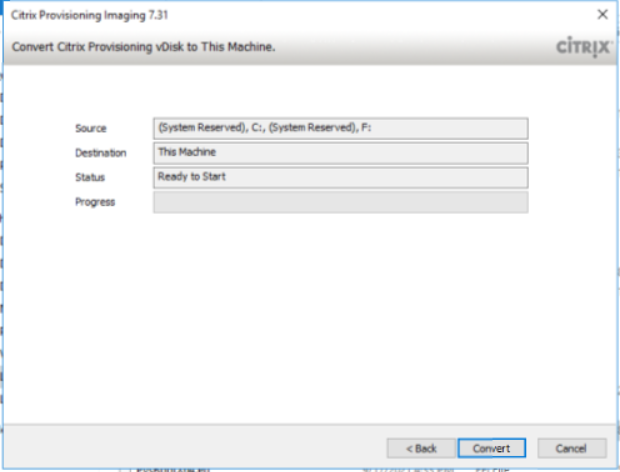
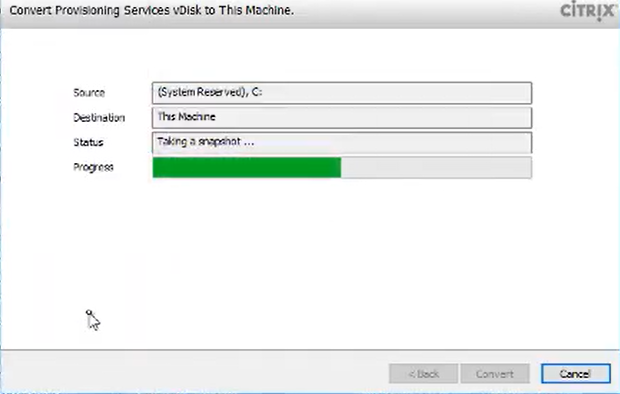
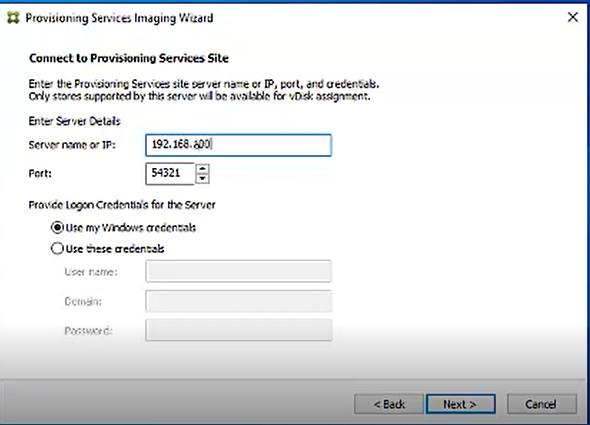
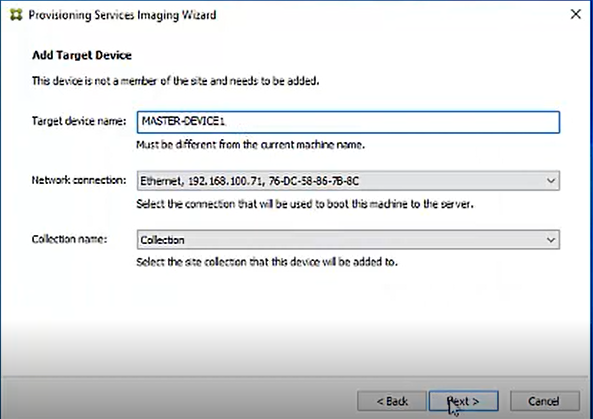
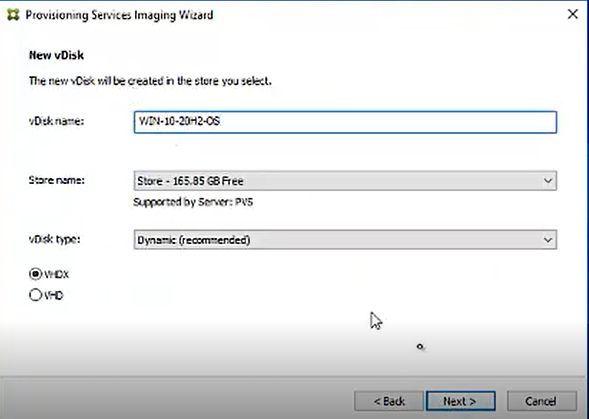
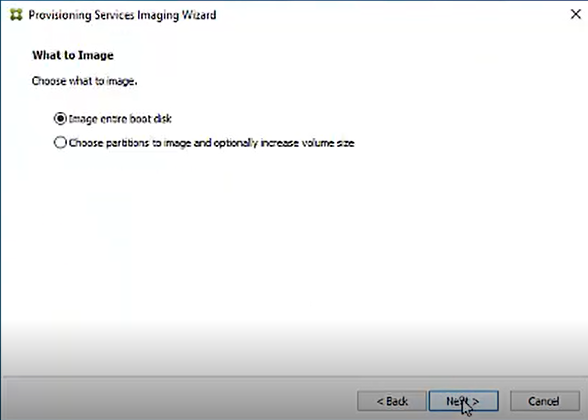
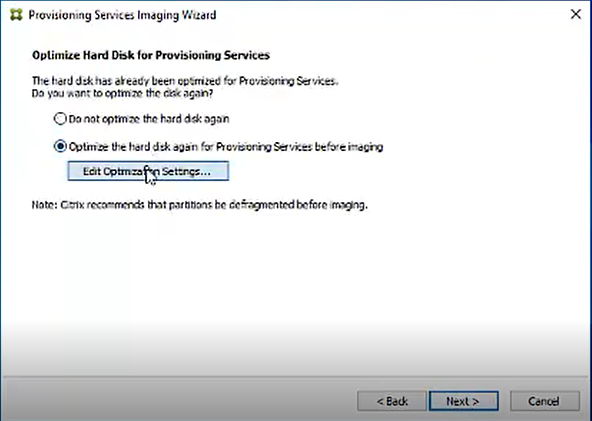
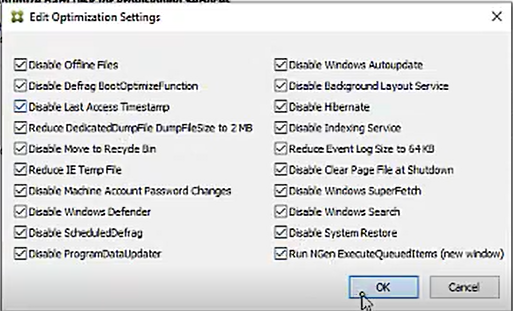
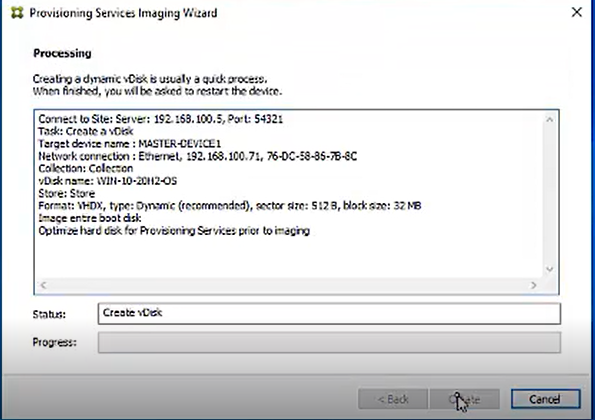
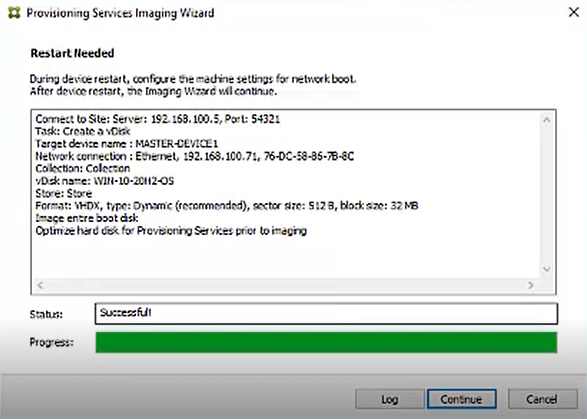
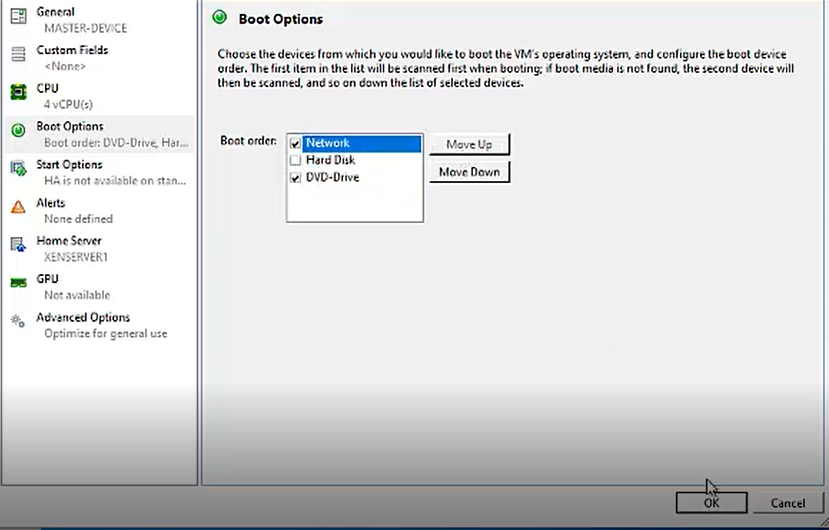
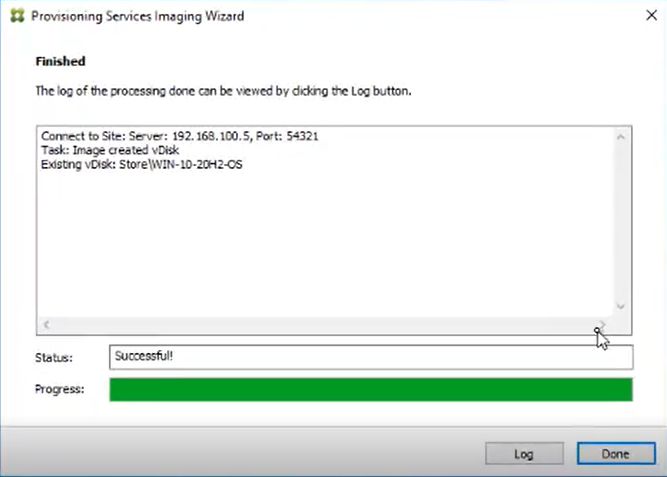
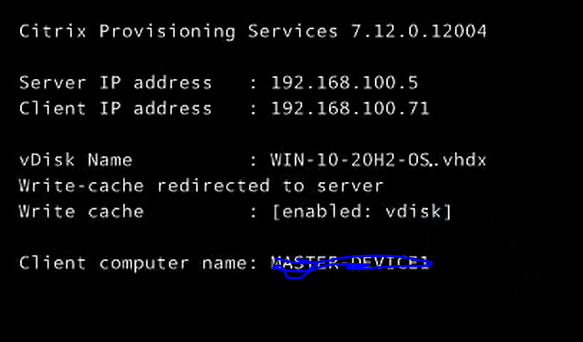
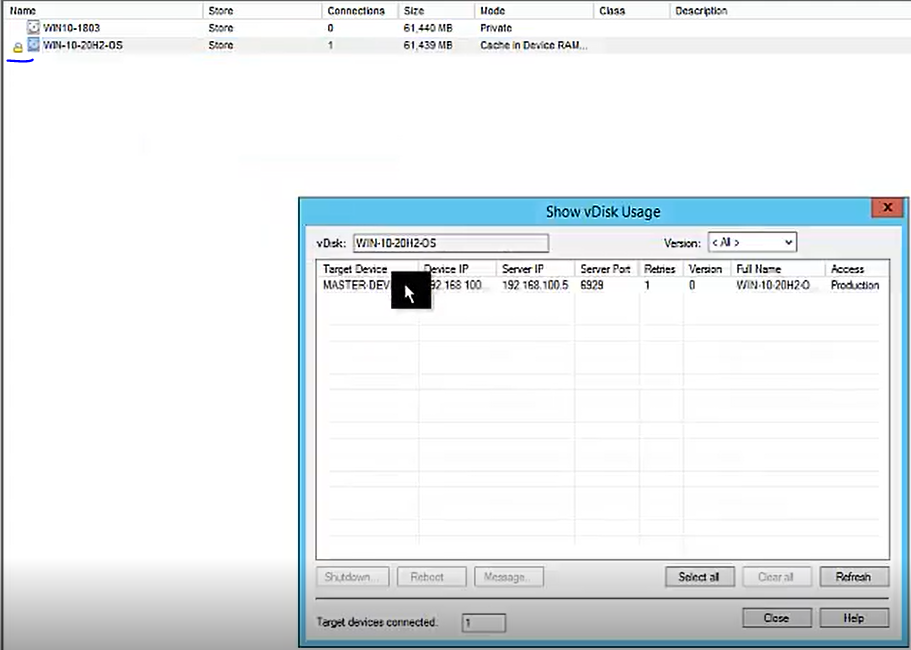
Citrix PVS Reverse Imaging We do reverse imaging when you want to update vDisk, VMTool, OS or drivers. To update Citrix target devices it...
-
Different ways for certification authority backup https://blog.ahasayen.com/certification-authority-backup/ Upgrading / Migra...
-
If you see EDGE node registration in pending state like below Run below command on NSX-T manager to get thumbprint get certificate api th...
-
You can upgrade using VUM, ISO or ESXCLI Here I am going to do this using ESXCLI I am using HPE custom ISO, you can download an offline bund...


No comments:
Post a Comment