Create Delivery group in Citrix 7.9 Step by Step


Create Delivery group in Citrix 7.9 Step by Step


To create a Delivery Group we need to first create a machine catalog and before creating a machine catalog we need to deploy machines.
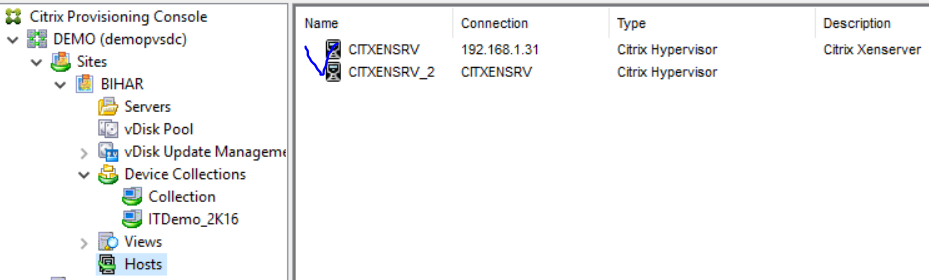

Login to DDC server 

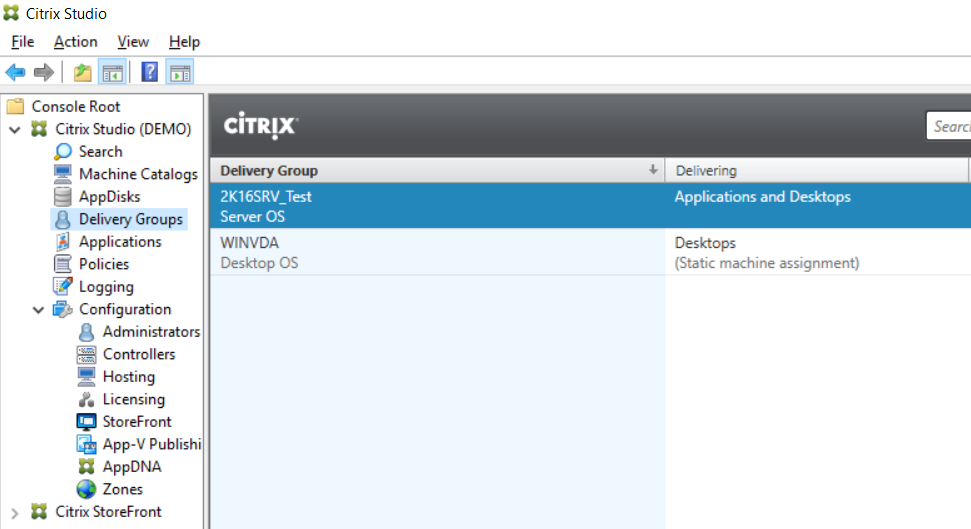
Open Citrix Studio -> Select Delivery Group


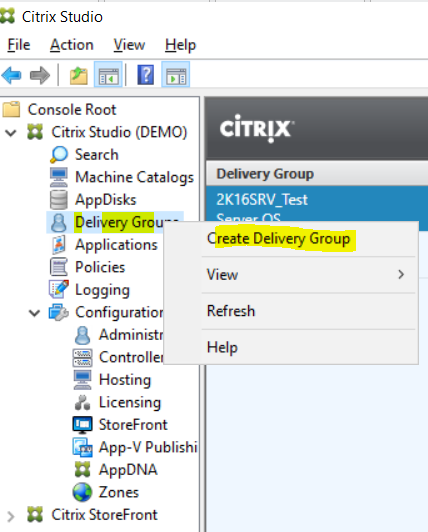
Right click on Delivery Group -> Create Delivery group
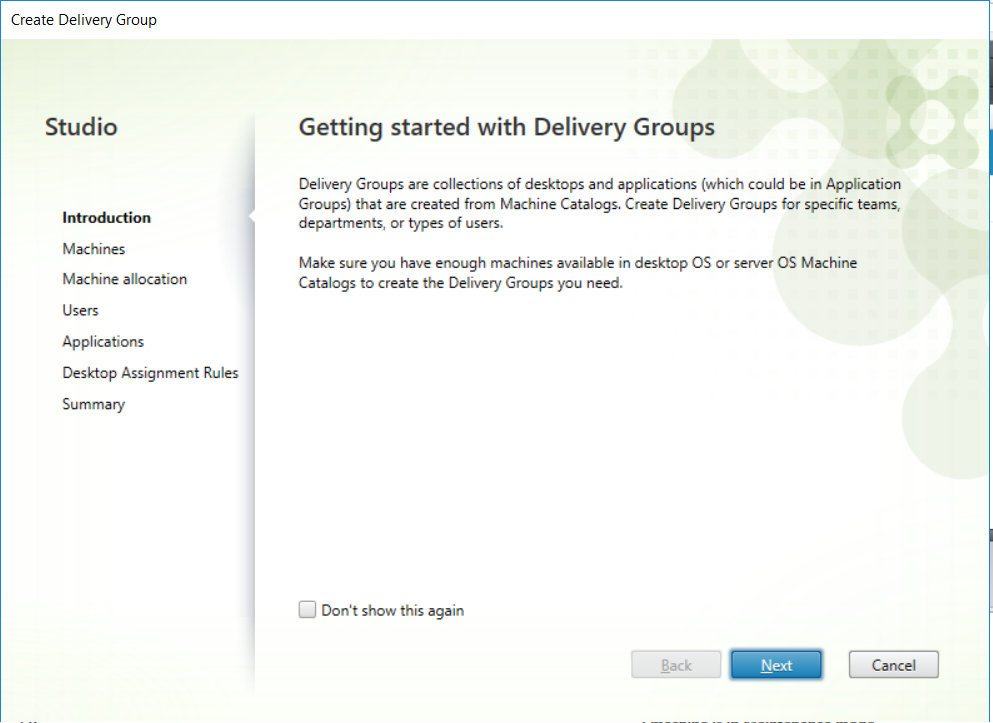


Click Next


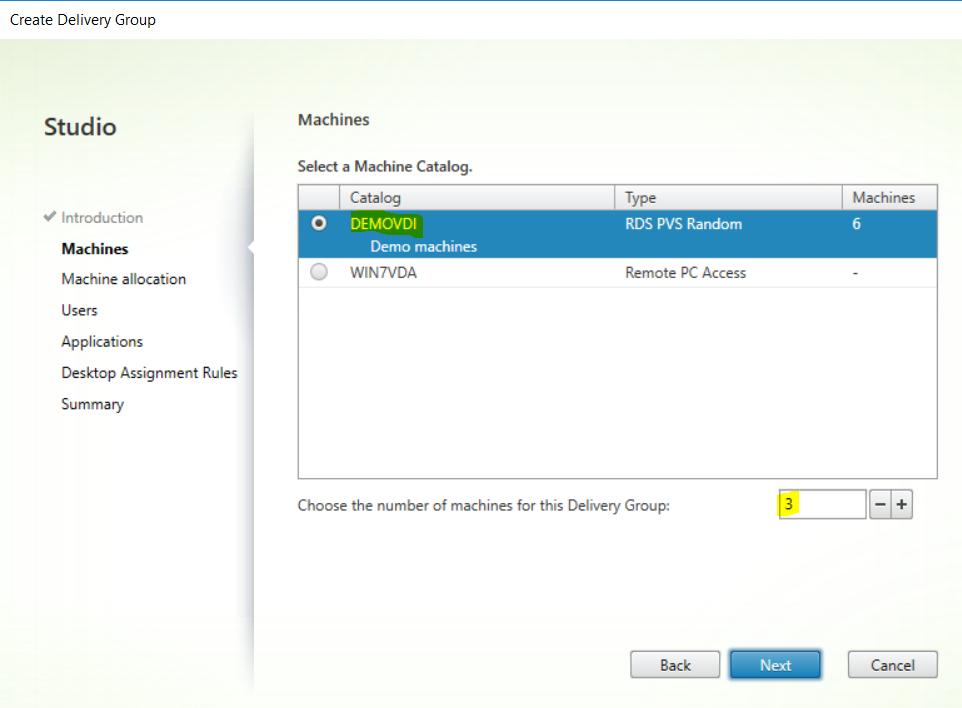
Select the machine catalog that you want to assign in delivery group

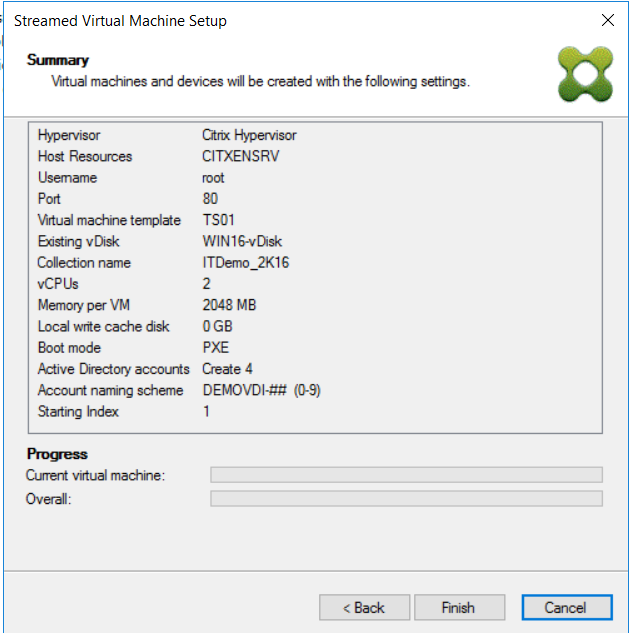
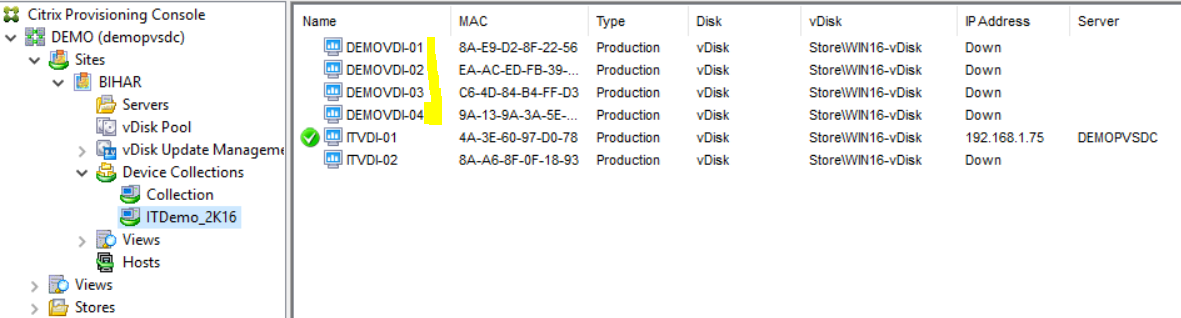
In my case I am selecting DEMOVDI that I created recently.


Choose the number of machines for this Delivery group


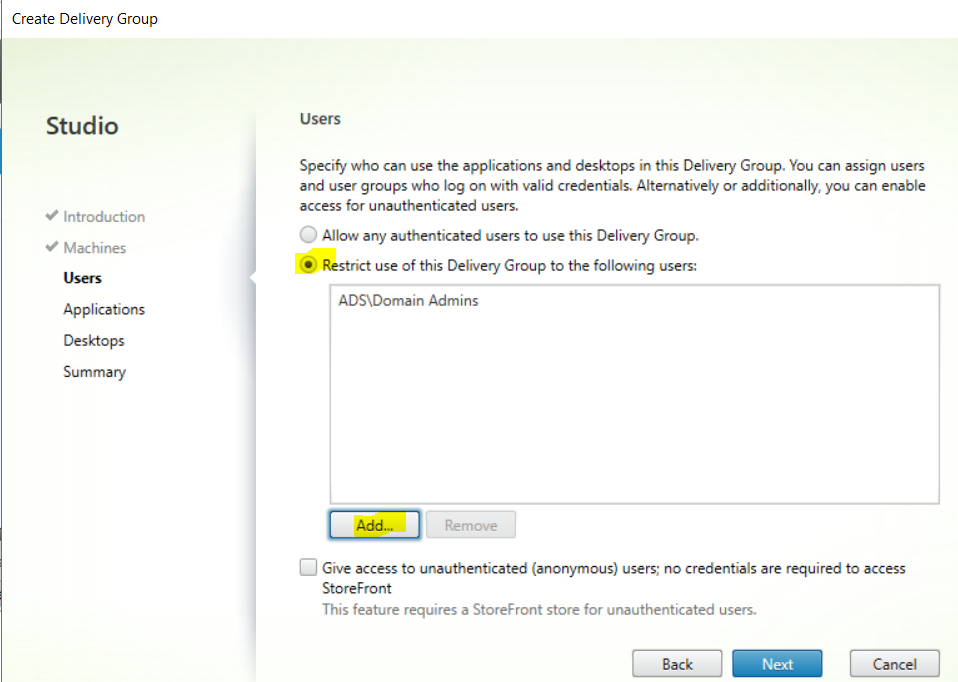
Add Users or group names here to whom you want to allow access.

As I am doing for testing purpose so selecting here Domain admins


If you want to publish an application from here, Click Add and publish application as well but in my case I am not publishing application from here.


Click next.


Click next


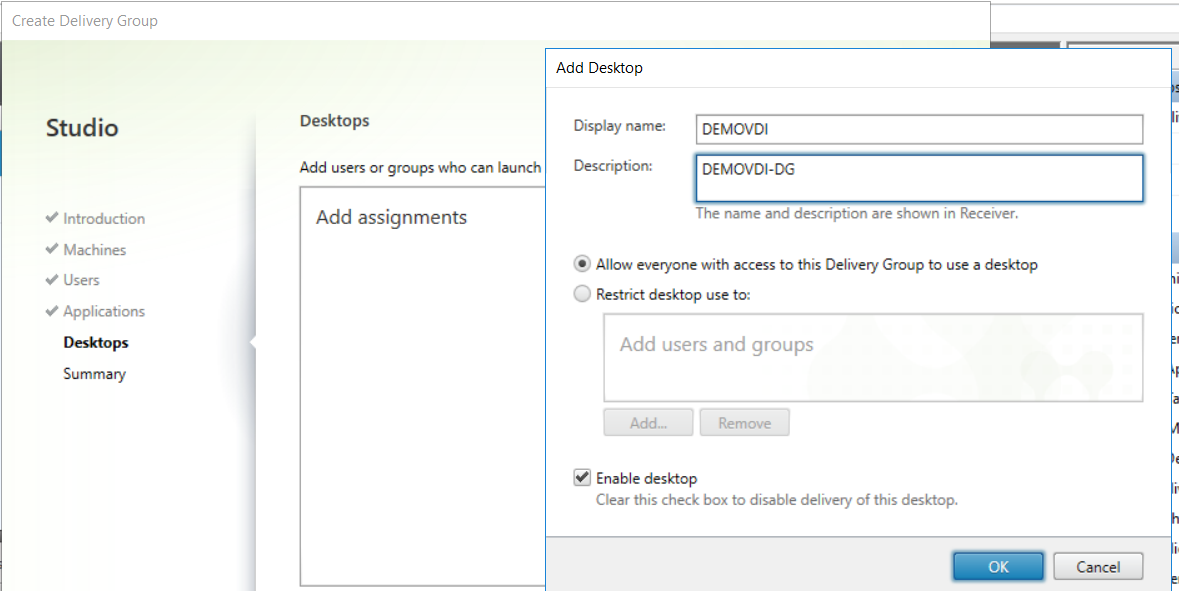
Enter Display name that will show when you will launch Citrix storefront web console

Check mark on Enable desktop.
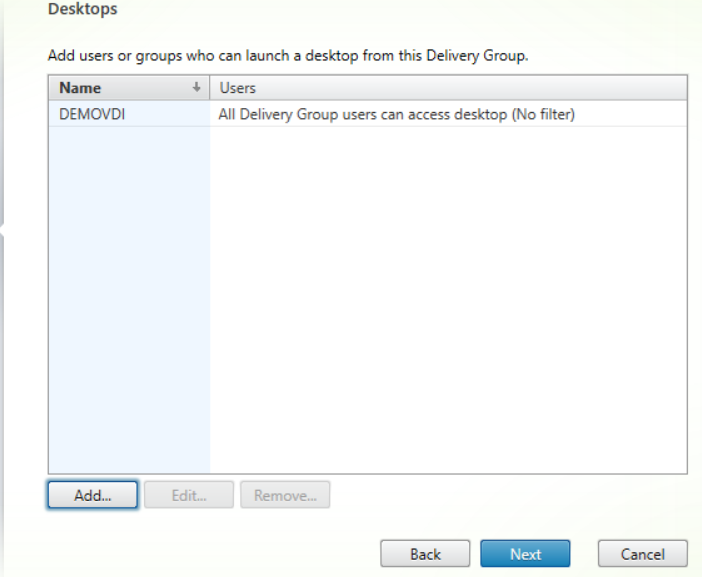


Click next


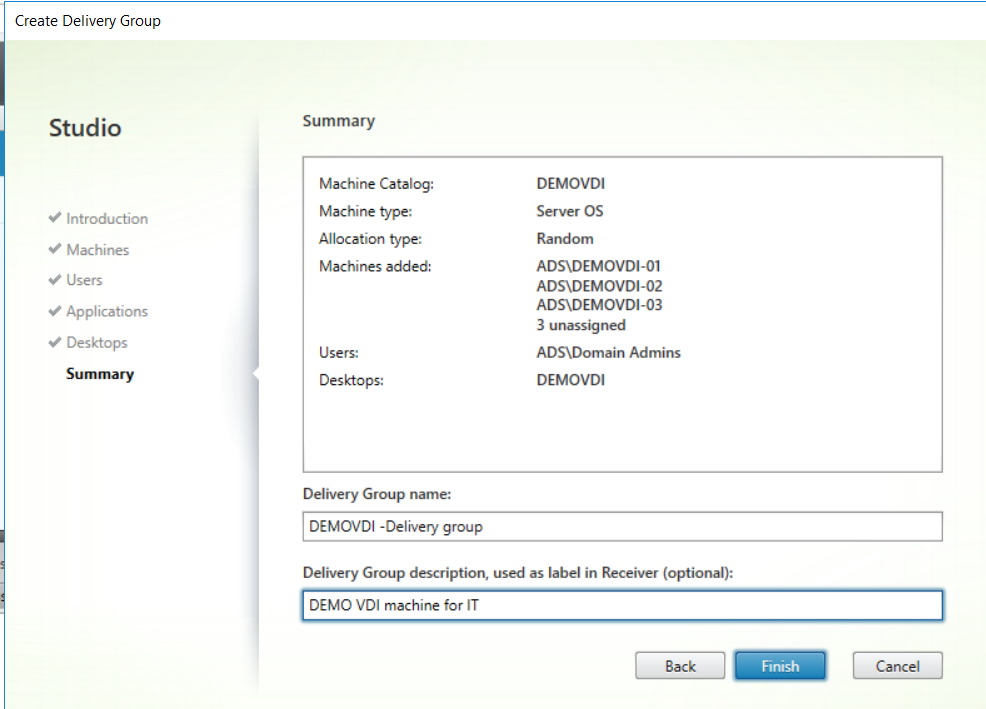
Enter delivery group name

Click finish


Now newly delivery group has been created.


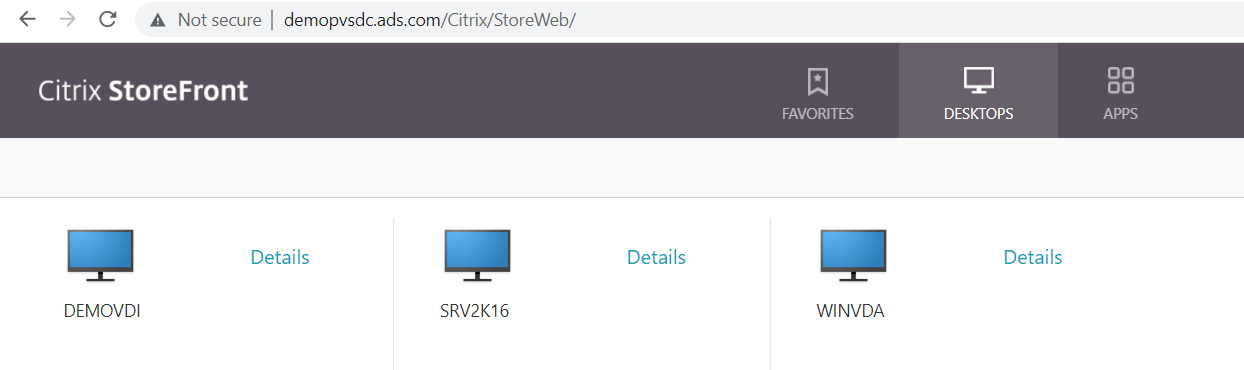
Now launch Citrix  StoreFront and login with user ID  & Password


http://demopvsdc.ads.com/Citrix/StoreWeb/ 


Newly created Delivery group DEMOVDI is showing here.


Create Machine catalog in Citrix Studio 7.9 step by step

 Create Machine catalog in Citrix Studio 7.9 step by step

Login to DDC server where you have installed Citrix Studio

Open Citrix Studio console


Right click on Machine Catalogs -> Select Create Machine Catalog


Click Next

Select Operating system types (In my case I am creating for server OS)


Select Machine Management for VM select Power managed


Deployment type – in my case I am using PVS based


Enter PVS Name

Expend Site and select collection that you want to publish.


Click Next


Enter Machine catalog name

Enter machine catalog description 


Click Finish


New Machine catalog has created.

Now all 6 machines are showing that is available in that device collection.


PVS Device collection


Next steps will be create delivery group


http://www.mytechinfoit.com/2021/12/citrix-provisioning-2109-installation.html 

http://www.mytechinfoit.com/2021/12/how-to-create-bulk-machines-in-citrix.html 


How to create bulk Machines in Citrix PVS using streamed VM setup wizard

How to create bulk Machines in Citrix PVS using streamed VM setup wizard

First of all you need to prepare one machine using all the prerequisite software and install Citrix provisioning target device software and export image and create vDisk


You can follow below link for Citrix target device software installation and image export.

http://www.mytechinfoit.com/2021/12/citrix-provisioning-2109-installation.html

Now convert one VM to template in XenServer.


Now login to Citrix PVS server

Open Citrix provisioning console


Make sure you have already added Hypervisor host 


Now right click on Site (In my case Bihar is my PVS site)

And click streamed VM setup wizard.


Click next


Enter Citrix Hypervisor Name

Username

Password

Port 80


Click Next


It will detect Virtual Machine template from XenServer


Click next


Select vDisk that you create during image export.


Drop down and select the collection where you want to create these VMs


Give VM number:-4

Assign vCPUs: - 2

Assign memory:-2048


Click next

Select Computer account option like create new or import


Dropdown and select domain: - ads.com

Select OU

Give account naming schema ## is number start from 0


Click next 

Click finish


Now all 4 devices have created. 

Click done


Now go to device collection -> ITDemo_2K16 and you will see newly created VMs


Also go to XenCenter and you will see all newly created VMs.


Now you can power it on publish on Citrix..


I will cover it in next document.


Citrix Provisioning 2109 Installation and configuration step by step


Requirement for Citrix Provisioning 2109 installation and configuration


1. Domain Controller (Already configured DHCP & DNS on SRV16.ads.com)

2. SQL server – (Already installed and configured on Database.ads.com)

3. PVS Server (For Console Installation, Server Installation & License server Installation) –      DEMOPVSTS.ads.com

4. Target device – WIN16TS.ads.com


Login to DHCP server and configure both point 066 & 067

Open DHCP expand Scope -> Go to Scope Options 

Right click on Scope Options -> Click Configure Options


Select point 066 and assign PXE boot server Name. In my case I am using a PVS server for PXE boot.


Now select point 067 to assign file Name for PXE boot ARDBP32.BIN.


Now login to PVS server

Mount Citrix provisioning application on PVS server “DEMOPVSTS.ads.com” to complete Console Installation and Server Installation

 Select Console Installation


Console installation will start


Once Installation will complete click Restart


Once server will back login to the server and launch Citrix Provisioning Setup


Click Server Installation


Click Install


Click Next


Click I accept and Next


Click next


Click next


Click Install


Now installation has completed


Once you will click Finish one pop up will come to install Citrix Console


Click Okay and do the configuration


Check mark on the service that runs on another computer (In My infra I have configured DHCP on my Domain controller server, in case if you have configured DHCP on same PVS server then keep it default)


Choose the option for PXE Services, in my case I am running PXE service on the same PVS server that you can see in DHCP configuration.


Select Create farm or use existing farm


In my case there is no existing farm so I am selecting Create farm


Enter Database server name – database.ads.com

Instance name -:  Give the name if you have already created or click next for let it create auto

TCP port-:  1433 


Enter Database Name: - database.ads.com

Farm Name: - DEMO

Site Name: - BIHAR

Collection Name: - Collection


Select use Active Directory group for security


Assign Name and path for Store


Enter License server Name

License server port

Uncheck validate license server communication: - In my case there is no License server that’s why I am unchecking.


Select Use network service account or Specified user account if you want to run it with a separate account.


Check mark to Automate computer account password within selected days


Select Network card for streaming and Management


In my case I am using single NIC for both Streaming and Management


If you are using PXE boot from the same server then check mark on Use the Citrix provisioning TFTP service or browse and assign the path for ARDBP32.BIN file.


Click next and add Stream server IP if you have different one


Click Next


Enter My Citrix user details to submit error details online else leave it.


Below is the final configuration details


DHCP - The service that runs on another computer

PXE - Install Service

Database Server = DATABASE\

Farm = database:DEMO

Site and Collection = BIHAR, Collection

AD Group = ads.com/Builtin/Administrators

Store and Default Path = Store, C:\PVSStore

License Server:Port = DEMOPVSDC:27000

User Account = Network Service Account

Computer account password changes every 20 days

Communications - First Port = 6890, Last Port = 6909

Console - Soap Port = 54321

NIC - Selected IP = 192.168.1.30

Management NIC - Selected IP = 192.168.1.30

TFTP - Install Service

File = C:\ProgramData\Citrix\Provisioning Services\Tftpboot\ARDBP32.BIN

Stream Service - Server IP, Server Port, Device Subnet, Device Gateway

192.168.1.30, 6910, 0.0.0.0, 0.0.0.0


Click Finish


Now Installation completed.


Now launch Citrix Provisioning Configuration wizard


Now go to Target Device server WIN16TS.ads.com and launch Citrix Provisioning setup


Select Target Device Installation


Click Target Device Installation


Click Finish

Once installation will complete it will ask for reboot the server.

Reboot the server and again launch Citrix provision installation setup wizard

Select Target device installation


Accept license agreement and click next


Click Next


Click install


Check mark on launch imaging wizard and click finish to start Image wizard


Or you can launch later.


Or you can launch Imaging Wizard from start menu


Click next


Enter PVS site IP or name -> click next


Select create a vDisk -> Press Next


Enter Target device name: it should not be existing one


vDisk Name: Enter vDisk Name 


Select vDisk type Dynamic VHDX/VHD


Select Volume licensing type. In my case I am not using any types of license server


Chose entire Image boot disk or custom 


Click on edit partition size to assign new size that you want to copy


Click optimization settings, if you want to customize else select do no optimize and click next


Click Create


Click continue once status will change to successful


It will ask to reboot the machine but before rebooting it you need to change the boot setting using below screen.


Before reboot the server, change server boot option

Next boot with network -> Apply Ok


Click yes to reboot the machine,


Once the machine comes online, login to the server.


Auto setup will start to copy files, it will take time to complete copy process.


Launch Citrix Provisioning Console from PVS server


Right click and select connect to Farm


Enter PVS server Name or IP address to connect with Farm -> Click connect


Now the new Farm has connected also you can see new vDisk WIN16-vDisk has been created.


Click on Device Collection to see live machine that is using vDisk


Now right click on Hosts and select add new host -> Next


Select Hypervisor -> In my case I am using Citrix Hypervisor -> Click next


Enter Hypervisor Name


Enter Hypervisor IP and port


Enter Username and password 

Click on Verify connection.

If connection verification is OK, click next


Click finish


Thank you all done for installation and configuration of PVS 2109


Featured Post

HPE MSA 2040 configuration step by step

HPE MSA 2040 configuration Default IP range for HP SAN storage MSA 2040 is 10.0.0.1/2 You need to connect your laptop and storage with...