Showing posts with label esxi. Show all posts
Showing posts with label esxi. Show all posts
vCenter Upgrade Plan Workflow

 SME VMware and Window | VMware | VxRail | vSAN | SRM | vRO | vROP|VMware Aria Log Insight| Nutanix |Cisco HyperFlex | NetApp | Azure | Citrix | Veeam Backup & Replication, EM & One
ESXI host upgrade failing with error the VIB cannot be satisfied within the ImageProfile | Missing_Dependency_VIBs_error
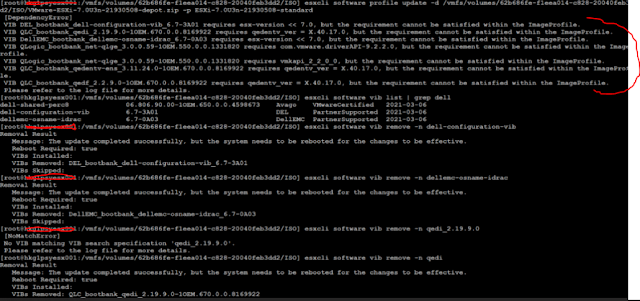
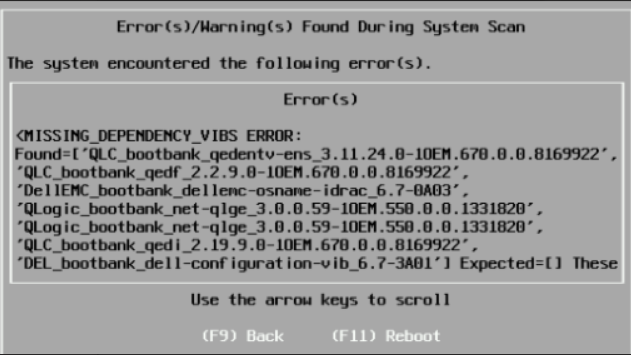
When upgrading the ESXI host from 6.7 to 7.0 or 8.0 it is failing with error the VIB cannot be satisfied within the ImageProfile
VIB Dell_bootbank_dell-configuration-vib
VIB qlc_bootbank_qedi
VIB DellEMC_bootbank_dellemc-osname-idrac
VIB QLogic_bootbank_net-qlge
dell-shared-perc8
You may perform below command to remove failed VIB.
Command -: esxcli software vib remove -n XXXXXXX(VIB name)
esxcli software vib remove -n dell-configuration-vib
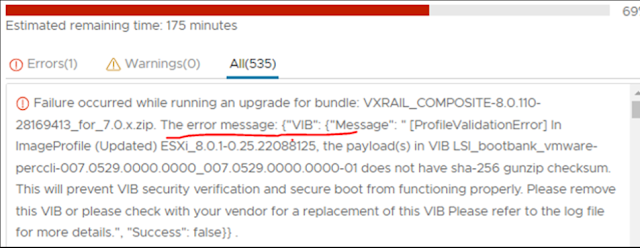
esxcli software vib remove --vibname=vmware-perccli-007.0529.0000.0000_007.0529.0000.0000-01
 SME VMware and Window | VMware | VxRail | vSAN | SRM | vRO | vROP|VMware Aria Log Insight| Nutanix |Cisco HyperFlex | NetApp | Azure | Citrix | Veeam Backup & Replication, EM & One
ESXI host connect with Vcenter server step by step 6.0
Steps to add ESXI host in Vcenter 6.0.
I have one Vcenter server with pre-installed application
IP Address:- 192.168.10.20
HostName :- 1-vsp.adds.com
Two ESXI host pre-installed ESXI on both node
IP Address:- 192.168.10.10
IP Address:- 192.168.10.11
One Domain server with server 2012 R2:-
IP Address:- 192.168.10.12
Host Name:- adds.com
One Client with Server 2012 R2:-
IP Address:- 192.168.10.13
Host Name:- Clent1.adds.com
On client machine you need to first install Vcenter client setup file using setup file.
1. Once the setup will install one shortcut key will appear on the desktop
 2. Double click and open it and enter Vcenter server host IP, User ID and password as below and click on login.

3. When you will click on login next page will be as below.

4. Click on Host and cluster.

5. Select Vcenter server Name and Right click and select new Data center

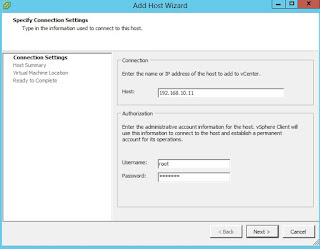
6. Now click on Add host
 7. Enter ESXI Host IP ESXI User ID and password as below


14. You can see the recent task here ESXI is getting attach with ESXI host.


I have one Vcenter server with pre-installed application
IP Address:- 192.168.10.20
HostName :- 1-vsp.adds.com
Two ESXI host pre-installed ESXI on both node
IP Address:- 192.168.10.10
IP Address:- 192.168.10.11
One Domain server with server 2012 R2:-
IP Address:- 192.168.10.12
Host Name:- adds.com
One Client with Server 2012 R2:-
IP Address:- 192.168.10.13
Host Name:- Clent1.adds.com
On client machine you need to first install Vcenter client setup file using setup file.
1. Once the setup will install one shortcut key will appear on the desktop


3. When you will click on login next page will be as below.
4. Click on Host and cluster.
5. Select Vcenter server Name and Right click and select new Data center

6. Now click on Add host


9. Click Yes button

10. Click next button here Virtual machine is showing because I have already created in ESXI host

11. Enter license key or select evaluation version
12. Click on Enable Lockdown Mode if you want your ESXI to lock.

13. Click twice next and finish
14. You can see the recent task here ESXI is getting attach with ESXI host.
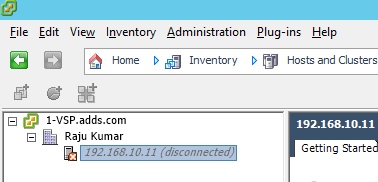
15. ESXI status showing disconnected because process is on going
16. Now configuration has completed 100 %
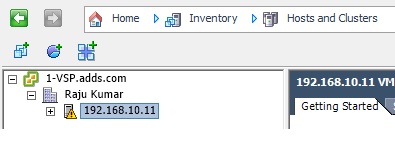
17. Now ESXI host connection is showing connected after 100 % task completion

18. Above are the VM list i.e Clonned VM, Test VM and Win 7
SME VMware and Window | VMware | VxRail | vSAN | SRM | vRO | vROP|VMware Aria Log Insight| Nutanix |Cisco HyperFlex | NetApp | Azure | Citrix | Veeam Backup & Replication, EM & One
ESXI PowerShell command to Automate ESXI configuration
# Prompt for vCenter password
$VCCred = Get-Credential
$vCenter = Read-Host "Enter vCenterName"
#$targetVC = 192.168.1.20
#Connect vCenter
#Connect-VIServer -Server $vCenter -Credential $VCCred
$DataCenter1= Read-Host "Enter Datacenter host"
#$datacenter = Get-Datacenter "Demo_DC"
#Prompt for ESXI
$ESXI = Read-Host "Enter ESXI hostName"
$ESXICred= Get-Credential
#Connect ESXI host
Connect-VIServer -Server $ESXI -Credential $ESXICred
# Add NTP server details
$NTPServer=Read-Host "Write NTP server details"
#Add-VmHostNtpServer -VMHost $esxi -NtpServer servername
#Add-VMHostNtpServer -VMHost $esxi -NtpServer 192.168.1.16
Add-VMHostNtpServer -VMHost $ESXI -NtpServer $NTPServer
# Create Datastore
$DataStore= Read-Host "Volume Name"
#Storage Device path
$DevicePath= Read-Host "Enter Storage device path"
#New-Datastore -VMHost $ESXI -Name $DataStore -Path mpx.vmhba0:C0:T1:L0 -VMFS -FileSystemVersion 6
New-Datastore -VMHost $ESXI -Name $DataStore -Path $DevicePath -Vmfs -FileSystemVersion 6
# To update Domain name, prefered DNS and SearchDomain
$vmHostNetworkInfo = Get-VmHostNetwork -Host $ESXI
Set-VmHostNetwork -Network $vmHostNetworkInfo -VMKernelGateway 192.168.1.1 -DomainName ads.com -SearchDomain ads.com -DnsAddress 192.168.1.16 -DnsFromDhcp $false
#Add host to vCenter
Add-VMHost -Server $targetVC -Name $ESXI -Location $DataCenter1 -Credential $ESXICred -Force
#Enable Storage IO Control
Set-Datastore -Datastore $DataStore -StorageIOControlEnabled $true
SME VMware and Window | VMware | VxRail | vSAN | SRM | vRO | vROP|VMware Aria Log Insight| Nutanix |Cisco HyperFlex | NetApp | Azure | Citrix | Veeam Backup & Replication, EM & One
Script for unattended esxi installation using ftp server | KickStart script
You can use scripts for unattended ESXi installation or upgrade, scripted installations or upgrades provide an efficient way to deploy multiple hosts.
The installation or upgrade script contains the installation settings for ESXi. You can apply the script to all hosts that you want to have a similar configuration.
For a scripted installation or upgrade, you must use the supported commands to create a script. You can edit the script to change settings that are unique for each host.
The installation or upgrade script can reside in one of the following locations:
FTP server
HTTP/HTTPS server
NFS server
USB flash drive
CD-ROM drive
In my lab I am keeping the installation script in FTP and HTTP server.
You can download the script from below link and save the script win KS.CFG
http://www.mytechinfoit.com/2022/04/script-to-automate-esxi-deployment.html
Steps to configure FTP server.
Login to server
Go to server manager
Add Roles and features -> Follow the screen
Check web server IIS
FTP server
Select FTP service
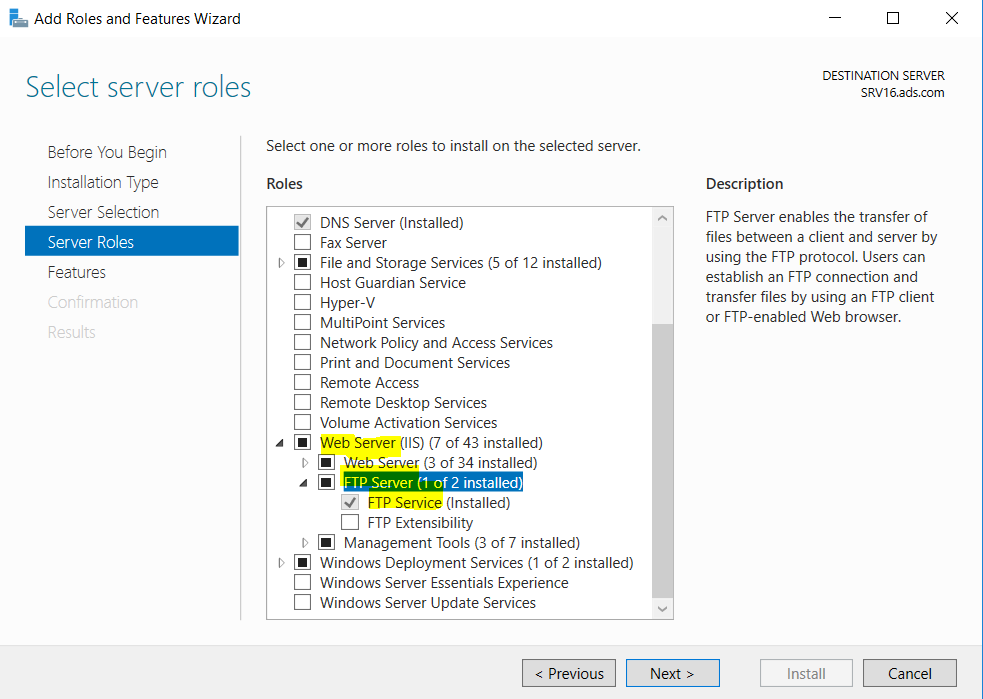
Click next and follow the screen and install
Once installation complete
Open IIS manager
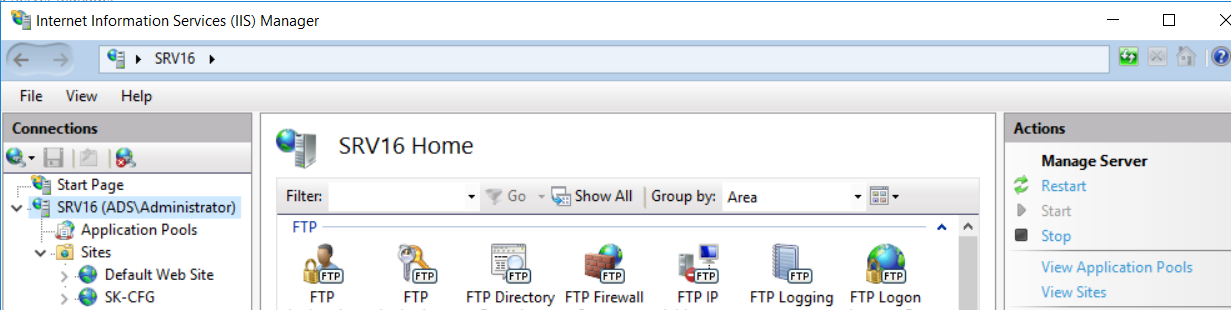
Right click on site and click Add FTP site
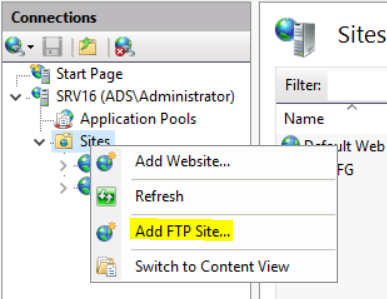
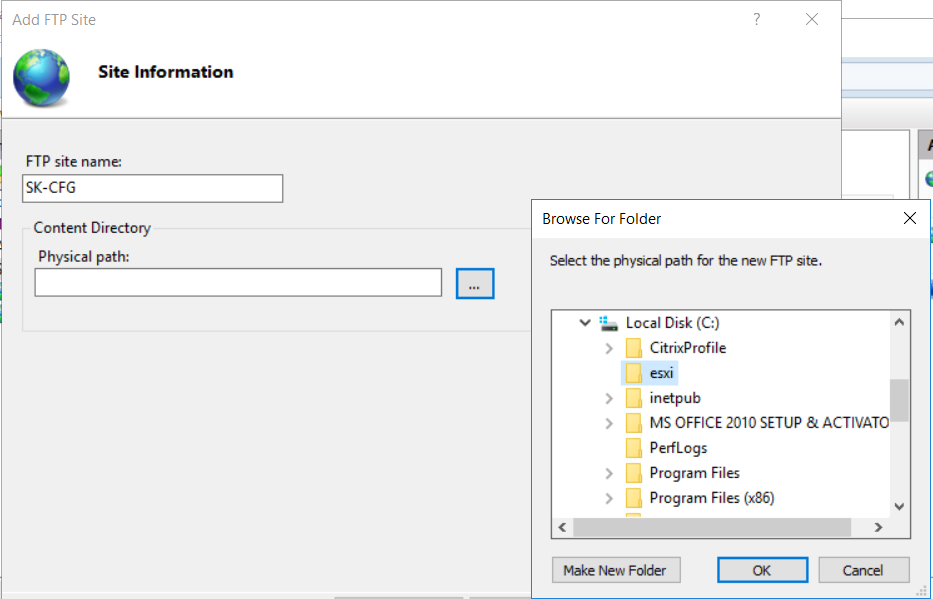
Give the FTP site name
In content directory give the physical location of script file
I have kept script file in c:\esxi folder
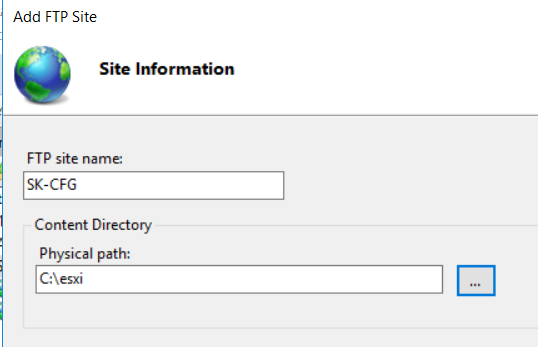
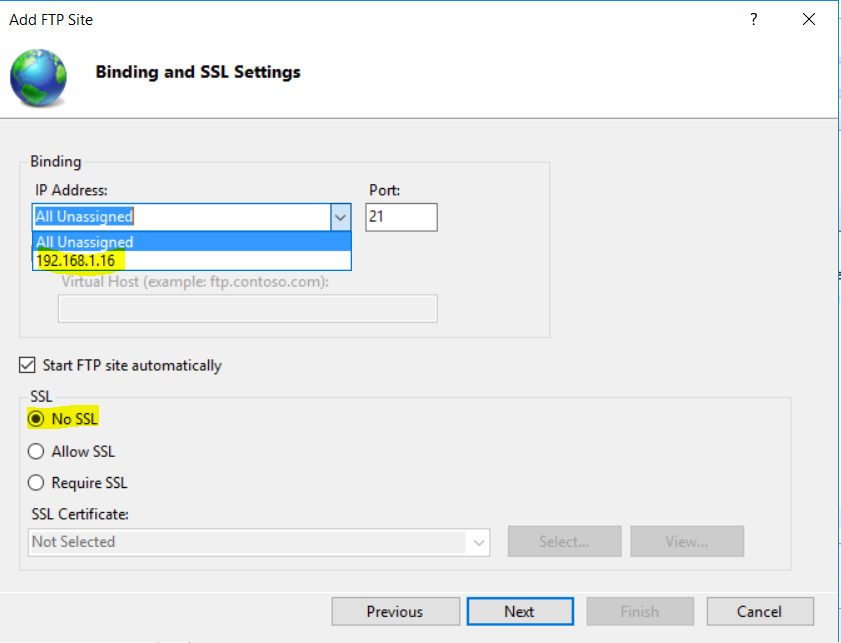
Click next
Select IP address to bind the address, in my Lab setup I am using single IP, if there is multiple assigned on the server then it will show in list
Select No SSL
In Authentication type
Select Anonymous
And anonymous users
In permission
Select Read
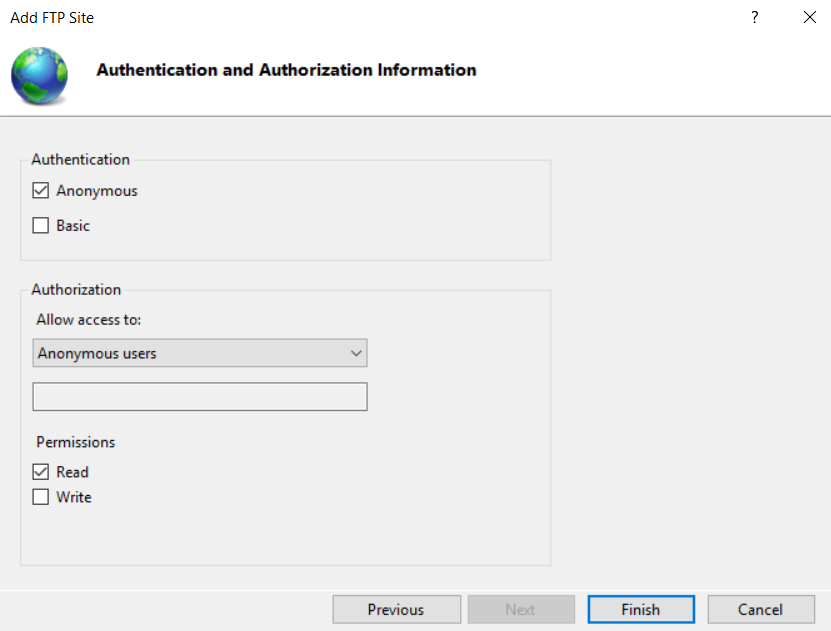
Then click finish
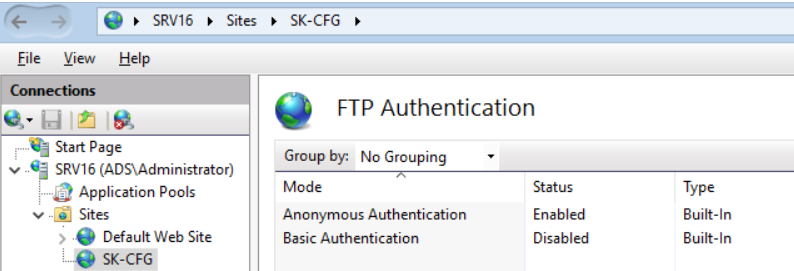
Now select newly created FTP site SK-CFG
Click FTP authentication and enable Anonymous authentication if it is not already enabled
Once you enable it then anyone can access this FTP content without login.
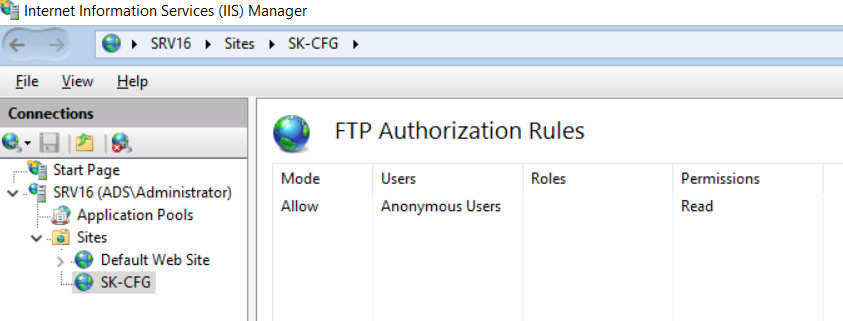
Also click on FTP authorization rule to recheck whether anonymous users are allowed or not
Now go to the client machine and check whether FTP is working or not.
Open browser and enter FTP path-> ftp://192.168.1.16/
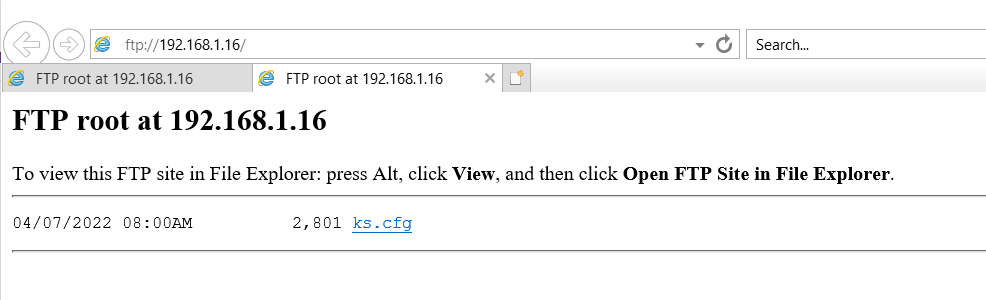
Now FTP page is opening without entering any user ID or password
Steps to install unattended ESXI
If you are using physical server for deployment, then mount ESXI ISO and boot the server using CD/DVD
And follow below steps, in my case I am deploying ESXi in VMware workstation.
Steps will be the same for both Physical and Virtual only, the booting process will be different.
For a physical server you need to launch iLO console and mount ISO and boot from there.
In the VMware workstation we need to edit the VM setting and assign the ISO path and boot the server.

Once you will boot the server using ISO at first boot press SHIFT=O to edit boot options
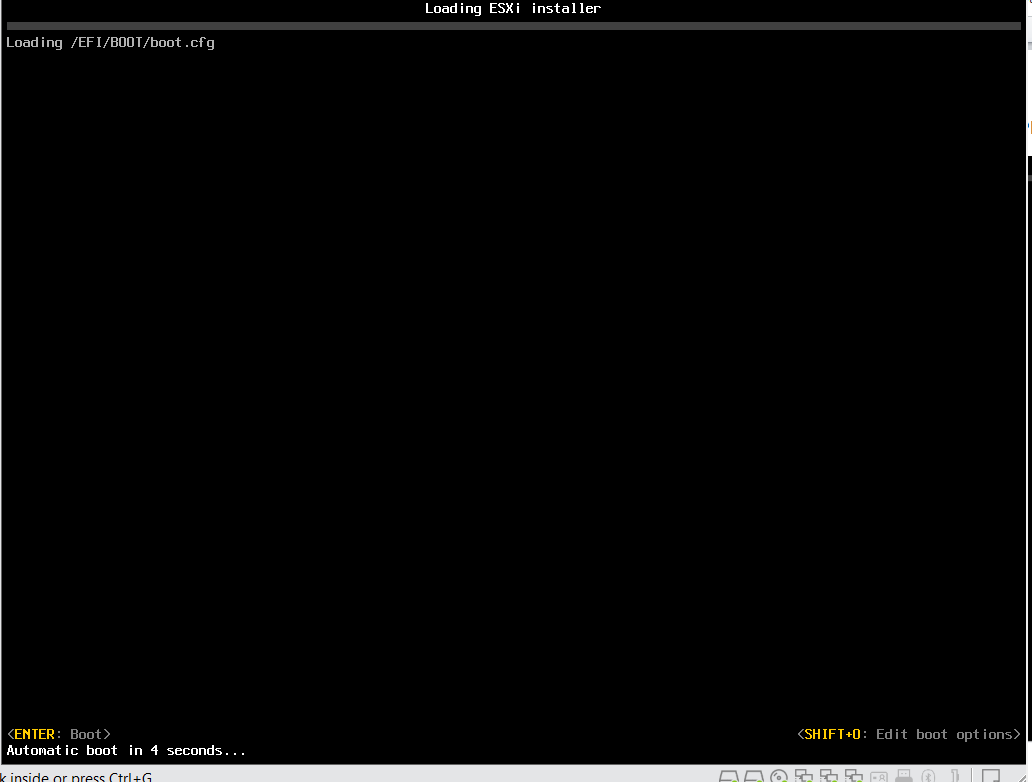

Now enter FTP address one temp IP to communicate with the FTP server like below.
Press enter.
Now installation has started
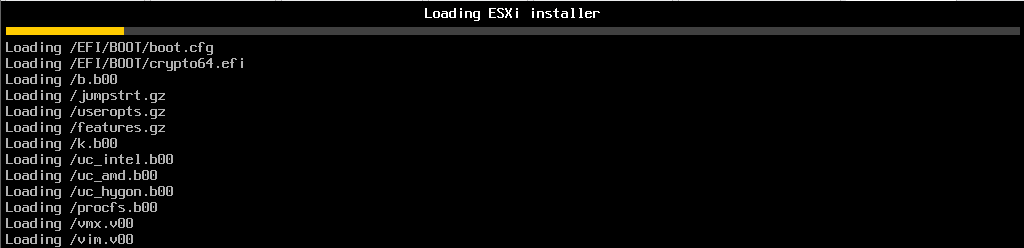
Post installation server will auto reboot and do the entire configuration that has been updated in the script.
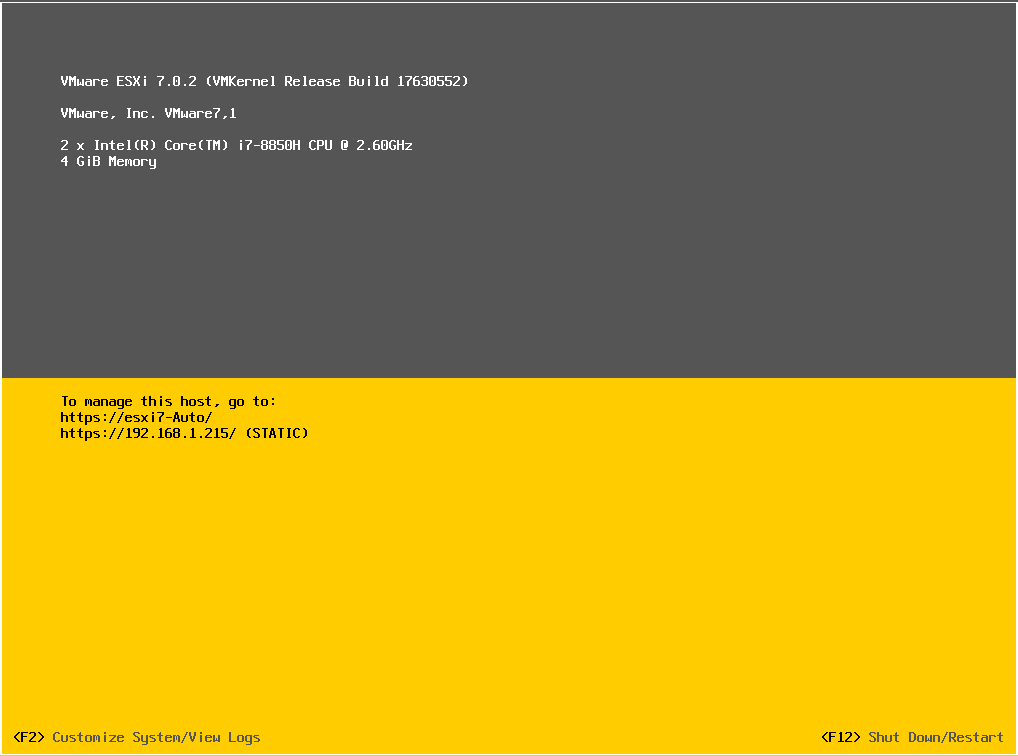
Finally installation completed with the same configuration that had updated in script file.
Thank you!!!!
SME VMware and Window | VMware | VxRail | vSAN | SRM | vRO | vROP|VMware Aria Log Insight| Nutanix |Cisco HyperFlex | NetApp | Azure | Citrix | Veeam Backup & Replication, EM & One
How to fix if ESXi host is showing Not responding in vCenter | Reset management agent using DCUI | vpxa service restart in ESXi host
How to fix if ESXi host is showing Not responding in vCenter

Below steps you need to check
Scenario 1 -> if the host is reachable and there is no lockdown mode enabled at host level.
Ping the host
C:\Users\administrator>ping 192.168.1.51
Pinging 192.168.1.51 with 32 bytes of data:
Reply from 192.168.1.51: bytes=32 time<1ms TTL=64
Reply from 192.168.1.51: bytes=32 time<1ms TTL=64
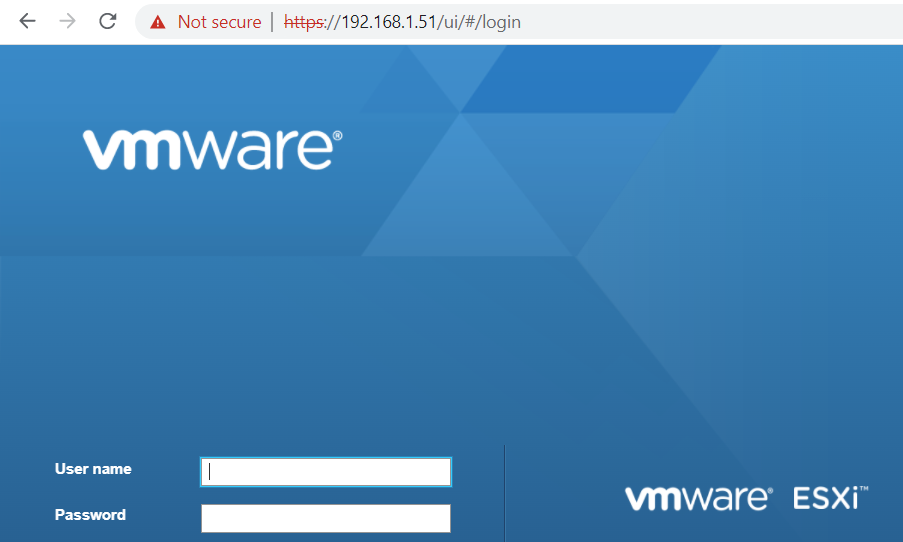
Login to host using web client -> If everything is fine start SSH service.
Login to ESXi host using putty console
Check VPXA service using below command
etc/init.d/vpxa status
Start the service using below command
etc/init.d/vpxa start
Now go to vCenter and check the status, it will take 2-3 minutes to sync.

Scenario -> In case lockdown mode is enabled on ESXI host level
As the lockdown mode is enabled on ESXi host level so you can’t connect using Webclient directly.
Login to iLO console -> Take remote console

Press F2 to login to host using DCUI with root credential

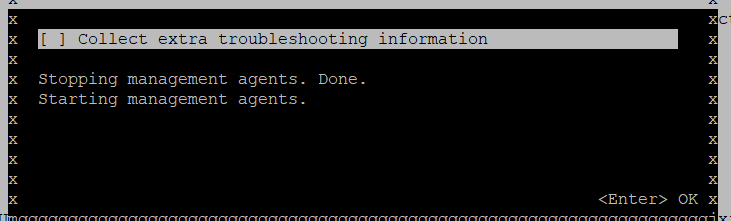
Go to troubleshooting options

Restart management agent
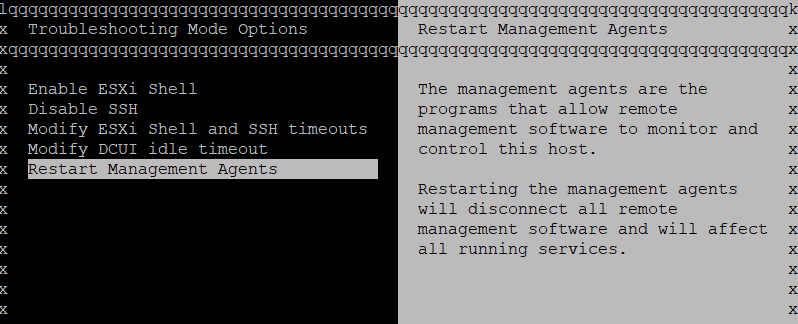
Press F (11) to restart management agent

Now management agent is restarting
Now go to vCenter and wait for 3-4 minutes to sync
SME VMware and Window | VMware | VxRail | vSAN | SRM | vRO | vROP|VMware Aria Log Insight| Nutanix |Cisco HyperFlex | NetApp | Azure | Citrix | Veeam Backup & Replication, EM & One
VMware Command to check vpxa, hostd service status | start stop the vpxa & hostd service | 503 Service Unavailable (Failed to connect to endpoint
Command to check vpxa, hostd service status | start stop the vpxa & hostd service
Login to ESXi host using putty session
Go to /etc/init.d/ and enter the service name and action type i.e status, start or stop
-> To terminate the service
[root@DEMOESX01:~] /etc/init.d/vpxa stop
watchdog-vpxa: Terminating watchdog process with PID 526649
vpxa stopped.
-> To check the status
[root@DEMOESX01:~] /etc/init.d/vpxa status
vpxa is not running
-> To start the service
[root@DEMOESX01:~] /etc/init.d/vpxa start
vpxa started.
If you are getting below error while accessing ESXI host
503 Service Unavailable (Failed to connect to endpoint: [N7Vmacore4Http16LocalServiceSpecE:0x00000000b6b48c80] _serverNamespace = / action = Allow _port = 8309)

Login to putty session
Check host d service status using below command
etc/init.d/hostd status
Start the host d service using below command
etc/init.d/hostd start

Now check ESXi host web console
 SME VMware and Window | VMware | VxRail | vSAN | SRM | vRO | vROP|VMware Aria Log Insight| Nutanix |Cisco HyperFlex | NetApp | Azure | Citrix | Veeam Backup & Replication, EM & One
Subscribe to:
Posts (Atom)
Featured Post
HPE MSA 2040 configuration step by step
HPE MSA 2040 configuration Default IP range for HP SAN storage MSA 2040 is 10.0.0.1/2 You need to connect your laptop and storage with...

-
 HPE MSA 2040 configuration Default IP range for HP SAN storage MSA 2040 is 10.0.0.1/2 You need to connect your laptop and storage with...
 -
When you are powering on the VM and getting below error what do you need to do? Error code Module ‘Monitorloop’ power on failed Failed to ...
-
 CRITICAL: This node is not healthy because the root volume is low on space (<10MB). The node can still serve data, but it cannot part...
 -
 Hi Friends, Here I am going to share some steps that will be required during ESXI host add in Vcenter 6.0. I have one Vcenter server wi...
 -
Command to check vpxa, hostd service status | start stop the vpxa & hostd service Login to ESXi host using putty session Go to /etc/in...
-
X enApp 6.5 Installation and Configuration Steps
-
Citrix PVS Reverse Imaging We do reverse imaging when you want to update vDisk, VMTool, OS or drivers. To update Citrix target devices it...
-
Different ways for certification authority backup https://blog.ahasayen.com/certification-authority-backup/ Upgrading / Migra...
-
If you see EDGE node registration in pending state like below Run below command on NSX-T manager to get thumbprint get certificate api th...
-
You can upgrade using VUM, ISO or ESXCLI Here I am going to do this using ESXCLI I am using HPE custom ISO, you can download an offline bund...


