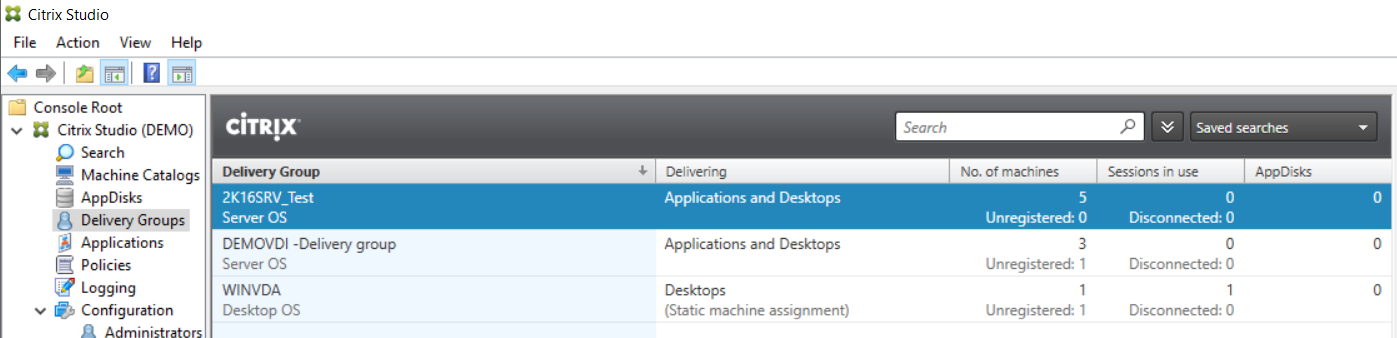
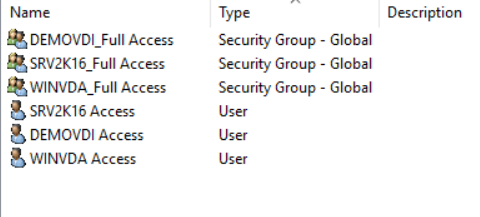
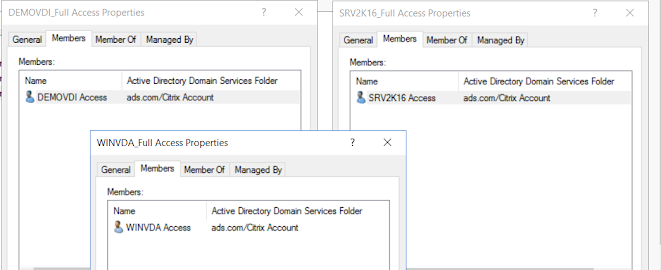
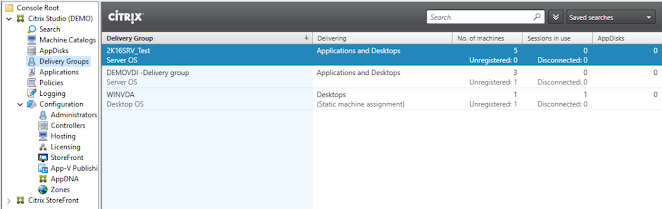
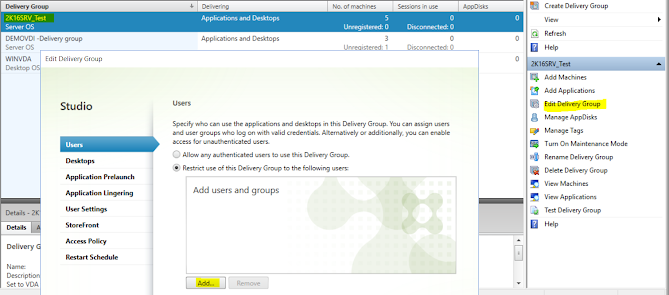
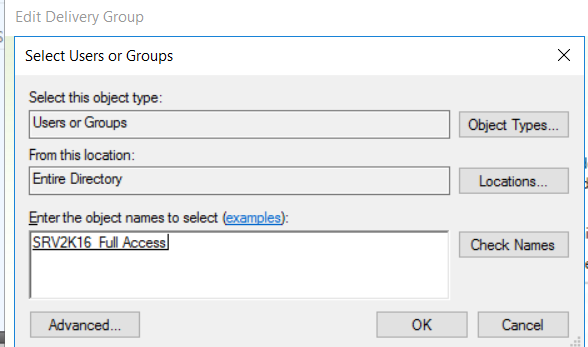
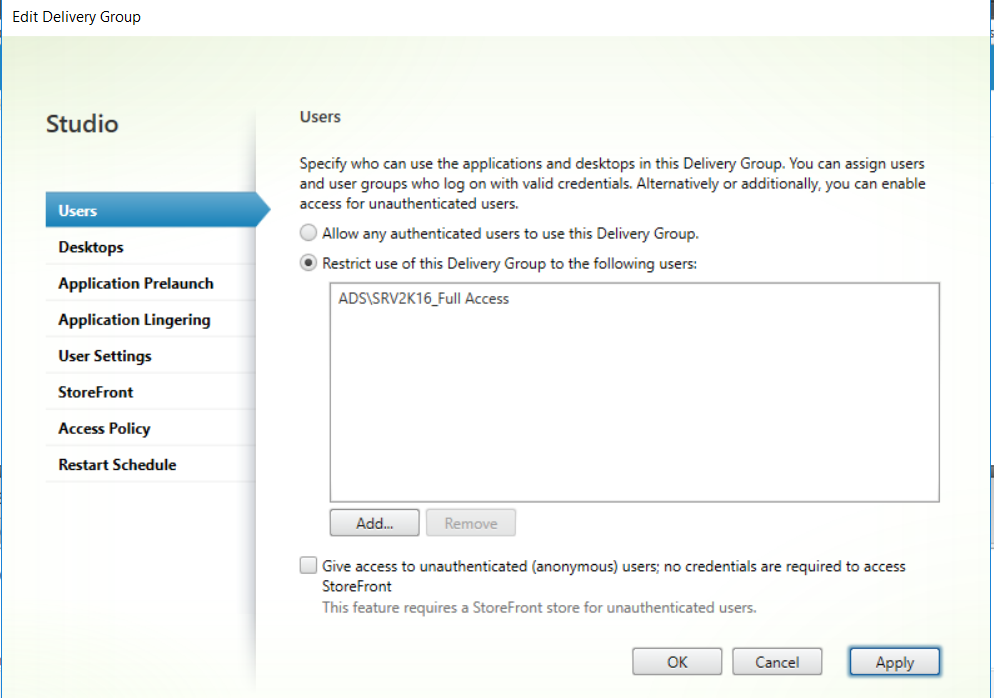
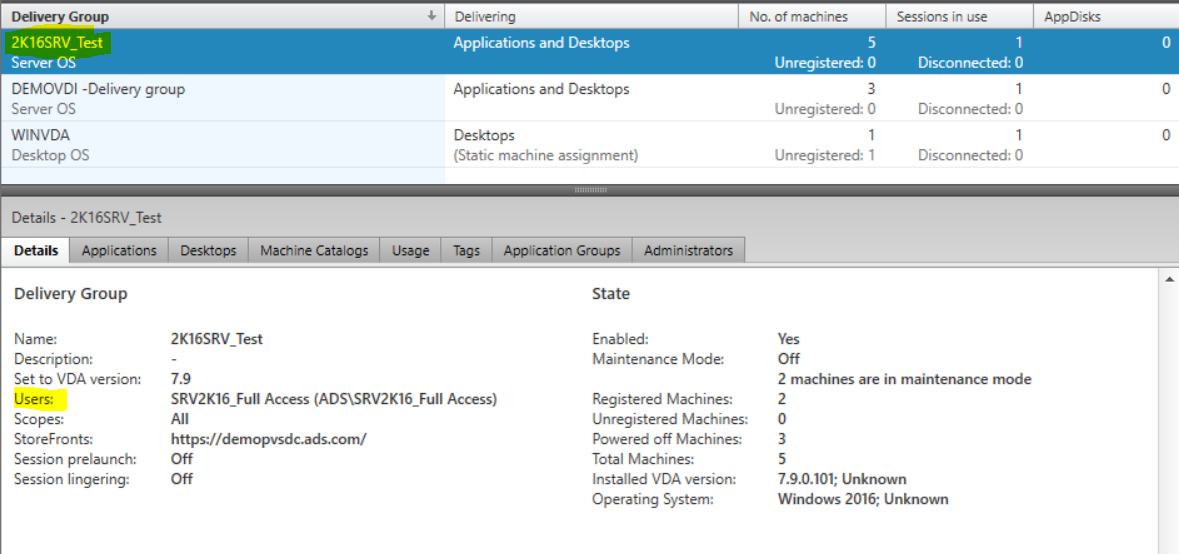
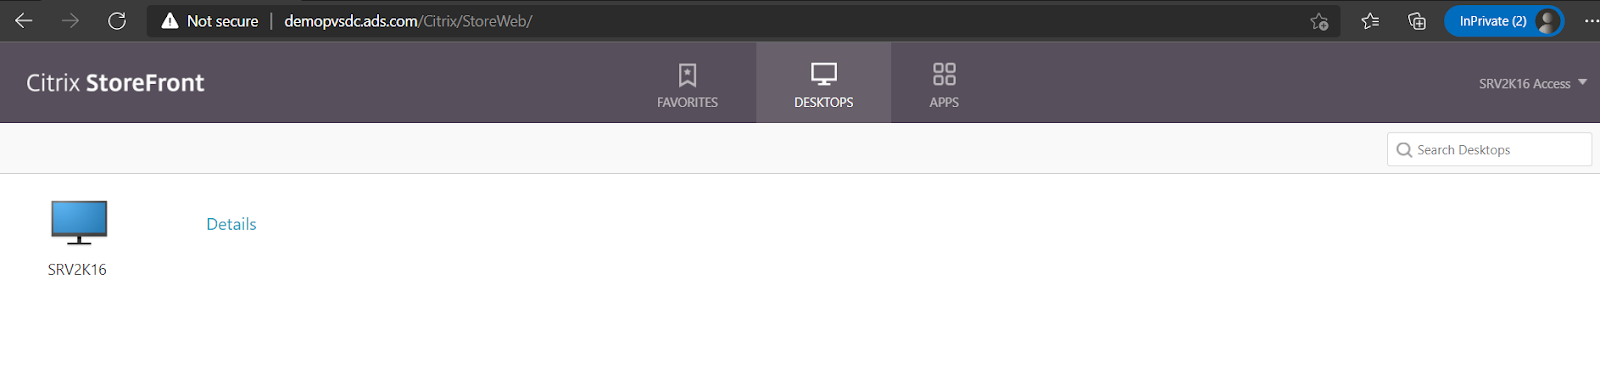
Manage Delivery Groups allow and restrict Users and groups to use desktop in Citrix delivery group
 SME VMware and Window | VMware | VxRail | vSAN | SRM | vRO | vROP|VMware Aria Log Insight| Nutanix |Cisco HyperFlex | NetApp | Azure | Citrix | Veeam Backup & Replication, EM & One
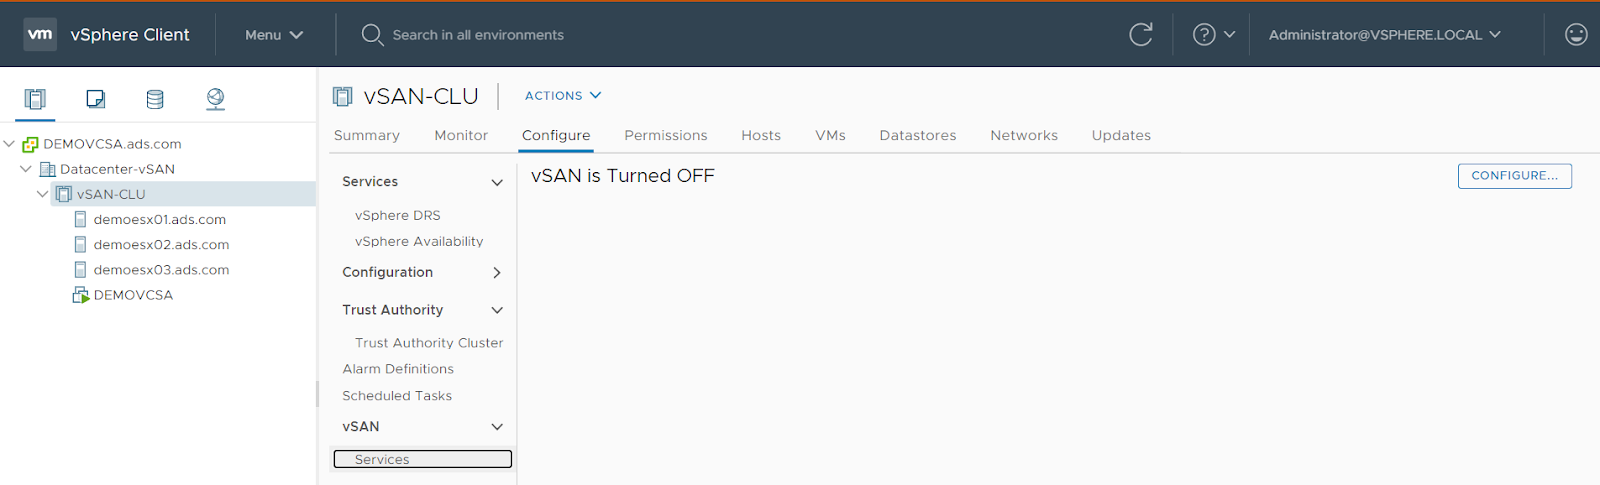
What is VMWare vSAN and how to configure vSAN step by step
What is VMWare vSAN and how to configure vSAN step by step
VMware vSAN uses a software-defined approach that creates shared storage for virtual machines. It virtualizes the local physical storage resources of ESXi hosts and turns them into pools of storage that can be divided and assigned to virtual machines and applications according to their quality-of-service requirements. vSAN is implemented directly in the ESXi hypervisor.
You can configure vSAN to work as either a hybrid or all-flash cluster. In hybrid clusters, flash devices are used for the cache layer and magnetic disks are used for the storage capacity layer. In all-flash clusters, flash devices are used for both cache and capacity.
You can activate vSAN on your existing host clusters and when you create new clusters. vSAN aggregates all local capacity devices into a single datastore shared by all hosts in the vSAN cluster. You can expand the datastore by adding capacity devices or hosts with capacity devices to the cluster. vSAN works best when all ESXi hosts in the cluster share similar or identical configurations across all cluster members, including similar or identical storage configurations. This consistent configuration balances virtual machine storage components across all devices and hosts in the cluster. Hosts without any local devices also can participate and run their virtual machines on the vSAN datastore.
If a host contributes its local storage devices to the vSAN datastore, it must provide at least one device for flash cache and at least one device for capacity. Capacity devices are also called data disks.
The devices on the contributing host form one or more disk groups. Each disk group contains one flash cache device, and one or multiple capacity devices for persistent storage. Each host can be configured to use multiple disk groups.

Steps to configure vSAN cluster
Login to vCenter
Select cluster -> Configuration
Go to vSAN left below -> Select service and click configure
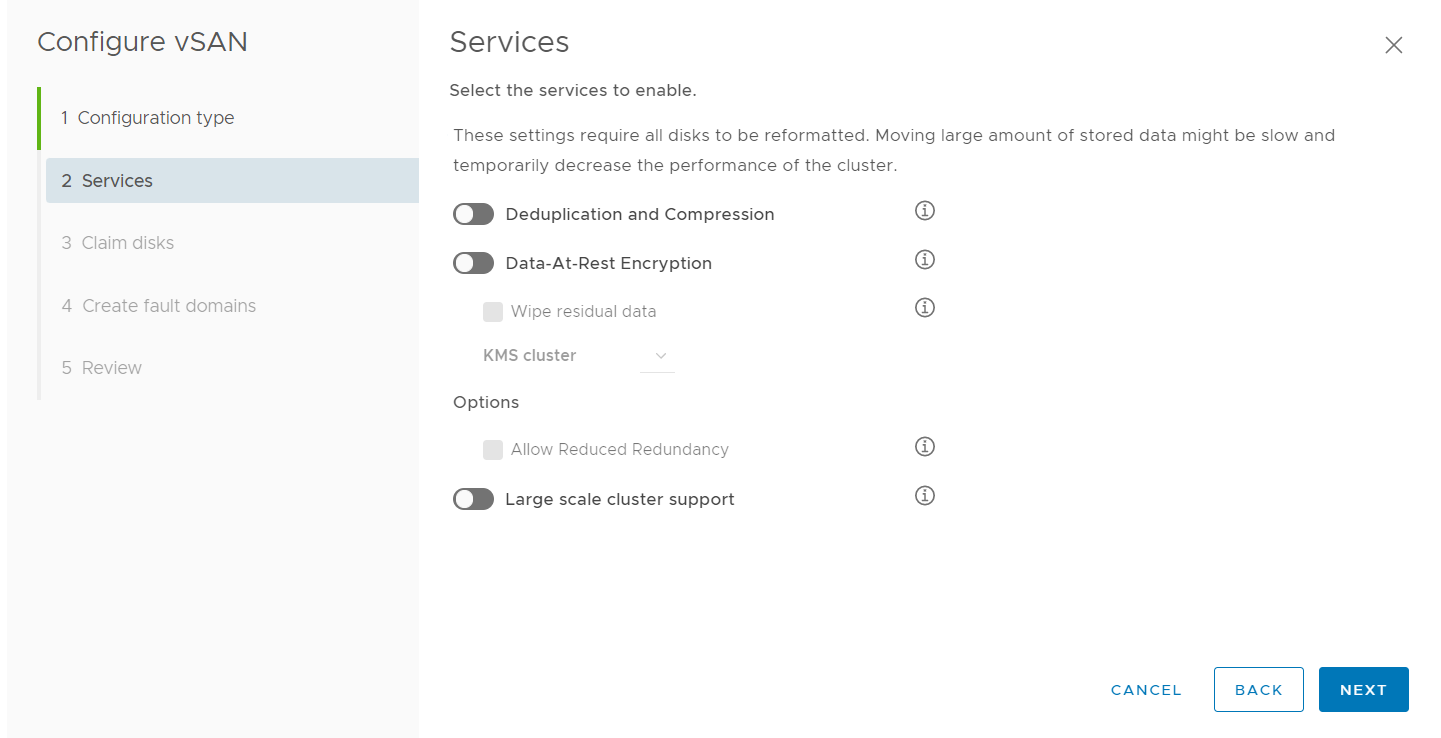
Select vSAN cluster type
While enabling vSAN cluster service you need to disable HA temporarily.

Select the service type that you want to enable
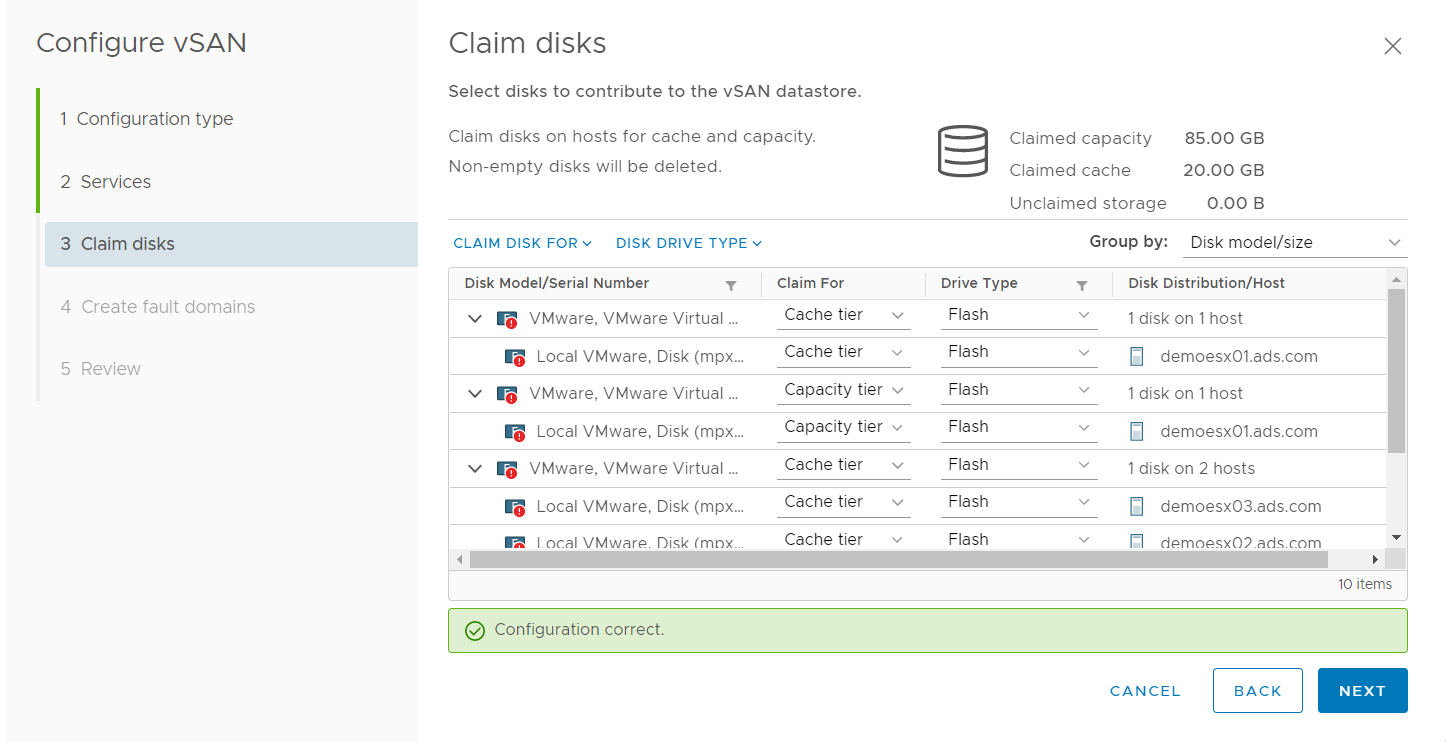
Claim disk for cache and capacity tier
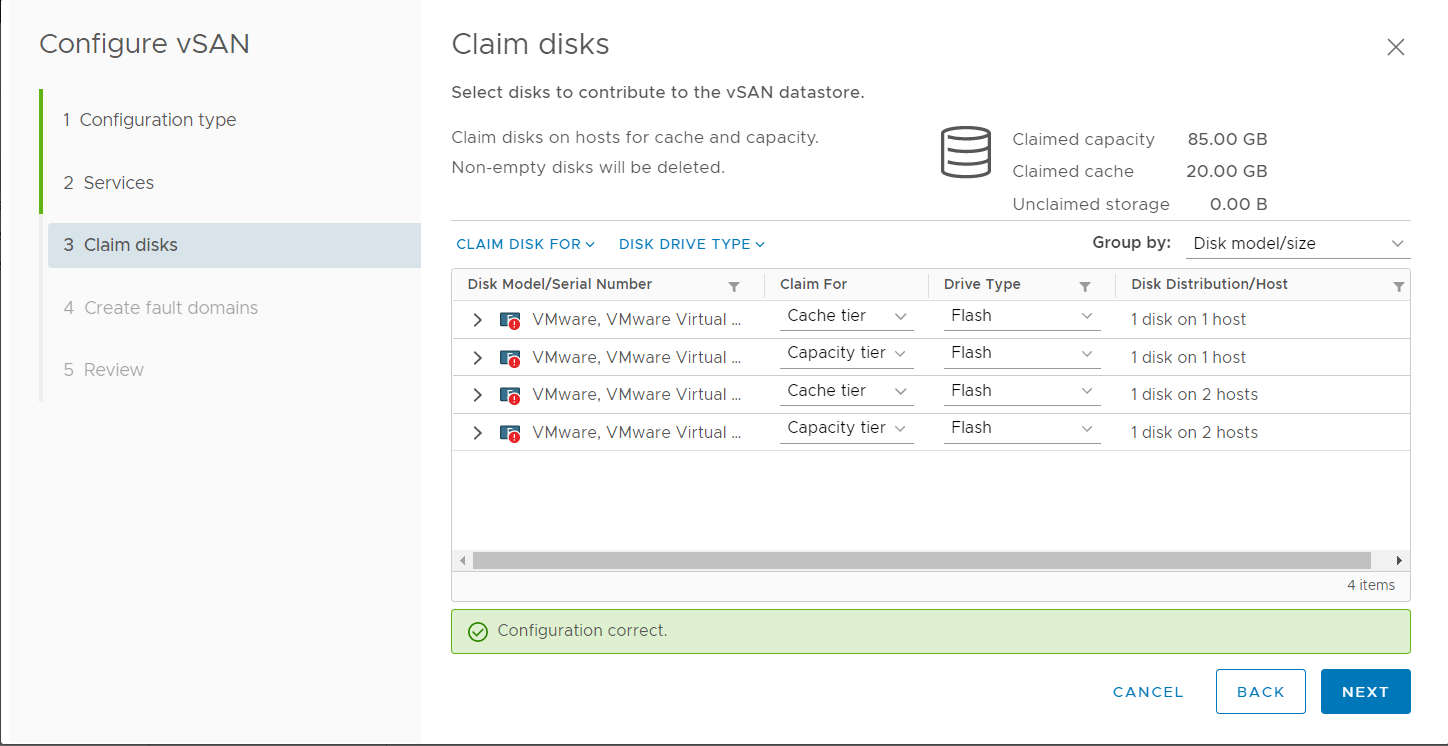
From each host there will be once cache tier and one capacity tier
Always keep cache tier SSD disk for high performance
Cache tier will keep hot data and capacity tier will keep cold data
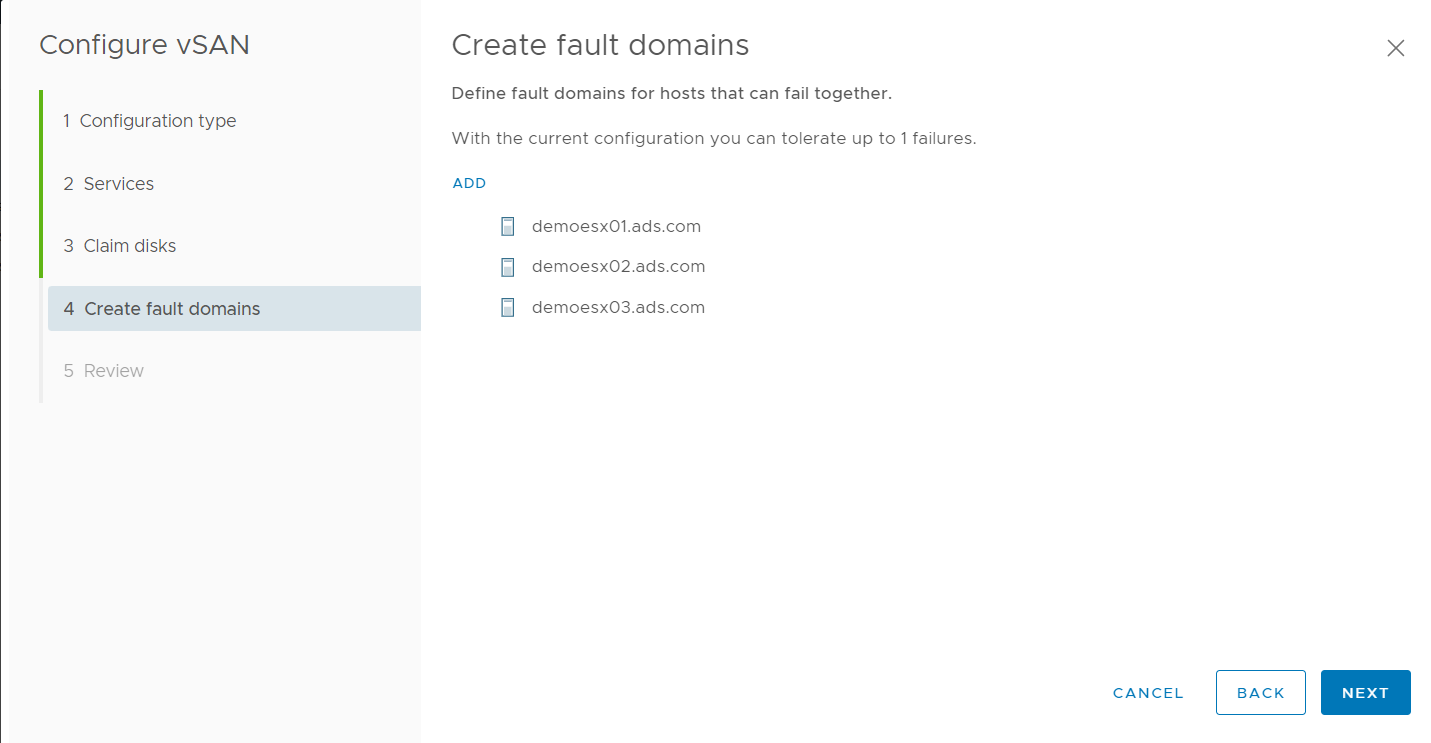
Click next you will see list of the host that will be part of cluster
If you want to add additional you can add from here as well
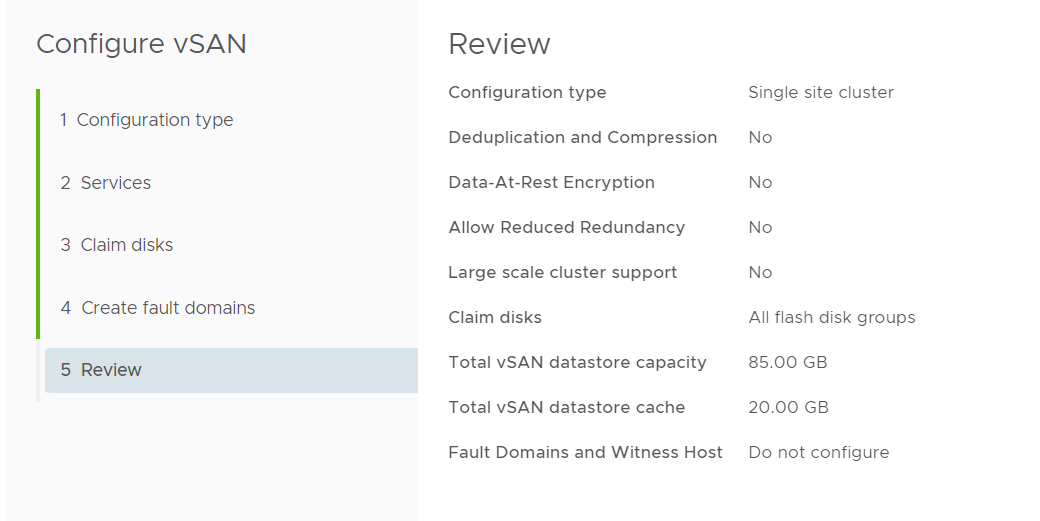
Click Finish
Now login to vCenter -> Select go to storage and you will vSAN Datastore created here.
 SME VMware and Window | VMware | VxRail | vSAN | SRM | vRO | vROP|VMware Aria Log Insight| Nutanix |Cisco HyperFlex | NetApp | Azure | Citrix | Veeam Backup & Replication, EM & One
How to view all rules and monitors running on an agent-managed computer?
How to view all rules and monitors running on an agent-managed computer?
To view all rules and monitors running on the agent we need to login in SCOM console
Click monitoring

Select monitoring and click Operation manager
Expand the option and select Agent details
Expand and click agent health state

Select Agent from the list that you want to check
Select Agent state

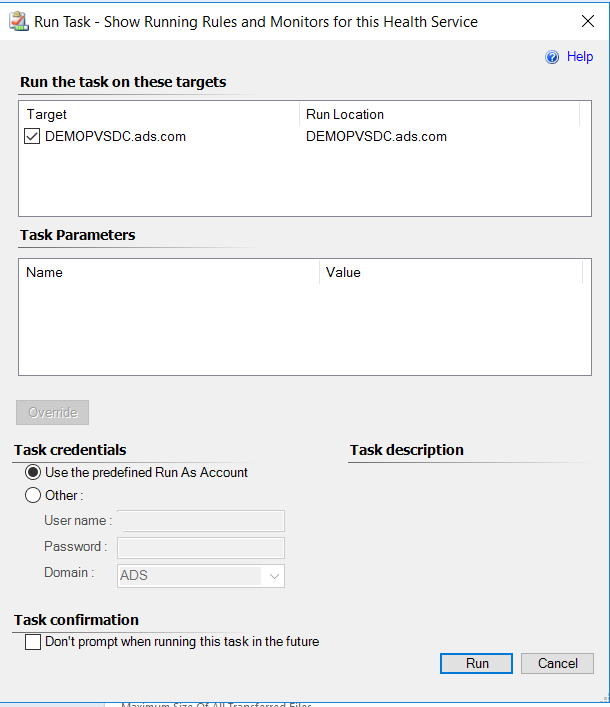
Click show running rules and monitors for this health service
Click Run
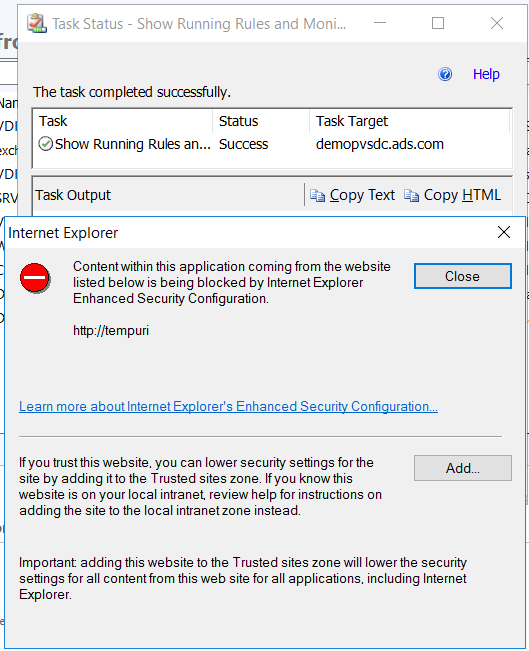
Allow it in IE now you will see created and applied rules on the host.
 SME VMware and Window | VMware | VxRail | vSAN | SRM | vRO | vROP|VMware Aria Log Insight| Nutanix |Cisco HyperFlex | NetApp | Azure | Citrix | Veeam Backup & Replication, EM & One
Steps to Add or Manage ESXi host with Distributed switch in vCenter server 7.0
Steps to Add or Manage ESXi host with Distributed switch in vCenter server 7.0
Login to vCenter server
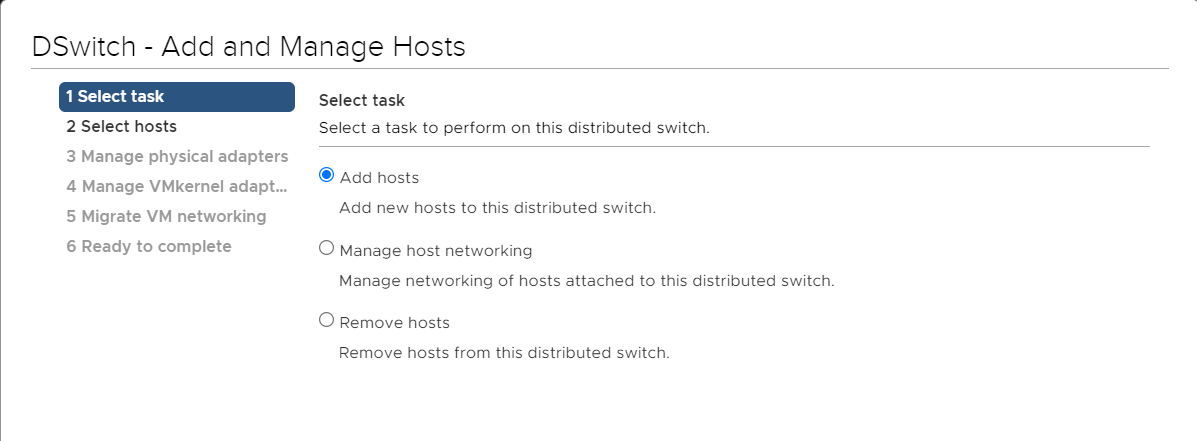
Select vDS switch -> Right click and select Add and Manage Hosts

Click Add host
Click next
Click new host and select host from the list that you want to add in vDS and manage through Distributed switch

Click next
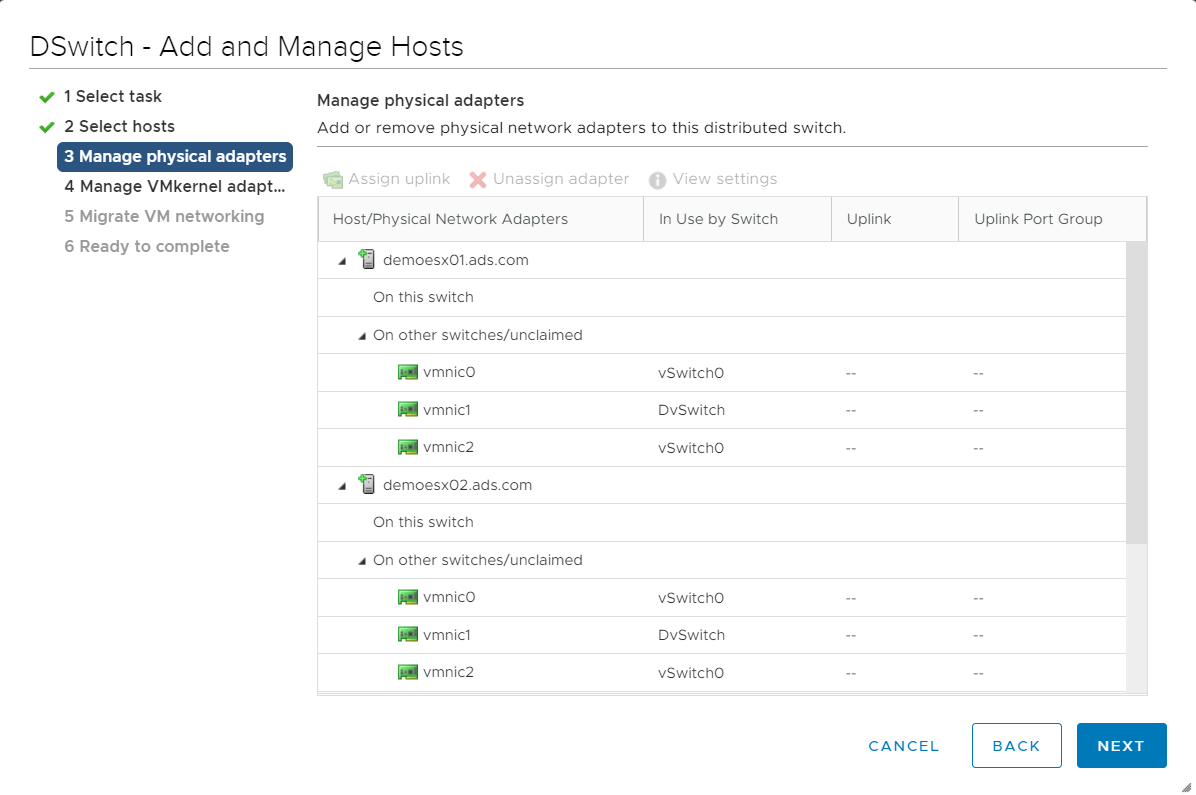
Select free NIC and assign to uplink

Check mark on Apply this uplink assignment to the rest of the hosts
Click OK
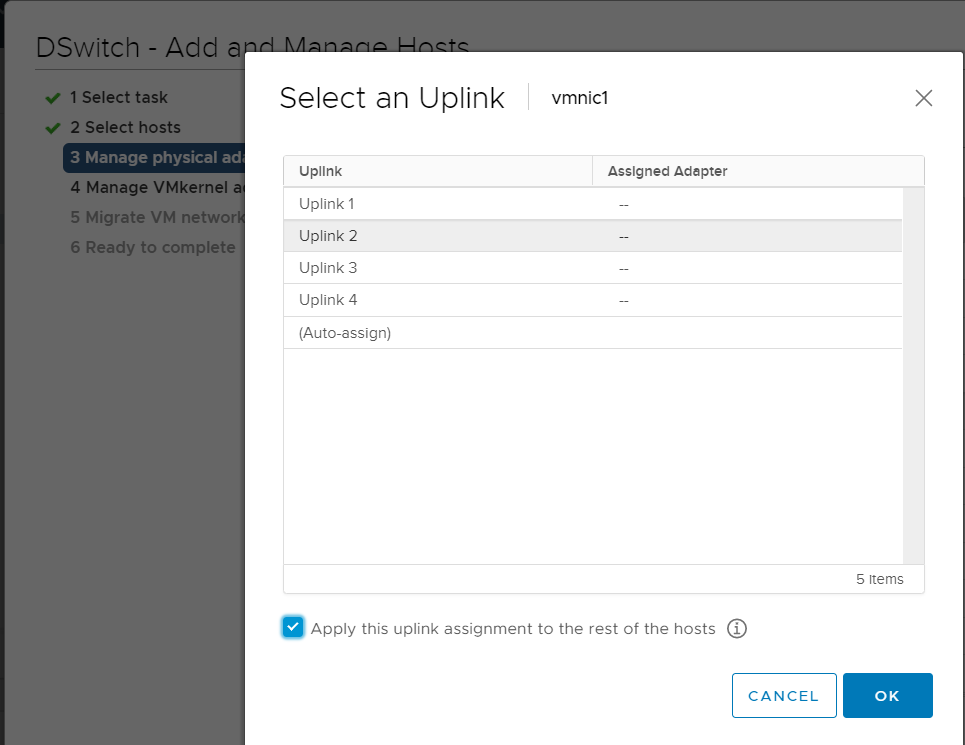
Now VMNIC1 from all 3 hosts have assigned to uplink 2
Click next

Click Next and select the correct VMK0 that you want to migrate. In my case I am not going to migrate I shall do it later.

Select the port group name

Select the kernel port and assign to port group, if you want to migrate incase not they click next

Check mark on Migrate virtual machine networking, if you want to migrate the VM with VM network.
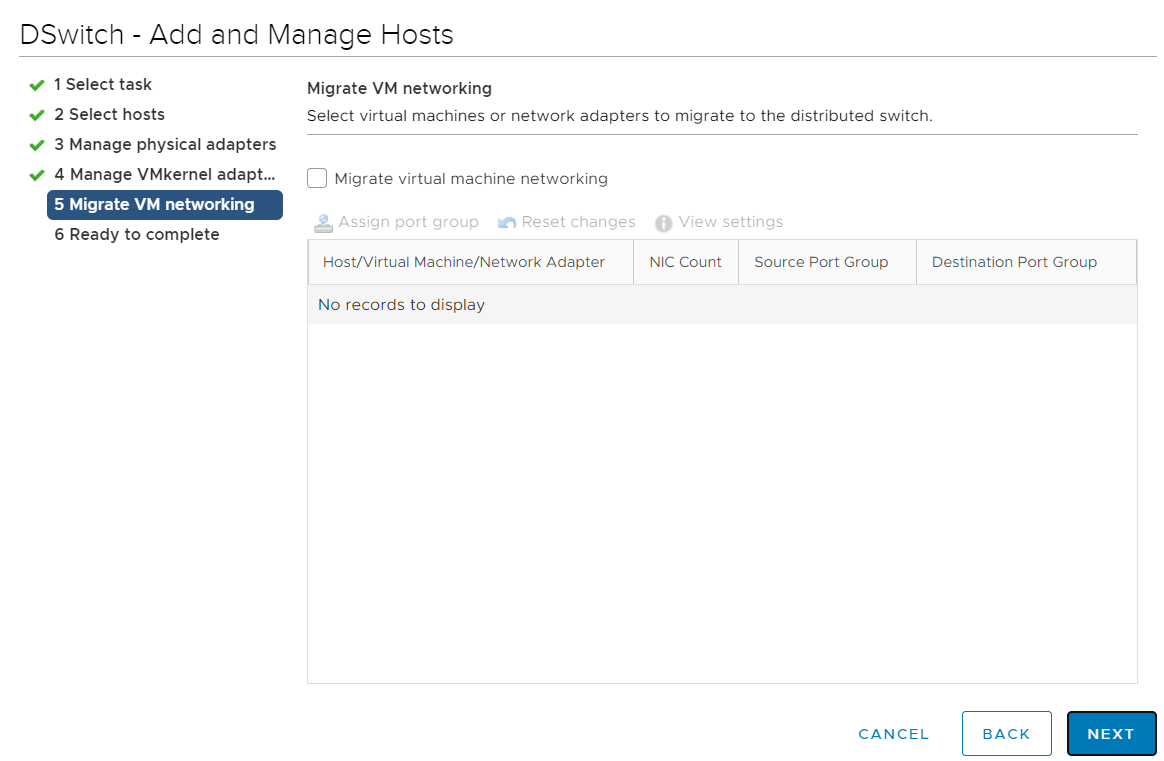
Click next and finish.
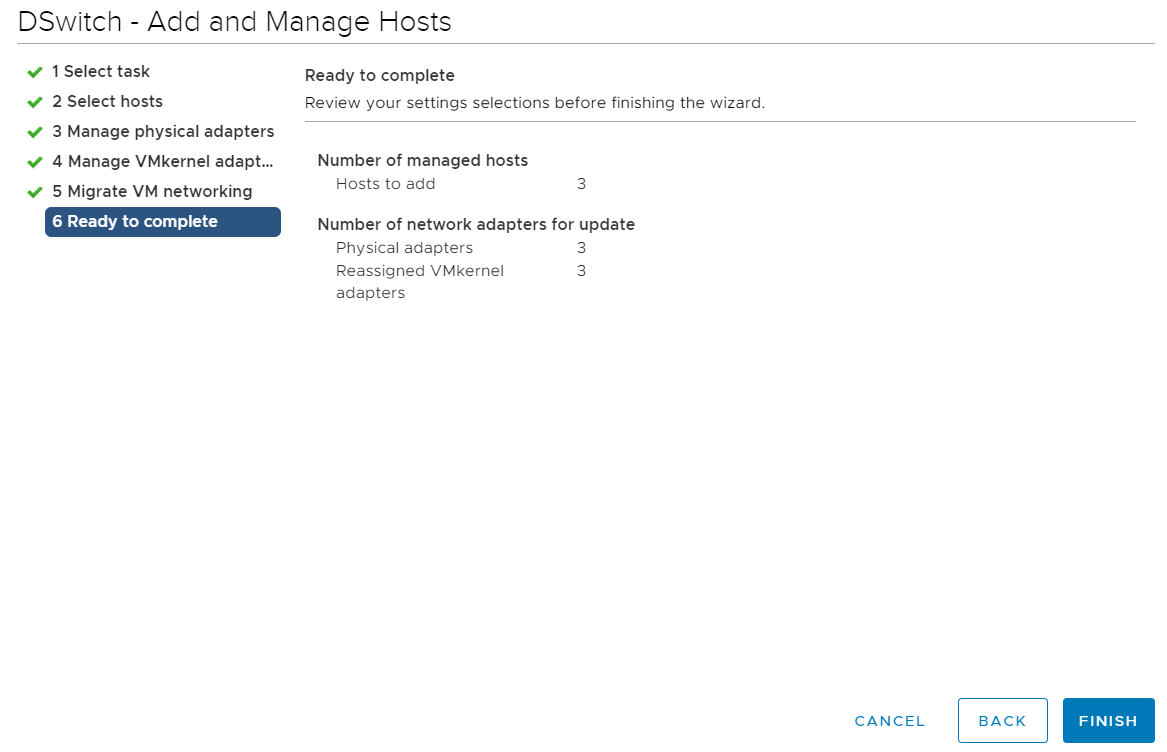
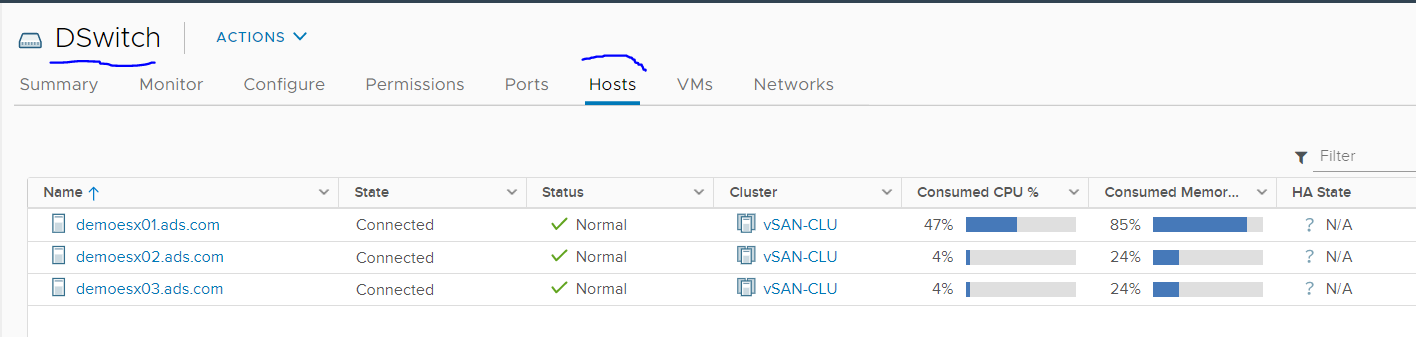
Once you will add host it will look like below.
 SME VMware and Window | VMware | VxRail | vSAN | SRM | vRO | vROP|VMware Aria Log Insight| Nutanix |Cisco HyperFlex | NetApp | Azure | Citrix | Veeam Backup & Replication, EM & One
Steps to create Distributed switch and port in vCenter server 7.0
Steps to create Distributed switch and port in vCenter server 7.0
Login to vCenter server
Select Datacenter Name and right click -> Select Distributed Switch
Select new Distributed switch

Give distributed switch Name & Click next

Select ESXi version, in my case I am selecting higher version

Specify number of uplinks
Check mark to create a default port group
Give port group name: MGMT

Click next

Click Finish
Now a Distributed switch has created.

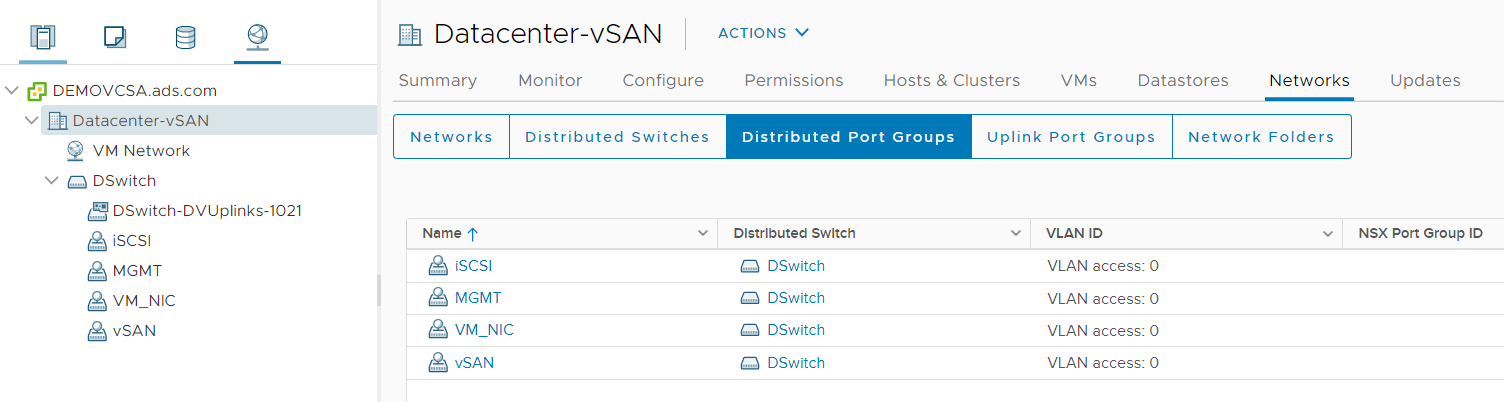
To create additional port group
Select Distributed Switch -> Right click and select Distributed port group
Select new distributed port group

Give port group name

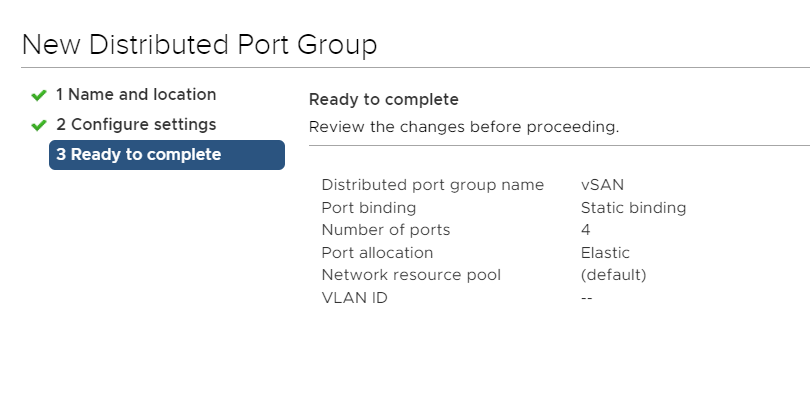
Modify the changes as per your requirements
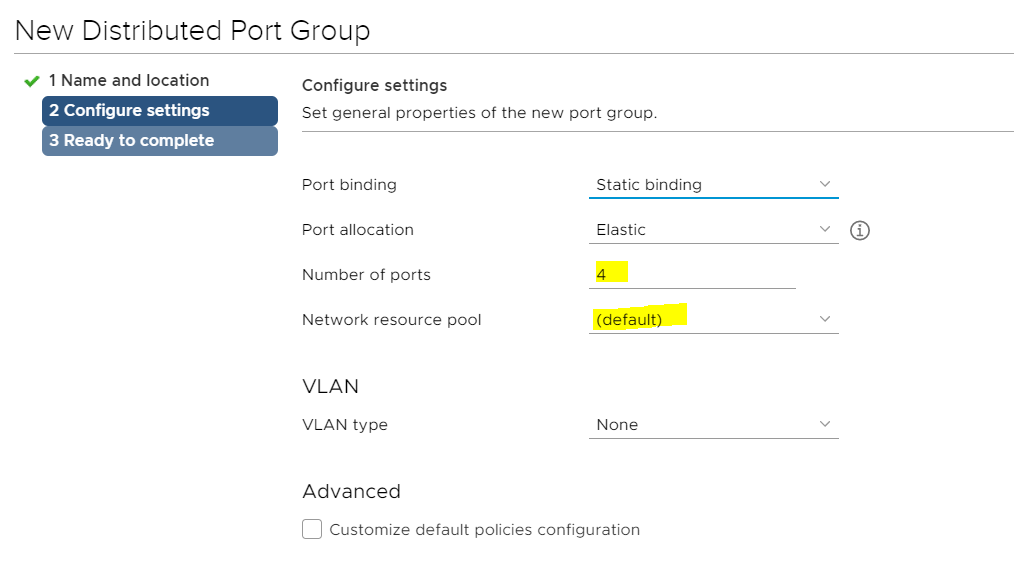
Click next and finish
Now I have created 4 port groups as per my requirements.
 SME VMware and Window | VMware | VxRail | vSAN | SRM | vRO | vROP|VMware Aria Log Insight| Nutanix |Cisco HyperFlex | NetApp | Azure | Citrix | Veeam Backup & Replication, EM & One
Subscribe to:
Posts (Atom)
Featured Post
HPE MSA 2040 configuration step by step
HPE MSA 2040 configuration Default IP range for HP SAN storage MSA 2040 is 10.0.0.1/2 You need to connect your laptop and storage with...

-
 HPE MSA 2040 configuration Default IP range for HP SAN storage MSA 2040 is 10.0.0.1/2 You need to connect your laptop and storage with...
 -
When you are powering on the VM and getting below error what do you need to do? Error code Module ‘Monitorloop’ power on failed Failed to ...
-
 CRITICAL: This node is not healthy because the root volume is low on space (<10MB). The node can still serve data, but it cannot part...
 -
 Hi Friends, Here I am going to share some steps that will be required during ESXI host add in Vcenter 6.0. I have one Vcenter server wi...
 -
Command to check vpxa, hostd service status | start stop the vpxa & hostd service Login to ESXi host using putty session Go to /etc/in...
-
X enApp 6.5 Installation and Configuration Steps
-
Citrix PVS Reverse Imaging We do reverse imaging when you want to update vDisk, VMTool, OS or drivers. To update Citrix target devices it...
-
Different ways for certification authority backup https://blog.ahasayen.com/certification-authority-backup/ Upgrading / Migra...
-
If you see EDGE node registration in pending state like below Run below command on NSX-T manager to get thumbprint get certificate api th...
-
You can upgrade using VUM, ISO or ESXCLI Here I am going to do this using ESXCLI I am using HPE custom ISO, you can download an offline bund...


