Showing posts with label vCenter. Show all posts

vTPM Windows 11 installation in VMware step by step


What is a vTPM? A virtual Trusted Platform Module (vTPM) as implemented in VMware vSphere is a virtual version of a physical TPM 2.0 chip, implemented using VM Encryption. It offers the same functionality as a physical TPM but is used within virtual machines (VMs).


Deployment of vTPM modules, require a Key Provider on the vCenter Server.
For more information on vTPM modules.

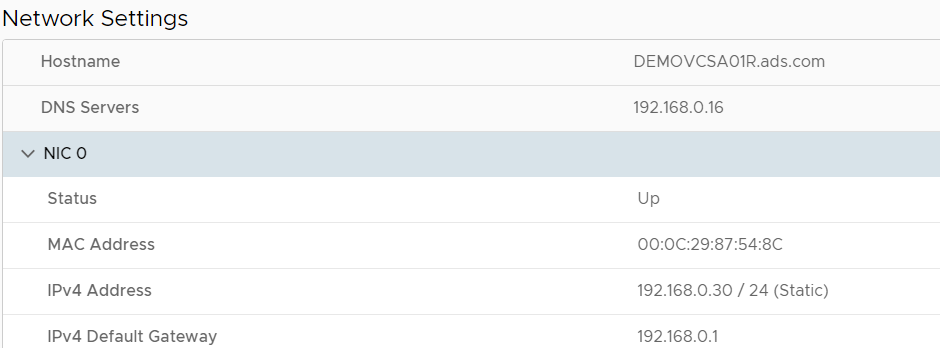
In order to deploy vTPM modules (and VM encryption, vSAN Encryption) on VMware vSphere ESXi, you need to configure a Key Provider on your vCenter Server.

Traditionally, this would be accomplished with a Standard Key Provider utilizing a Key Management Server (KMS), however this required a 3rd party KMS server and is what I would consider a complex deployment.

VMware has made this easy as of vSphere 7 Update 2 (7U2), with the Native Key Provider (NKP) on the vCenter Server.

The Native Key Provider, allows you to easily deploy technologies such as vTPM modules, VM encryption, vSAN encryption, and the best part is, it’s all built in to vCenter Server.


Enabling VMware Native Key Provider (NKP)

To enable NKP across your vSphere infrastructure:

->Log on to your vCenter Server
->Select your vCenter Server from the Inventory List
->Select “Key Providers”
->Click on “Add”, and select “Add Native Key Provider”
->Give the new NKP a friendly name
->De-select “Use key provider only with TPM protected ESXi hosts” to allow your ESXi hosts       without a TPM to be able to use the native key provider.

In order to activate your new native key provider, you need to click on “Backup” to make sure you have it backed up. Keep this backup in a safe place. After the backup is complete, you NKP will be active and usable by your ESXi hosts.


https://www.starwindsoftware.com/blog/windows-11-tpm-and-encryption-in-vmware-vsphere

What is new in VxRail 8.0.201 | VxRail 8.0 upgrade plan


What is new in VxRail 8.0.201


VxRail 8.0.201 includes the VMware vCenter Server 8.0 Update 2a (same as VxRail 8.0.200), VMware ESXi 8.0 Update 2 (same as VxRail 8.0.200), updated BIOS for hardware models V670F, P670F/N, E660/F/N, S670, and other security fixes.

For more information, see VMware vCenter Server 8.0 Update 2a Release Notes and VMware ESXi 8.0 Update 2 Release Notes.

Security fixes:

VxRail 8.0.201 contains fixes that resolve multiple security vulnerabilities. For more information, see the following Dell Security Advisory (DSA):

DSA-2023-465: Dell VxRail Security Update for multiple third-party component vulnerabilities which address:

       PowerEdge: Intel November 2023 Security Advisory (2023.4 IPU) (CVE-2023-23583)

VxRail Manager: SUSE


VxRail 8.0.201 Package Software

This section lists the components of the VxRail 8.0.201 software package.

VxRail Software

       VxRail Manager 8.0.201 build 28354420

       VxRail System 8.0.201 build 28354422

       VxRail Manager VMware vCenter Plugin 9.3.0.0

VMware integration

       VMware ESXi 8.0 Update 2 build 22380479

       VMware vCenter Server Appliance 8.0 Update 2a build 22617221

       VMware vSAN 8.0 Update 2 build 22380479

PowerEdge platform components

       BIOS: 1.12.1

       iDRAC: 7.00.30.00

       iSM: 5.2.0.0.3156


NSX Compatibility


What is vSAN file service? And how to configure step by step


What is vSAN file service? And how to configure step by step

vSAN native file services draw attention for many reasons.
Its flexibility, integration, and capabilities make it a good fit for a variety of use cases.
The initial version provided a key element to serving up cloud-native applications in vSAN:
Persistent, read-write many (RWM) volumes. vSAN 7 Update.
1 improved on the capabilities of file services even further with support for SMB v2.1 and v3,
Active Directory integration and Kerberos Support. vSAN 7 U2 extends the capabilities of vSAN file services
in new and interesting ways including support for stretched clusters, data-in-transit encryption,
snapshots and improved scale, performance and efficiency.


Step to configure File service using vSAN step by step.

I have already built 3 node vSAN cluster.

1 Node I am using for Witness and 2 nodes for FTT.

Login to vCenter console

Click on vSAN enabled cluster

Configuration -> Select File Shares


Give File service domain name -> Next


Select Protocol –> IPv4

Assign DNS servers 

Assign DNS suffixes

Assign Subnet mask & Gateway


Assign IP and DNS name manually or select Autofill.

Click next


Check mark on Active directory service

AD domain name

AD username and password

 Follow the steps and click next & finish


vCenter Upgrade Plan Workflow


Error Source vCenter Server has unsupported version of host profiles

 Issue -: If you are getting below error during vCenter upgrade pre-check.


Error Source vCenter Server has unsupported version of host profiles

Host profiles with versions lower than 6.7 are not supported by vCenter Server 8.0.0 Upgrade the 1 host profiles listed below to version 6.7 or later before proceeding with the upgrade of vCenter server upgrade the host profile before upgrading all hosts with versions lower than 6.7 for more information see KB52932 list of unsupported host profiles.


Solution -: You need to check Host profile created in vCenter and delete unsupported Host profiles.


Steps to Upgrade VxRail vCenter.

Before starting VxRail infra upgrade you need to go with pre-validation test using vCenter and command line using VxRail Manager.


Please take some time to review the Customer Preparation Guide KB:
https://www.dell.com/support/kbdoc/en-us/000200768 

 Recommendation:

VxRail Engineering performed a data analysis, which has shown that 92% of upgrades complete with no issue when the ESXi nodes are proactively rebooted. This will identify VM's with potential vMotion issues, ESXi maintenance mode issues, reboot issues and refreshes all ESXi services.  

Therefore, RPS are recommending customers to perform a rolling reboot on the ESXi nodes, several days before the VxRail Upgrade (Customer Task).

If a customer has any issues during the reboots, they can open an SR with the VxRail Support team to address an issue.
Additionally, your Upgrade Engineer will also reboot all Service VM's (VxRail Manager, vCenter** & PSC**) and reset iDRAC on all nodes prior to starting the upgrade.
**Only if VxRail Managed. 


 1.      Run Skyline Health

Login to Vxrail vCenter -> Cluster -> Monitor

Under the vSAN Run Skyline


2. Check Resyncing Objects

Login to VxRail vCenter -> Cluster -> Monitor

Under the vSAN -> Resyncing Objects

If all object has already resync then it’s fine if not, then run the Resync from Configuration.


3.      Change VxRail cluster heartbeat duration to repair Object, default it is set to 60 Minutes.

Change it to 300Minutes or more to avoid object sync during node isolation.


Login to VxRail vCenter -> Cluster -> Configuration

Under the vSAN -> Service -> Advanced Option

Click Edit and set Object repair timer.


4.      Enable VxRail health Monitoring.


Login to VxRail vCenter using root credentials and below command to check health status.

Command -> vsan.whatif_host_failures 0


Download vxverify_XXX_XX_XXX.phy file


Open vxverify_XXX_XXX_XX file using phython


Once you will run this command, VxRail manager will start collecting health report like below.


 In preparation for your upcoming upgrade event, note the below known items:

Schedule the upgrade for a time outside of your peak I/O load, as performance degradation may occur during the migration of VMs while individual nodes or hosts are being upgraded.

Since VMs are vMotioned as part of the upgrade, ensure that VMs are available to be vMotioned in advance. Examples of issues which may prevent vMotion:

VM with an ISO mounted.

VM with external storage locally mounted

VM pinned to a host (Affinity rules)


Download the latest ISO from dell portal for VxRail upgrade.


https://dl.dell.com/downloads/PG9N6_VxRail-8.0.110-Composite-Upgrade-Package-for-7.0.x.zip


Mount the ISO in VxRail cluster

Login to vCenter -> Select Cluster -> Configuration

Under VxRail -> Updates -> Local Updates 

Select Update Bundle and Upload


Once ISO Image upload complete click start.

Once you click start it will go with Precheck -> Scan and then Update.

Now all the tasks will complete auto. first will upgrade vCenter -> ESXI host.

It will prompt to enter Temp IP that will be assign temporarily to vCenter during upgrade. 


ESXI host upgrade failing with error the VIB cannot be satisfied within the ImageProfile | Missing_Dependency_VIBs_error

When upgrading the ESXI host from 6.7 to 7.0 or 8.0 it is failing with error the VIB cannot be satisfied within the ImageProfile


VIB Dell_bootbank_dell-configuration-vib

VIB qlc_bootbank_qedi

VIB DellEMC_bootbank_dellemc-osname-idrac

VIB QLogic_bootbank_net-qlge

dell-shared-perc8


You may perform below command to remove failed VIB.

Command -: esxcli software vib remove -n XXXXXXX(VIB name)

esxcli software vib remove -n dell-configuration-vib


esxcli software vib remove --vibname=vmware-perccli-007.0529.0000.0000_007.0529.0000.0000-01


Steps to Change vCenter Server FQDN | vCenter FQDN Rename Step By Step

 For prerequisite  follow below VMware KB article 

https://blogs.vmware.com/vsphere/2019/08/changing-your-vcenter-servers-fqdn.html


  1. Prepare Infra level configuration

Current VCSA FQDN -: DEMOVCSA01.ads.com

Current VCSA IP       -:192.168.0.30

VCSA URL -: https://demovcsa01.ads.com/ui/ 

Create new DNS host record keeping the same old IP 192.168.0.30

Update both A and PTR records and run nslookup to see DNS is resolving DNS name correctly.


Once DNS level configuration complete and everything is resolving correctly

  1. vCenter level 


Now go to vCenter prerequisite like taking backup, create clone or snapshot

Make sure you are taking backup and cloning vCenter server for roll back plan

Open VAMI console using 5480 port

https://192.168.0.30:5480/ 

Login with root account

Go to networking -> check the existing configure hostname and IP


Click Edit


Select the correct NIC assign to Management, usually we keep NIC 0 for Management traffic


Change Hostname and DNS 


I changed from DEMOVCSA01.ads.com to DEMOVCSA01R.ads.com

Click Next


Enter administrator@vsphere.local user ID and password

Click next


Acknowledge and click Finish


Once service will restart the VAMI page you need to reconnect.


Login with root password in VAMI page


Wait for to restart all the services and complete the process


Refresh the page or re-login 


Use the new URL to access vCenter UI link

https://demovcsa01r.ads.com/ui


How to take vSAN Storage Policy Backup | Import & Export Storage Policy


Review and finish

General

Name

vSAN_Custom_Storage_Policy_Old

Description

vSAN_Custom_storage_policy_Old

vCenter Server

DEMOVCSA08.ads.com

VSAN

Availability

Site disaster tolerance

Site mirroring - stretched cluster

Failures to tolerate

No data redundancy

Storage rules

Encryption services

No preference

Space efficiency

No preference

Storage tier

No preference

Advanced Policy Rules

Number of disk stripes per object

1

IOPS limit for object

0

Object space reservation

Thin provisioning

Flash read cache reservation

0%

Disable object checksum

No

Force provisioning

No

CANCELBACKFINISH

Modal end of content


Featured Post

HPE MSA 2040 configuration step by step

HPE MSA 2040 configuration Default IP range for HP SAN storage MSA 2040 is 10.0.0.1/2 You need to connect your laptop and storage with...