Citrix Provisioning : How to update a vDisk Using Versioning Method
AD Server: - 192.168.1.16 srv16.ads.com
DHCP & DNS Server: - 192.168.1.16 srv16.ads.com
SQL Server: - 192.168.1.12 srv16.database.ads.com
PVS Server: - 192.168.1.36 CTRXXENDA.ads.com
XenCenter: - 192.168.1.31 CITXENSRV.ads.com
Master Target machine: - WIN2K16
Test Machine: - VDI-05
Updating vDisks
It is often necessary to update an existing vDisk so that the image contains the most current software and patches. Each time the vDisk is to be updated, a new version of that vDisk is created (VHD file) to capture the changes without changing the base vDisk image. Updating a vDisk involves the following: l Create a new version of the vDisk, manually or automatically. l Boot the newly created version from a device (Maintenance device or Update device), make and save any changes to the vDisk, then shut-down the device. l Promote the new version to Production.
The following illustrates the general promotion of a vDisk update:

The availability of the updated version depends on the current promotion of that version (Maintenance, Test, or Production), and the type of device attempting to access it (Maintenance Device, Update Device, Test Device, or Production Device).
Update Scenarios
The following vDisk update scenarios are supported:
1 Manual Update – An administrator may choose to update a vDisk manually by creating a new version of that vDisk, and then using a Maintenance device to capture updates to that version. Manual updates are initiated by selecting the New button on the vDisk Versions dialog. The Access column on the vDisk Versioning dialog displays that the newly created version is currently under maintenance. While under maintenance, this version can only be accessed and updated by a single Maintenance device. Multiple Maintenance devices can be assigned to a vDisk. However, only one device can boot and access that version of the vDisk at any given time. During that time that Maintenance device will have exclusive read/write access. For details, refer to Manually Updating a vDisk Image.
2 Automated Update – Creating automated updates saves administration time and physical resources. Updates are initiated on-demand or from a schedule and are configured using vDisk Update Management. If updating automatically, the Access column on the vDisk Versioning dialog displays that the newly created version is currently under maintenance. While under maintenance, this version can only be accessed and updated by the one Update device to which it is assigned.
Note: vDisk Update Management is intended for use with Standard Image Mode vDisks only. Private Image Mode vDisks can be updated using normal software distribution tool procedures. Attempting to register a Private Image Mode vDisk for vDisk Update Management, or switching a vdisk that is already registered, will cause errors to occur.
1 Merge – Merging VHD differencing disk files can save disk space and increase performance, depending on the merge option selected. A merge update is initiated manually by selecting the Merge button on the vDisk Versions dialog, or automatically when the maximum vDisk versions count is reached.
Login to PVS server and open Citrix Provisioning Console
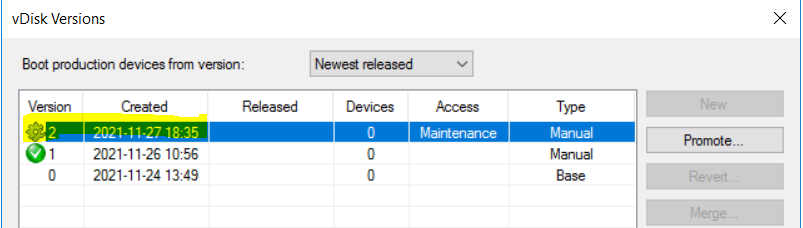
Click vDisk Pool -> Select vDisk and Right click and select Versions

Click New

Once you will create new version access will change to Maintenance -> Click done
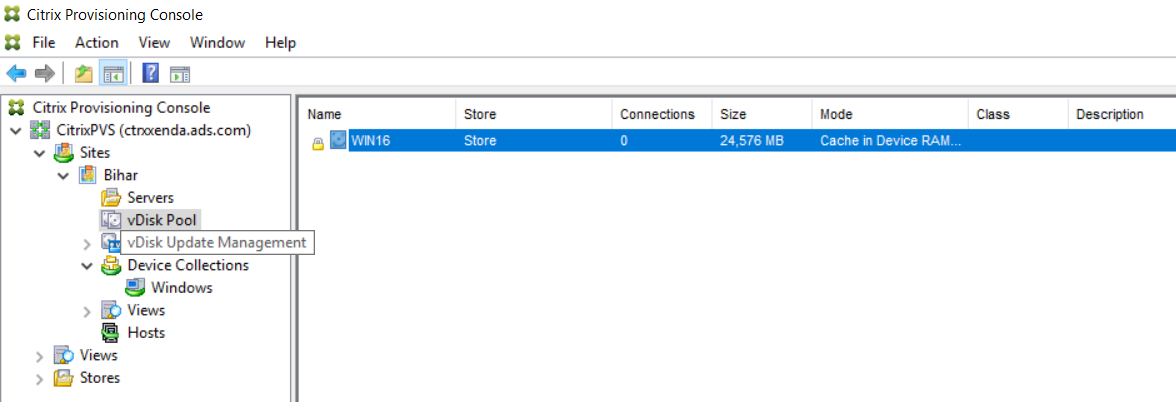
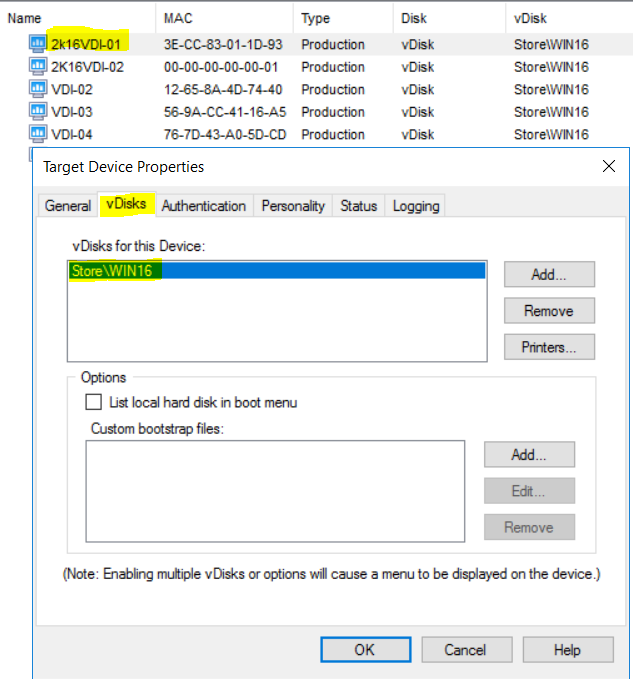
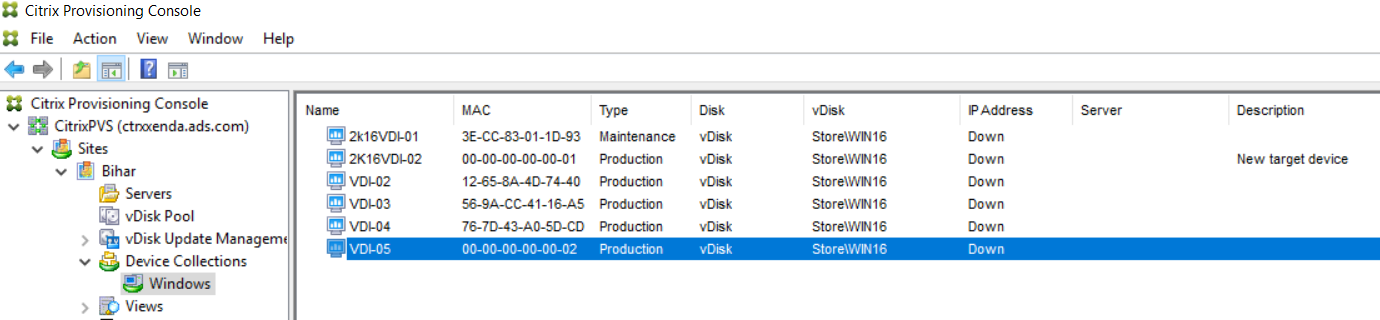
Click to Device Collections -> Select collection Name

Select master server -> Right click -> Properties
Click vDisks to check whether vDisk is attached or not, Incase not attached just attached clicking on Add button.
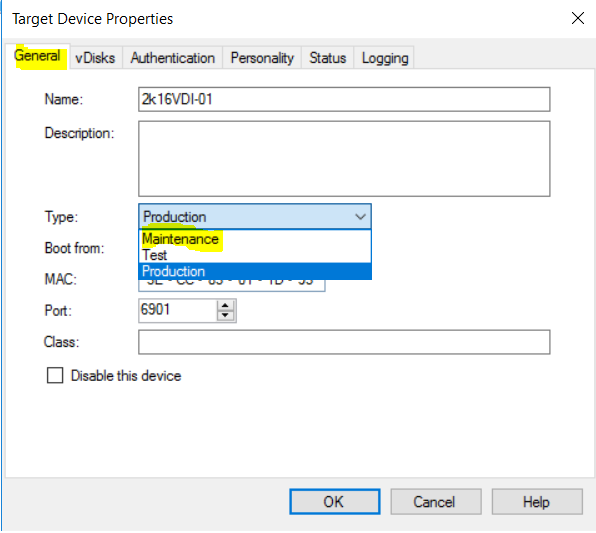
If already vDisk attached -> Click General
Drop down from type and select Maintenance -> Ok
Now Login to XenCenter -> Click on master target server and power it ON.
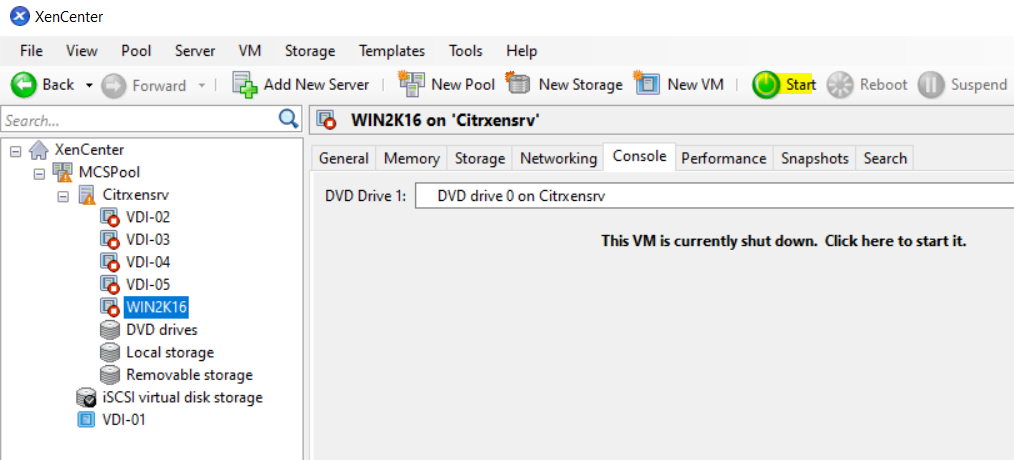
Select 1 to boot using maintenance vDisk
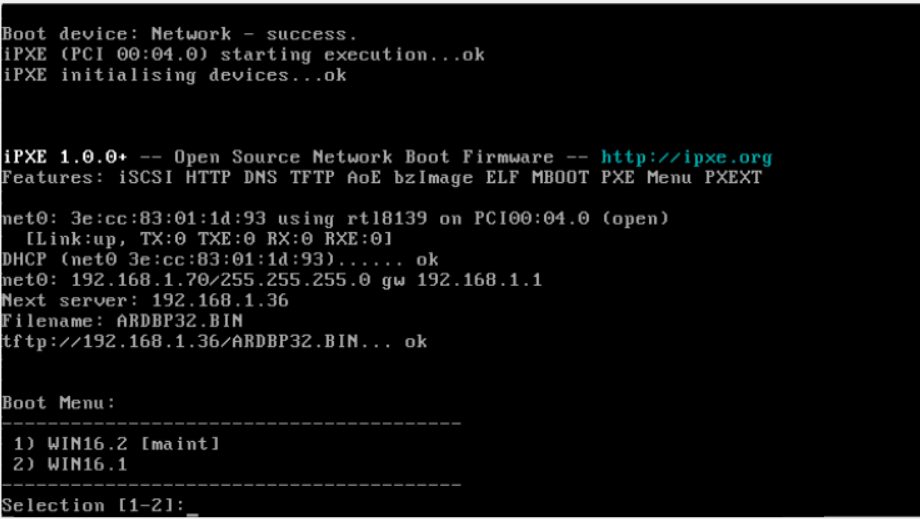
System is still booting.
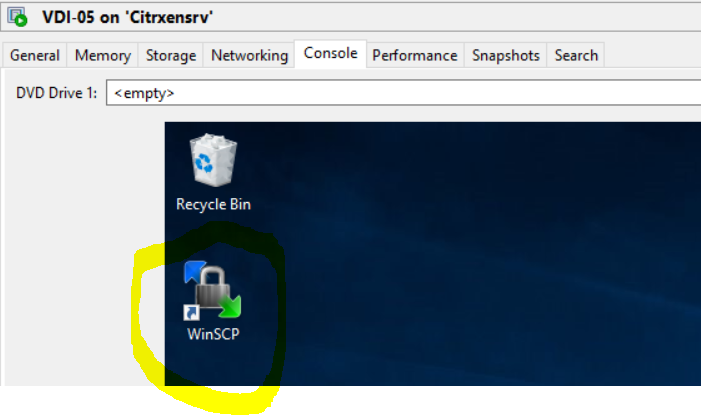
Once OS will load I shall install WinSCP and update to the existing machine using promote version method.
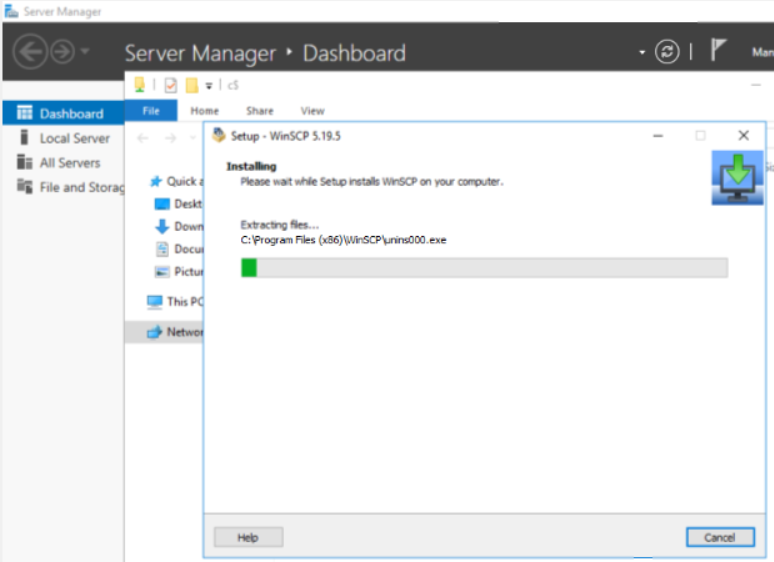
WinSCP has been installed on the master server.
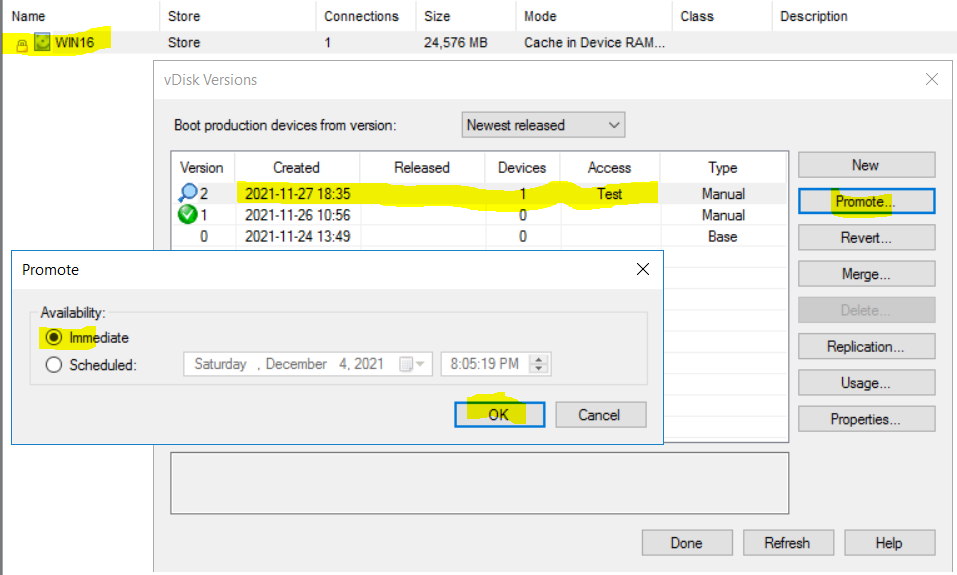
Shutdown the master server and go to PVS server and click on vDisk Pool -> Right click on vDisk and click version

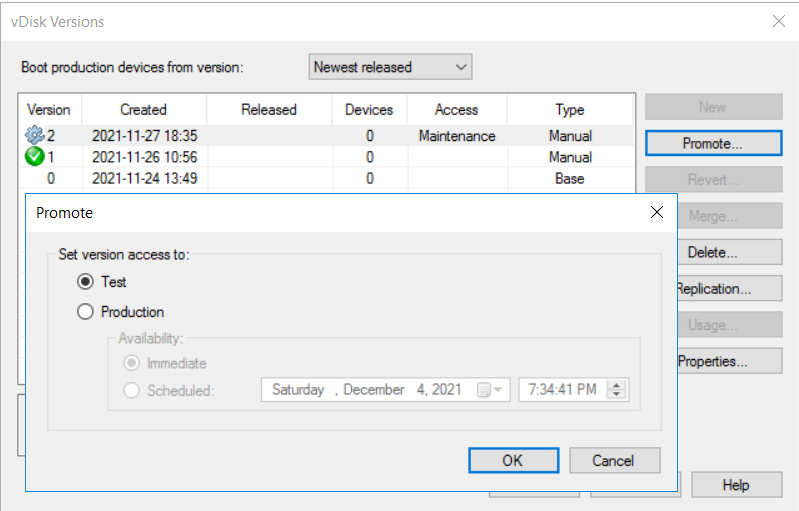
Select vDisk version that is newly created and click Promote

Select Test -> OK
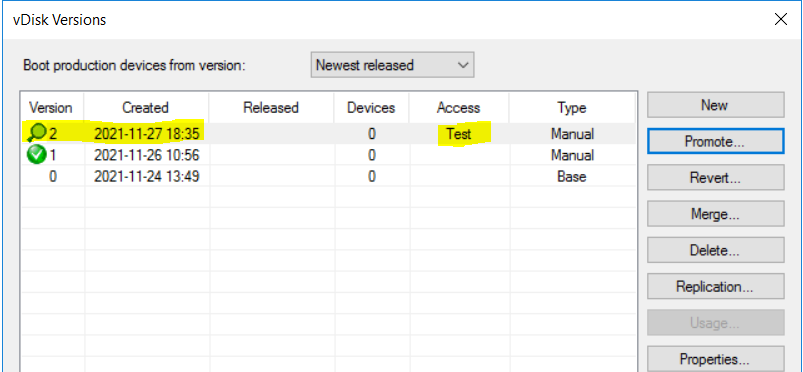
Now it has successfully promoted to Test
Go to device collection from vDisk and click collection -> select VM where you want to test new vDISK.
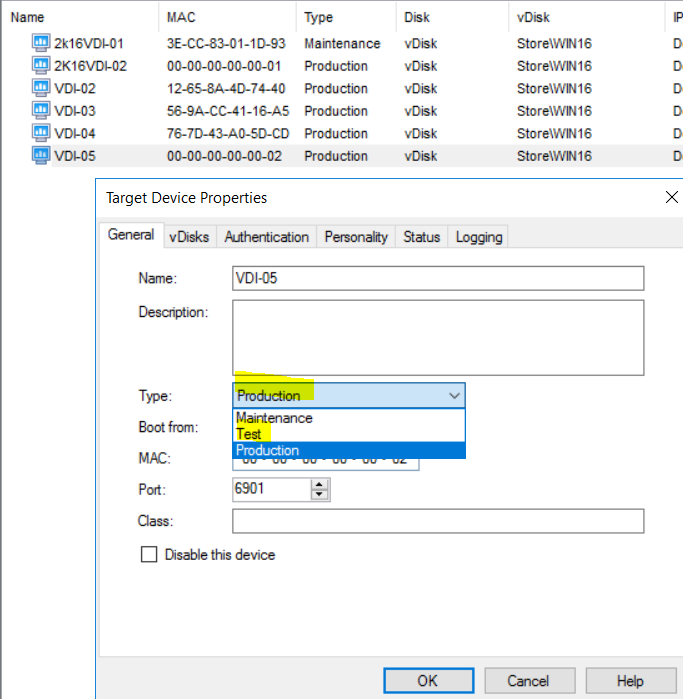
Right click VM go to properties -> from General tab drop down and select Test and click OK

Go to XenCenter and power on the machine where you want to test vDisk VDI-05 and power on
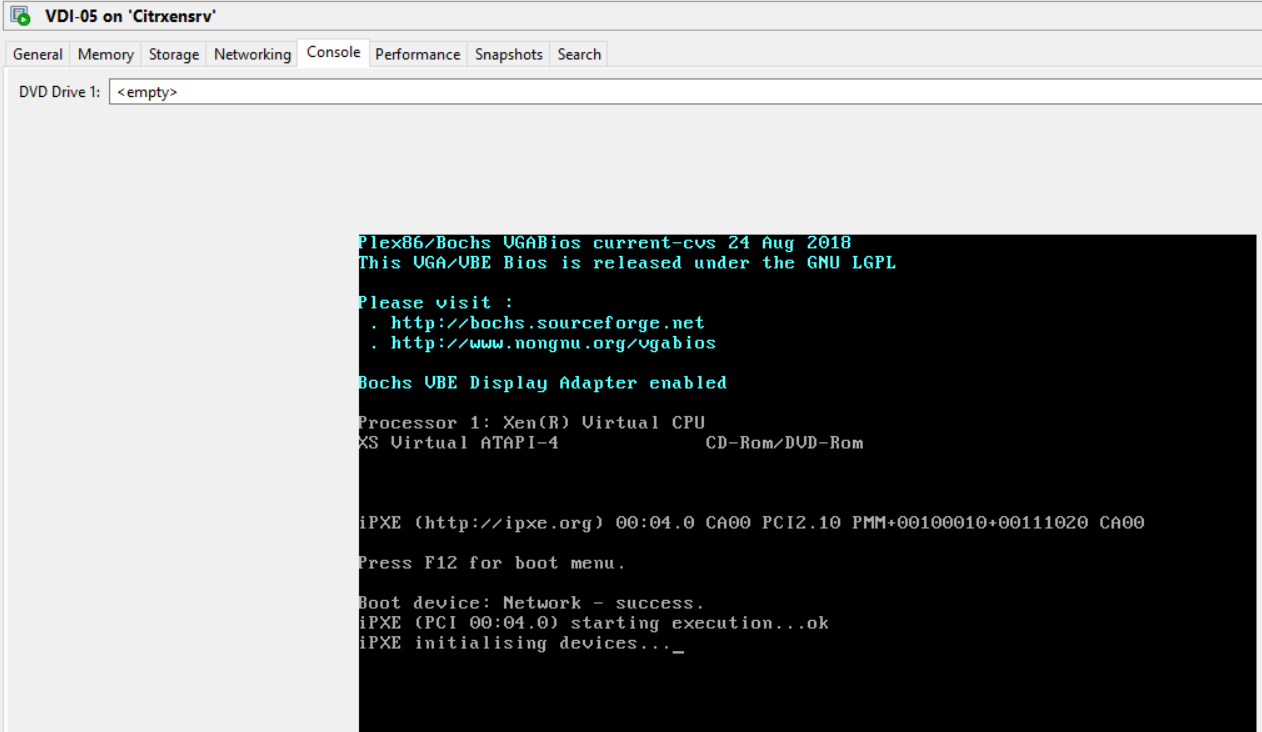
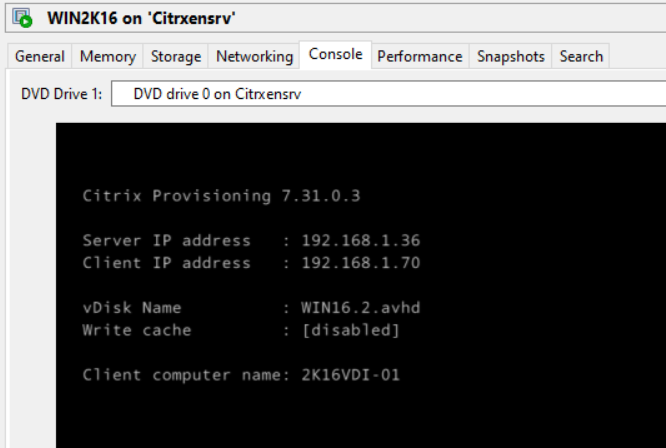
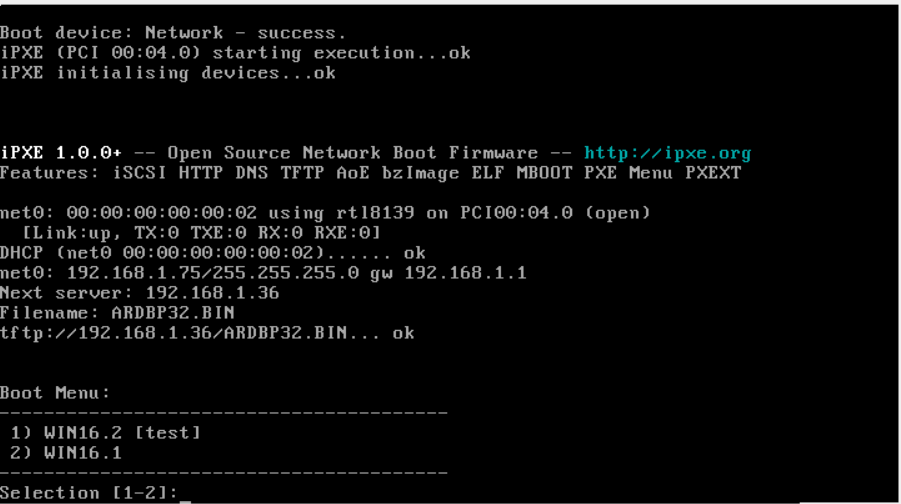
Click 1 to boot machine with test vDisk
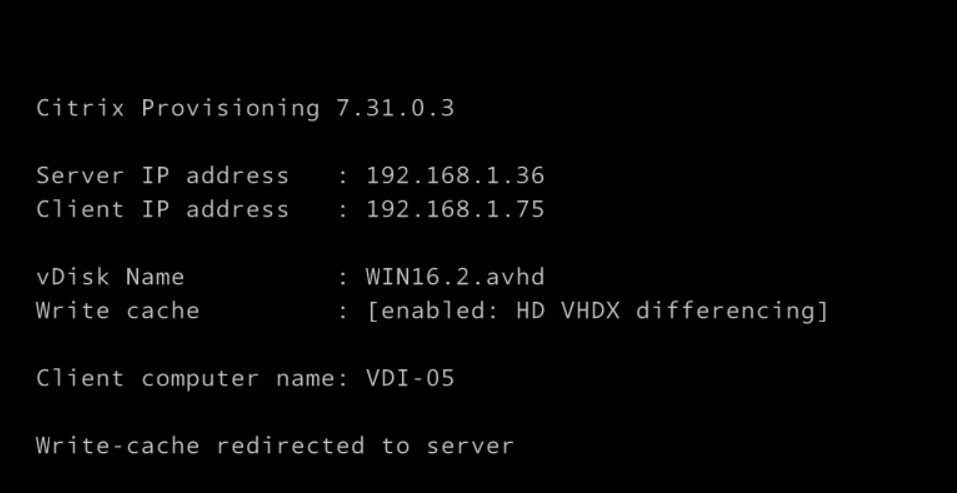
VM is booting WIN16.2.avhd
Login to new server -> WinSCP has updated in another VM as well
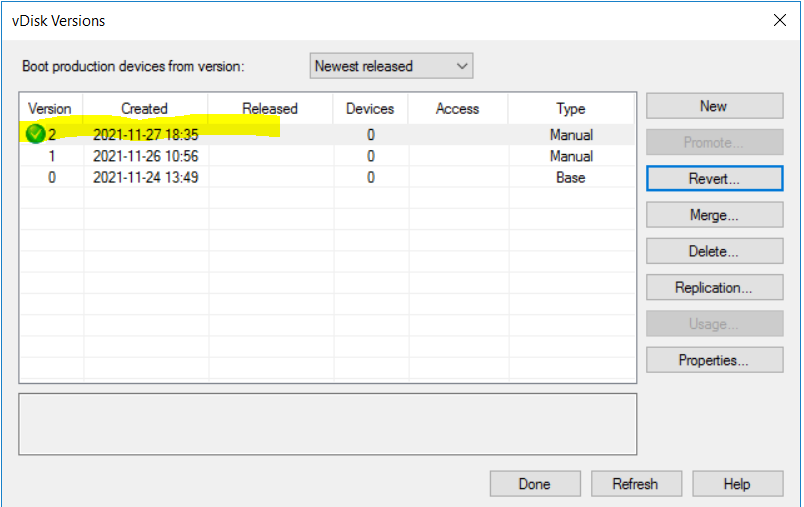
Now next we need to promote versioning from test to production
Go to PVS -> click on Disk pool -> Select vDisk and right click -> Select versions
Select version that you want to promote from Test to production
Now vDisk access has changed to Production
Now login to PVS server -> Select Device Collection -> Select Collection
Right click to test VDI-05 -> Properties -> Select General Drop down from Type and select Production

Okay -> Now power on the test machine VDI-05
Thank you now all done for vDISK update using versioning!


GVC Casinos - JamBase
ReplyDeleteFind your nearest GVC 의왕 출장샵 casinos and sites. Top Casino Sites: Borgata Hotel Casino 고양 출장샵 & Spa, 서귀포 출장샵 Borgata Hotel Casino 군포 출장마사지 & Spa, Atlantic City, 김제 출장샵