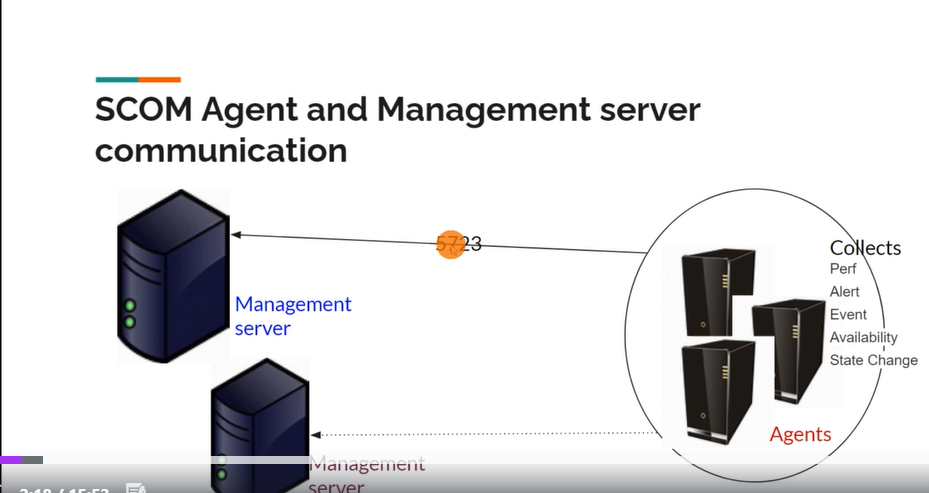
SCOM Agent-: An SCOM agent is a piece of software which we install on Windows and Linux client to collect alert, availability, performance and send these data to the SCOM management server for monitoring purpose and further troubleshooting.
How to install SCOM Agent from Operation manager Console
Connect with SCOM Operation Manager Console.

Click Administration -> Go to device management -> under device management click Agent Manage.

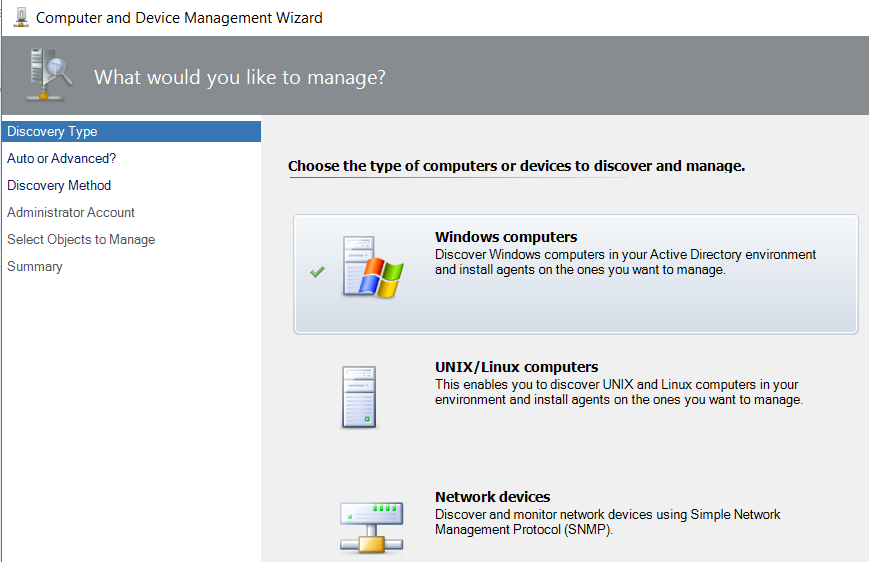
Right click on Agent Managed -> Click Discovery Wizard

Click Windows Computers
Select Automatic computer discovery -: If you are using AD integrated SCOM else select Advanced Discovery.
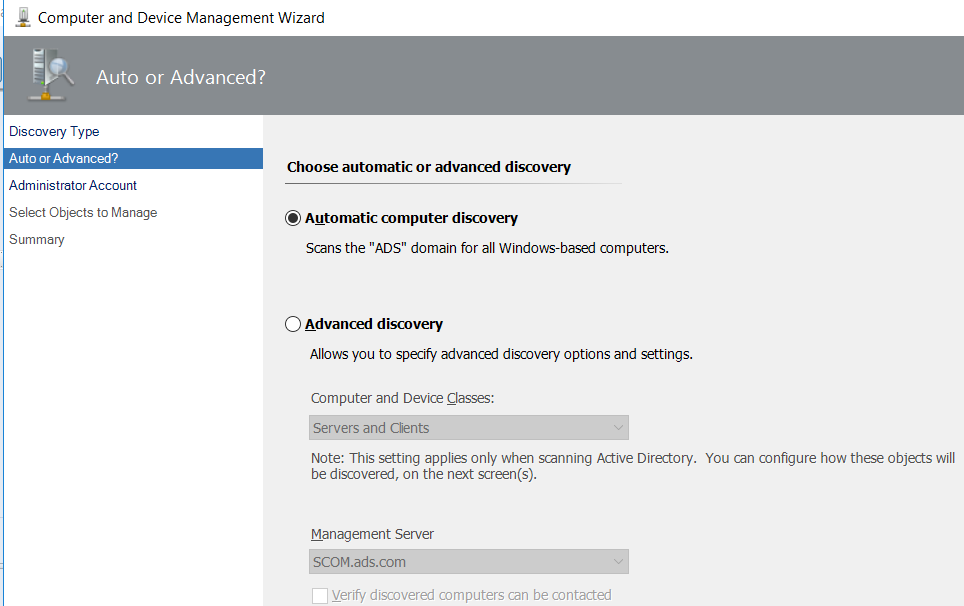
Click Next
Select Account for execute discovery

Click Discover
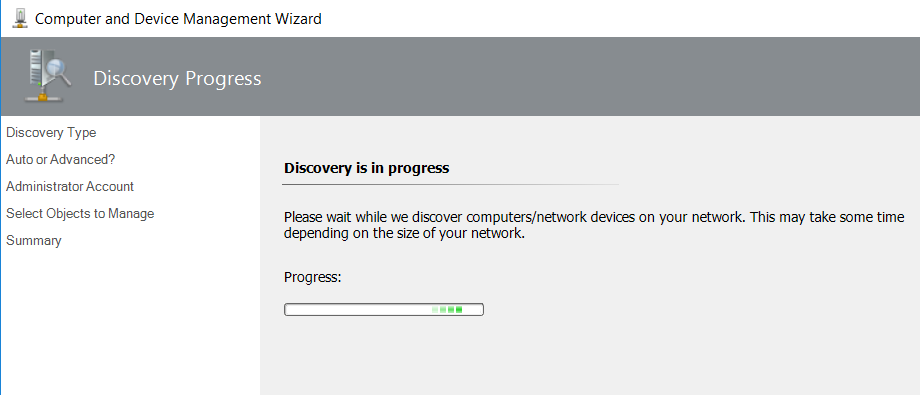
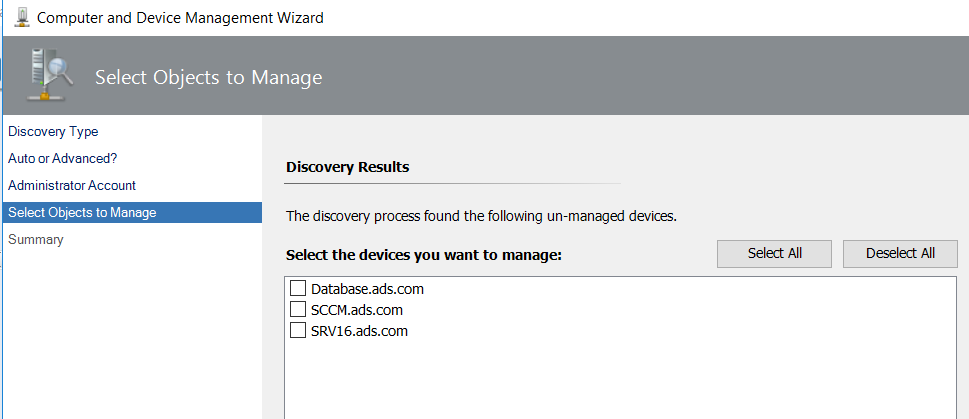
Once Discovery will complete you will see a list of the computers.
Select all or one of them and click and click next
You can change Agent installation Directory.
Specify Credentials for Agent installation, Here I am selecting domain Administrator account
because I have added this account into the local admin group in all member servers.
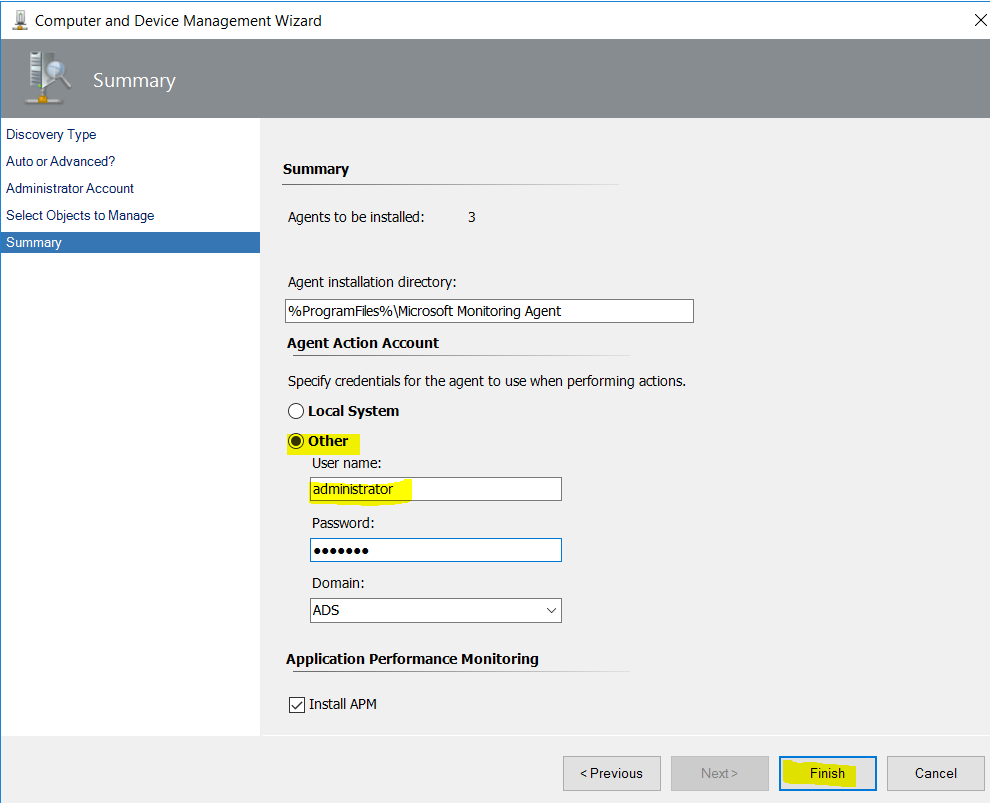
Click finish
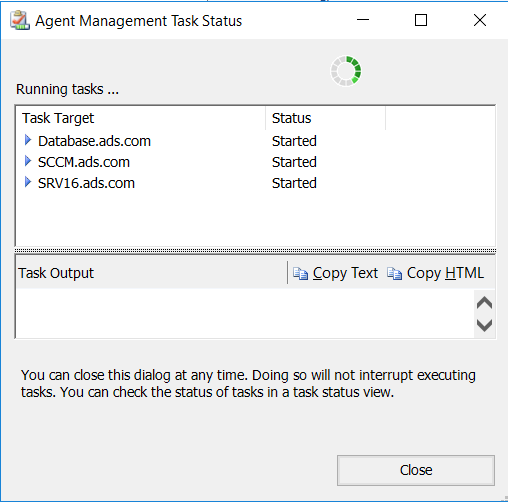
Now Agent push installation has started on all 3 servers.
Wait for 5-10 minutes and check the status
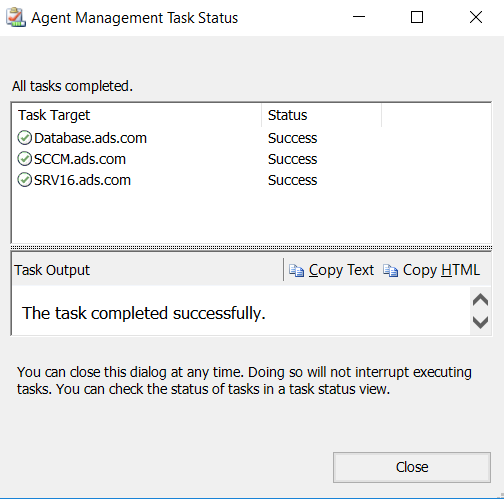
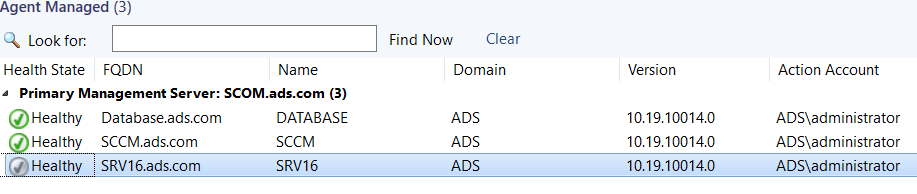
Now all 3 servers are reflecting under SCOM Agent Managed – Agent will take some time to replicate with SCOM server.

Now all the Agents are showing correctly in SCOM console under Agent Managed.
In Case if Agents are not reflecting properly under the Agent managed, just logged into to any of the failed server and open Event Viewer
Under Applications and services log click Operations Manager and check the log. In my case everything is fine so not giving any alert.


No comments:
Post a Comment