Public IP Address -: Public IP addresses allow Internet resources to communicate inbound to Azure resources. Public IP addresses enable Azure resources to communicate to Internet and public-facing Azure services.
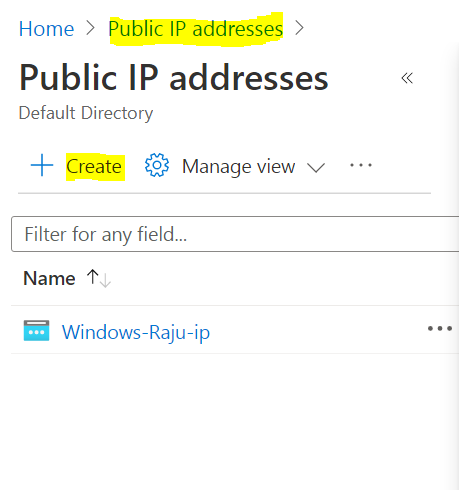
Public IP Address -> Login to Azure Portal -> Search for Public IP Address
Click Create
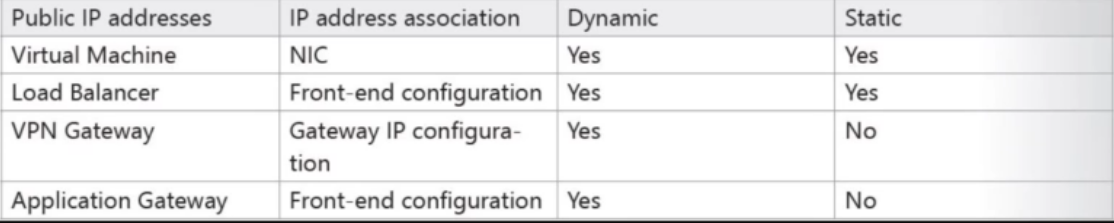
Public IP Address assignment criteria
Virtual Machine -> We can assign Public IP in both way either Dynamic or Static
VPN Gateway -> Dynamic Public IP Address assignment is possible on Application Gateway.
Below chart for Public IP Address assignment on applications
Click Create Public IP Address
Select IPv4
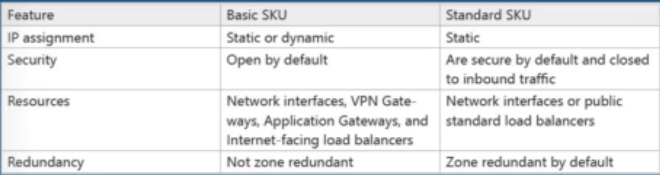
Select SKU Type Standard or Basic.
Note -: If you select Basic SKU then you can assign Static or Dynamic Public IP on VMs, if you select Standard SKU then you can assign Static public IP address.
Below chart for Basic and Standard SKU
Select Tier for Regional and Global.
Give name for Public IP Configuration.
Here I am selecting Basic SKU - You will see both Static and Dynamic IP assignment is highlighted
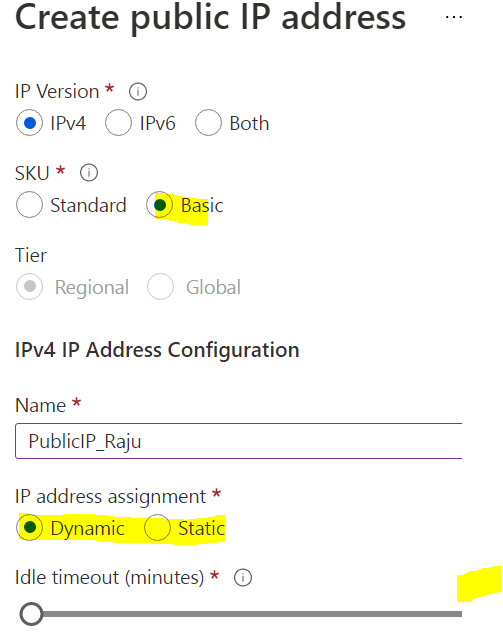
Give DNS name label -> Always in small letter
An "A record" that starts with the specified label and resolves to this public IP address will be registered with the Azure-provided DNS servers. Example: mylabel.westus.cloudapp.azure.com.
Select Subscription
Select Resource Group
Select location
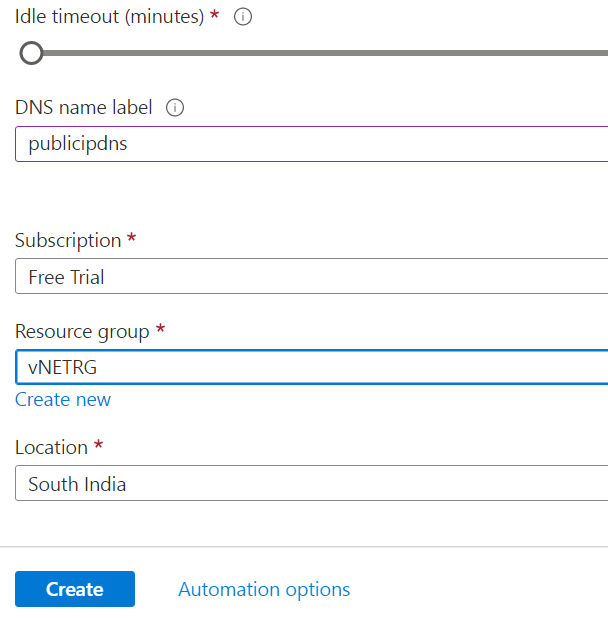
Click Create
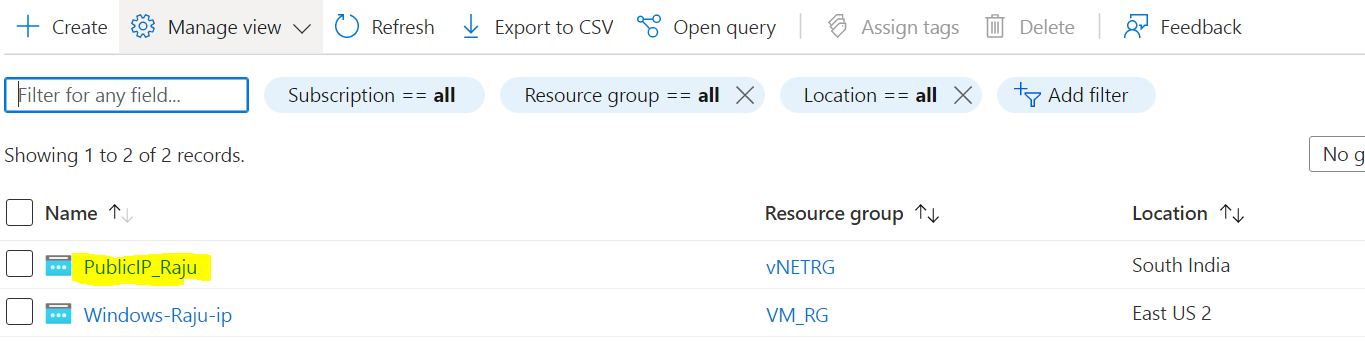
New Public IP "PublicIP_Raju" has created.
How to assign Public IP address to Network interface or loadbalancer
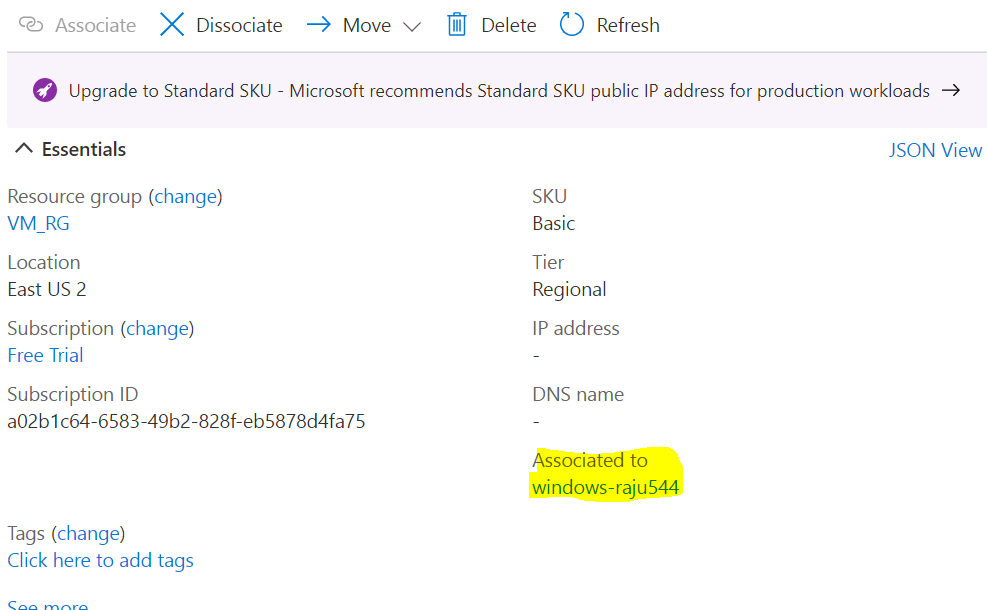
Click on newly created Public IP -> PublicIP_Raju
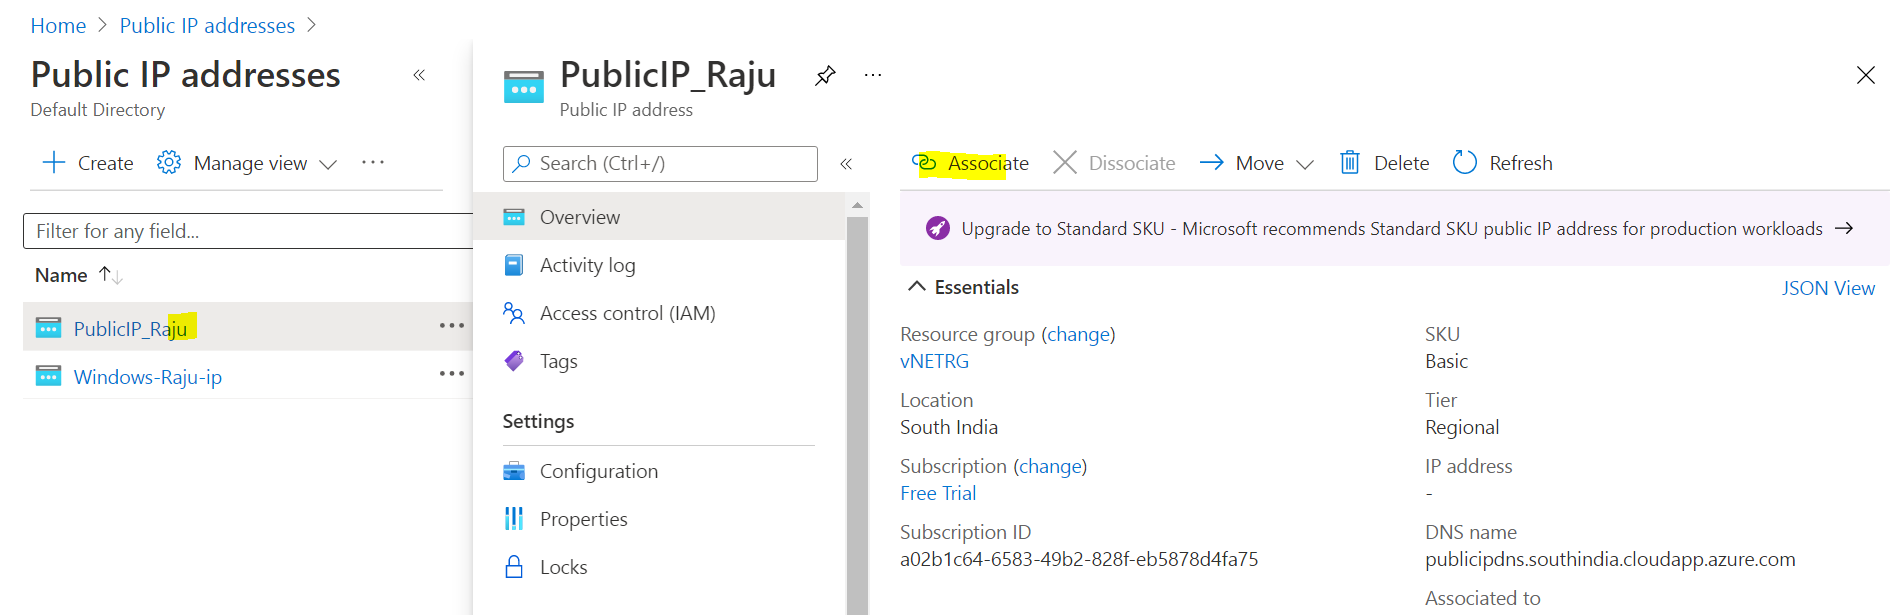
Click Associate ->
Select Load balancer or Network Interface from the drop down
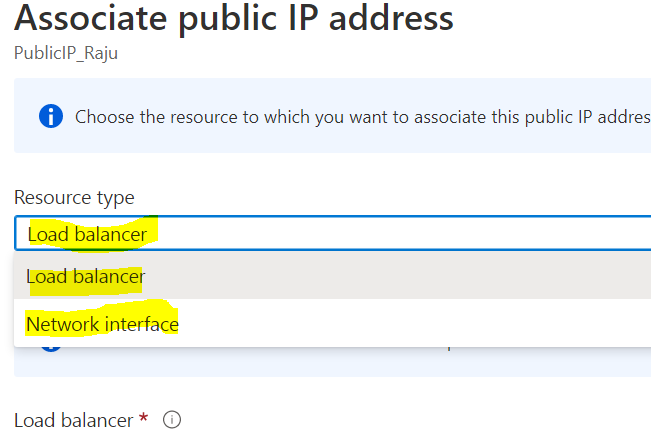
Once you select Network Interface you will see a list of the network interface created in the location, select from one of them.
To delete Created public IP in Azure
Login to Azure Portal
Search for Created public IP
Open created public IP
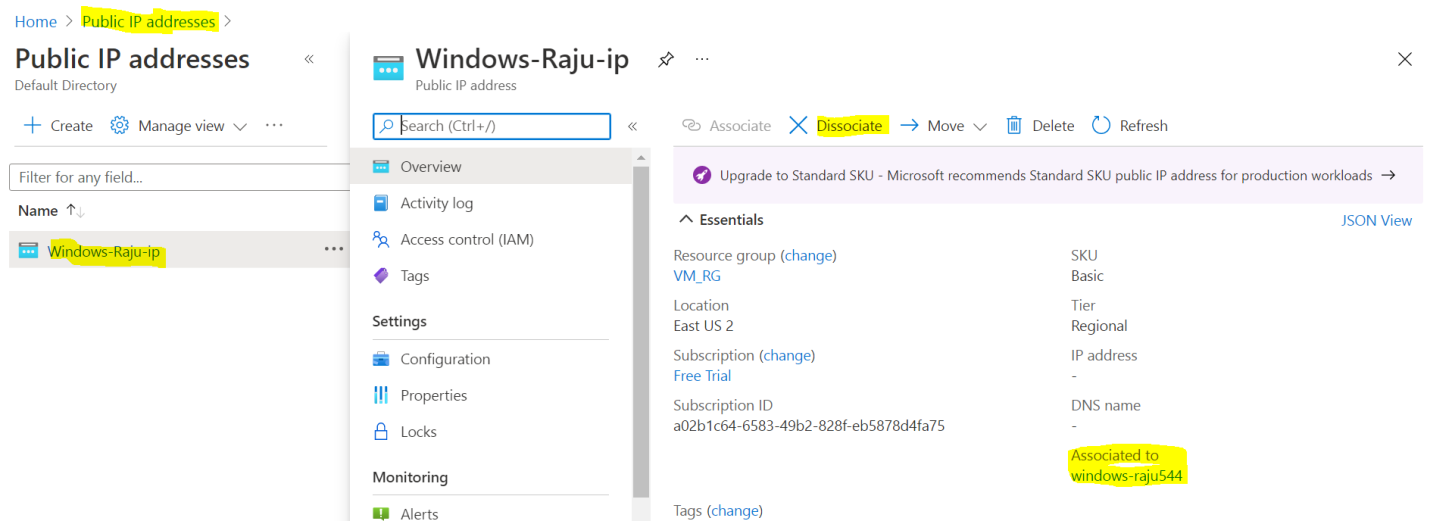
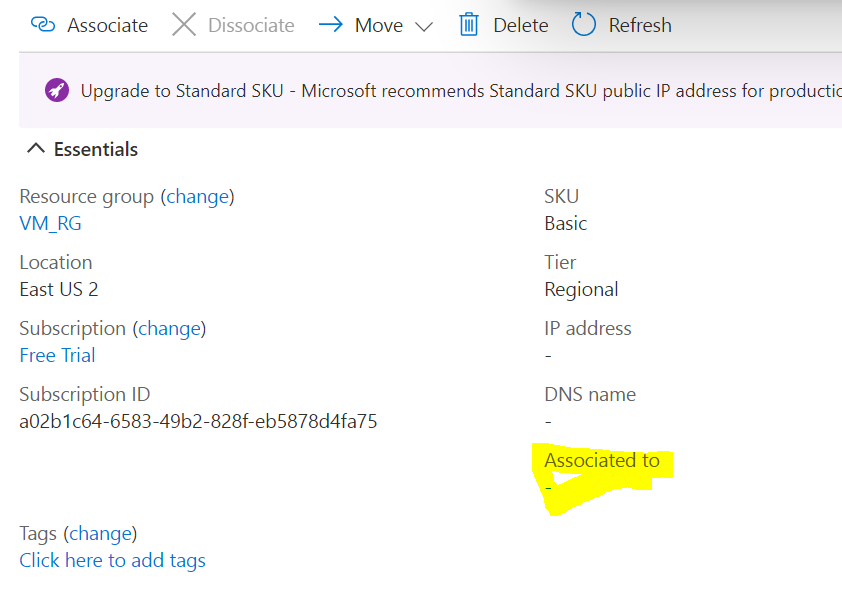
Click on Dissociate -> Select Yes

Now it is not Associated to any of the network or load balancer
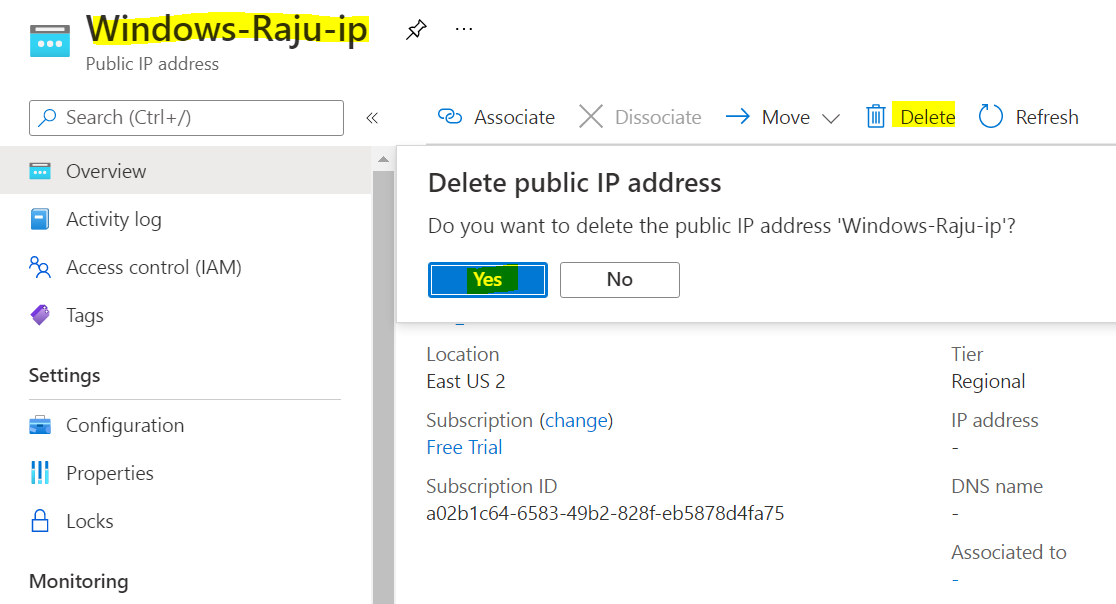
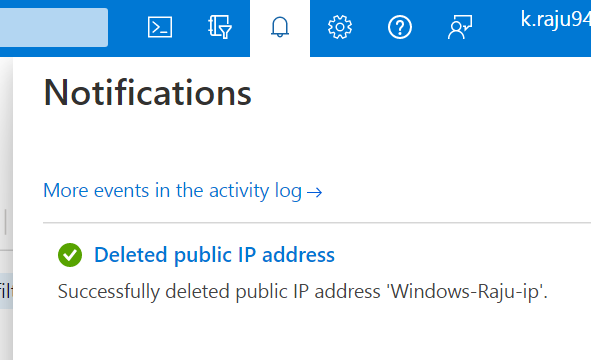
Now it has successfully Deleted
Thanks