Azure Cloud Shell # PowerShell

Azure Cloud Shell -> Azure Cloud Shell is an interactive, authenticated, browser-accessible shell for managing Azure resources. It provides the flexibility of choosing the shell experience that best suits the way you work, either Bash or PowerShell.

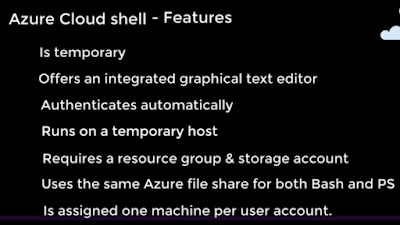
Azure Cloud Shell Features -> 

1. Azure PowerShell can be launched directly from a portal and it is temporary.

2. Azure PowerShell provides an integrated graphical text editor.

3. Azure PowerShell authenticates directly so no need to enter login details again and again.

4. Azure PowerShell runs on a temporary host.

5. Azure PowerShell requires a resource group and storage account, When you launch Azure Cloud Shell and if you have not created a Storage account, One pop up will prompt and ask to create an account automatically.

6. Azure PowerShell uses the same Azure file share for both Bash and PowerShell. Bash for Linux users and PowerShell for Windows.

7. Azure PowerShell is assigned one machine per user.

https://blogger.googleusercontent.com/img/b/R29vZ2xl/AVvXsEhKD-hg6TxjvOc13viAcCC_9Yv3F7LFRg94VnoIfIYrbE7zMQFQ_66tsw_RArMMvcizLJPvBmNxM1g0n6YbCrHRfABfQ8gJPvS8HTzA1bgR4PWnuBJFpEXwDnkn9Jewp3I9mIlZANpjI43M/w400-h225/image.png


Login to Azure Portal

https://blogger.googleusercontent.com/img/b/R29vZ2xl/AVvXsEh3Hp41Dh2BKC-c8W4W2_j7aaSah68IMbb31WmNcffFt3z5J2ZOtYsi8z_2CnOl4uqKqjyzgzI-YSRMM8T6xGar8URw4XNSGaGD2yiOFZwNM-tLiwOfI7KRlELPMw21aEwlrAufxYua0T-5/w400-h108/image.png

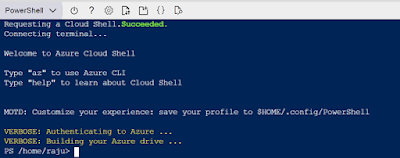
Click on PowerShell icon -> once you click on Cloud PowerShell icon one below page will open.


https://blogger.googleusercontent.com/img/b/R29vZ2xl/AVvXsEgPUmOPOXXqD1hVveUtRIgdVB_Ncs0uEzAU8D66jRoLWBYl49dZMRZ7UZSiI4NQcukaW1lV69OriPanT-8zl7zho8oDh0WCLAYNEAVd0Pzj_ADhc4YdjAXAtC01fWdVs0G7I1-XMyaYloDf/w400-h156/image.png

If you want to open for windows , click PowerShell.

https://blogger.googleusercontent.com/img/b/R29vZ2xl/AVvXsEjMQHkBqEwdUxMxsdQEScvnXaGAK0ZzIuhfKpp5IWnk0JK1aKfW_g_S6nXCHeNDr5aI4lIG7qZkXmkbfVamrFBCWSgfGNs20CSWLopbQjH_Gx3-aDIJNObbxGKLGD9JqXMeyOfWDeyeSUgI/w400-h161/image.png

One Storage account will be created if you don’t have an existing one.

It will take 2-3 minutes and PowerShell will launch.

https://blogger.googleusercontent.com/img/b/R29vZ2xl/AVvXsEjHoWHF5IoQ1zpaTvTsYHrtbc6oUSLgjHfOb8dcFVd_FvYQKeApb4IofOkcY5CYnGP1ljhUOv4vp2afiOmHC80D0n_9L-RmY-2U22FzFz8SFdTm-Soz9jsZHLhtOmu1RSpNKd3AZEtE3Jkl/w400-h158/image.png


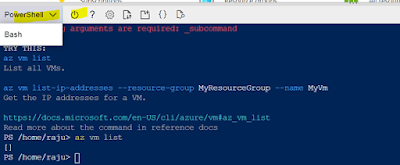
Later if you want to switch to Bash you can switch also you can re-launch PowerShell.

https://blogger.googleusercontent.com/img/b/R29vZ2xl/AVvXsEi8RH8nYiOWRkzVWi9dVlNsuHr2u3BhTNKzivm-uwMEqNuOKFKVbXOCjF4dW-1xcllJJySTSWpcTZjgsUy7Bon9vVuuXzpRr9SRel-4_U0ht_Yg7bx7zhkiZG9HV8ZwCv5KOGQyZzszvWaM/w400-h165/image.png


Create Resource Group using CloudShell


To perform any activity on Azure CloudShell or PowerCli you need to login with your subscription ID.


Login to Azure Account -> To login Azure subscription use below command.


Login-AzAccount -UseDeviceAuthentication


Then Open the link below and enter the Authentication Code.


https://microsoft.com/devicelogin


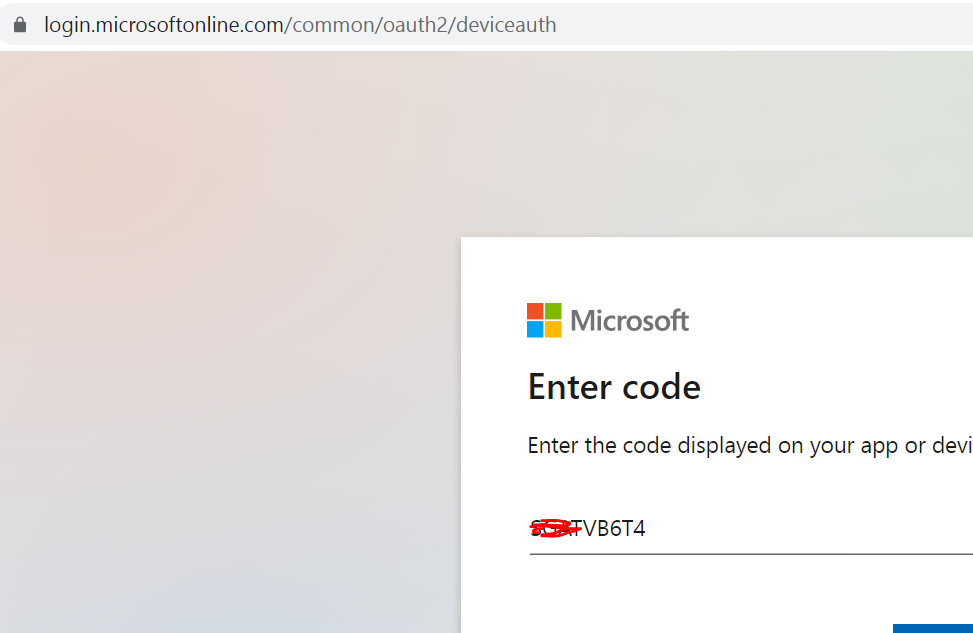
Now close this page as Authentication has already done.


Use Below Command to Create a Resource Group.


New-AzResourceGroup -Name RG_PowerShell -Location 'EastUS'


Use Below Command to Get a list of created Resource Groups.


Get-AzResourceGroup


Use Below Command to Delete Resource Group


Remove-AzResourceGroup -Name RG_PowerShell


RG_PowerShell -> Resource Group Name


Get Network adapter details

Below PS command can be use to get physical network and team details.


Get-NetAdapter | Format-table

Get Network Adapter details(Physical Only).
Get-NetAdapter -Physical


Get Network Adapter Statistics

Get-NetAdapterStatistics


List all the available NIC teams.

Get-NetLbfoTeam


Server Uptime and Service Status matching the text command

Some important command to get server uptime and Service status matching the text.

To get server Uptime

================

 Invoke-Command -ScriptBlock {

$dt = Get-Date 

$tz = [System.TimeZone]::CurrentTimeZone

Write-Host "`r`nHostname:" $(hostname)

Write-Host "Timezone:"  $tz.StandardName " / " $tz.DaylightName

Write-Host "Date: " $dt

}

============================
Expected output


===================================================
Get Service status matching the text
===============================

Get-Service | Where-Object {$_.Name -Match "windows" -or $_.DisplayName -Match "window" }

Expected Output


Start a service

Start-Service -Name "ServiceName"

Stop a service

Stop-Service -Name "ServiceName"


PS C:\Windows\system32> get-service -name wuauserv

Status   Name               DisplayName
------   ----               -----------
Stopped  wuauserv           Windows Update


PS C:\Windows\system32> start-service wuauserv
PS C:\Windows\system32> get-service -name wuauserv

Status   Name               DisplayName
------   ----               -----------
Running  wuauserv           Windows Update


PS C:\Windows\system32> stop-service wuauserv
PS C:\Windows\system32> get-service -name wuauserv

Status   Name               DisplayName
------   ----               -----------
Stopped  wuauserv           Windows Update


VMtool update at power cycle and Manual

 Script to enable update vmtool at power cycle  and Manual

Using below script you can enable and disable VMtool update. You can schedule VMtool update using VUM as well.


#Script to update Vmtool on power cycle

Connect-VIServer -Server VCSA7.ads.com

$VM = Get-Content "c:\temp\VM_list.txt"

foreach ($i in $VM){

$vm = Get-VM -Name $i | % {Get-View $_.ID}

$vmConfigSpec = New-Object VMware.Vim.VirtualMachineConfigSpec

$vmConfigSpec.Tools = New-Object VMware.Vim.ToolsConfigInfo

$vmConfigSpec.Tools.ToolsUpgradePolicy = "upgradeAtPowerCycle”

$vm.ReconfigVM($vmConfigSpec)


VM_List  -> Put list of the VMs on which you want to update VMTool

=======================================


Script to Disable update vmtool at power cycle 

#Script to change the VM update at power cycle to Manual


Connect-VIServer -Server VCSA7.ads.com

$VM = Get-Content "c:\temp\VM_list.txt"

foreach ($i in $VM){

$vm = Get-VM -Name $i | % {Get-View $_.ID}

$vmConfigSpec = New-Object VMware.Vim.VirtualMachineConfigSpec

$vmConfigSpec.Tools = New-Object VMware.Vim.ToolsConfigInfo

$vmConfigSpec.Tools.ToolsUpgradePolicy = "Manual”

$vm.ReconfigVM($vmConfigSpec)


Windows system up time and high CPU usage processes

 Windows system up time

Invoke-Command -ScriptBlock {
	$ut = (get-date) - (gcim Win32_OperatingSystem).LastBootUpTime 
	$tz = [System.TimeZone]::CurrentTimeZone
	Write-Host "`r`nHostname:" $(hostname)
	Write-Host "Timezone:"  $tz.StandardName " / " $tz.DaylightName
	Write-Host "Up time: " $ut.Days " Days " $ut.Hours " Hours " $ut.Minutes " Minutes `r`n"
}

Sample Output:
Hostname: Computer1
Timezone: Romance Standard Time / Romance Daylight Time
Up time: 4 Days 22 Hours 51 Minutes


Get top 5 high CPU usage processes

Get-Process | Sort CPU -descending | Select -first 5 -Property ID, ProcessName, Description, CPU | Format-List
=================================
Expected output
Id          : 2140
ProcessName : chrome
Description : Google Chrome
CPU         : 681.109375

Id          : 7032
ProcessName : mcshield
Description :
CPU         : 649.71875

Id          : 5016
ProcessName : dptf_helper
Description : Intel(R) Dynamic Tuning Utility Application
CPU         : 516.328125


Bulk Machine Remote Telnet PowerShell Script

How to do remote Telnet from multiple source machines & ports.

$Servers = "Computer1",

"Computer2",

"Computer3",

"Computer4",

"Computer5"

 $Ports   =  "443"    

$Destination = "192.168.1.5"

$Results = @()

$Results = Invoke-Command $Servers {param($Destination,$Ports)

                $Object = New-Object PSCustomObject

                $Object | Add-Member -MemberType NoteProperty -Name "ServerName" -Value $env:COMPUTERNAME

                $Object | Add-Member -MemberType NoteProperty -Name "Destination" -Value $Destination

                    Foreach ($P in $Ports){

                        $PortCheck = (Test-NetConnection -Port $p -ComputerName $Destination ).TcpTestSucceeded

                        If($PortCheck -notmatch "True|False"){$PortCheck = "ERROR"}

                        $Object | Add-Member Noteproperty "$("Port " + "$p")" -Value "$($PortCheck)"

                    }

                $Object

           } -ArgumentList $Destination,$Ports | select * -ExcludeProperty runspaceid, pscomputername -Verbose

            $Results | Format-Table -AutoSize | Out-file "C:\temp\portstatus.csv" -Append


============================

# Add the source servers separated with comma " , "

# Make sure the last source server doesn’t end with a comma

To check multiple port status add separated with comma " " , " "

$Ports   =  "445",

                  "139"

Fix Failed resolving Custom domain in blogger For full functionality of this site it is necessary to enable JavaScript

If you are getting below error while opening custom website in blogger, you need to follow below steps to fix it.

For full functionality of this site it is necessary to enable JavaScript. Here are the instructions how to enable JavaScript in your web browser.

Login to your blogger link

Go to Setting

You need to check below settings in Blogger

Under Privacy

Visible to search engines should be enabled.

Once you will enable it only Google will recognize your newly purchased domain name.


Under publishing

Check Custom domain

Redirect domain -> Should be enabled.

Now under Errors and redirects

Click Custom redirects 


Click Custom redirects -> Click Add


Under From enter Custom domain name without www that is failing to recognize in Google, Like below


Under To enter custom domain Name with WWW, like below.


And Save it.

Now wait for 5-10 minutes and search it again in Google.


NetApp ONTAP Data LIF Create

NetApp ONTAP Data LIF -:

A LIF identify the type of traffic that is supported over the LIF, A LIF can carry traffic any of the below types:
1.Data Traffic
2.InterCluster Traffic
3.Cluster  Traffic
4.Cluster Management Traffic
5.Node Management Traffic

The Storage Virtual Machine (SVM) does not have any data LIF configured for CIFS protocol. Create data LIFs before configuring the CIFS server.]

If you are getting above error while enabling protocol on SVM you need to create LIF.

How to create LIF in NetApp using GUI

Login to NetApp ONTAP using cluster IP.

Click on Network -> Network Interface


Click create


Give Name for LIF

Select interface role -> Here I am selecting for serves data

Select SVM for that you want to create LIF. One LIF can be use for one SVM

Select protocol access -> CIFS, iSCSI, NFS

Assign IP address -> Drop down and select without a subnet one page will prompt to enter IP, Subnet and DG

From port-> expend it and select though with physical interface you want to pass the traffic. Later you can migrate it.

Once you will configure you can't edit it


 iSCSI enabled SVM in NetApp ONTAP and mount to Windows and ESXI host

NetApp ONTAP LUN create step by step

NetApp ONTAP NFS volume and mount to ESXI host

NetApp ONTAP SVM create (NFS, CIFS, iSCSI protocol)


NetApp ONTAP LUN create step by step

NetApp ONTAP LUN  create step by step 

Login to ONTAP using cluster IP

Expend Storage

Click LUNs


Click Create

Click next


Give LUN Name

OS Type -> Select VMWare


Assign Size -> Next


Select an existing Volume or qtree for this LUN

Browse


Select Volume where you want or create LUN

If you want to create new Volume for LUN


Select Create a new flexible volume


Aggregate Name -> Click choose and select Aggregate name

Volume Name -> Give Volume Name


Click Add Initiator group


Name -> Give Initiator group name

Operating System -> Drop down and select Operating system


Select the Supported protocol for this Group -> iSCSI


Select Initiator Group name give LUN ID -> Next


Check mark manage Storage quality of service if you want to configure

Here I am not configuring. -> Click Next


Click Next


Click Finish

Give Initiator Details i Initiator Group

Click newly created LUN

SVM-> Select iSCSI enabled SVM
Click initiator Groups

Click initiators
enter initiator IQN name and add initiator


Apply and OK

Done with NetApp ONTAP LUN  creating  steps


now you can MAP LUN in ESXI host ......................


NetApp ONTAP SVM # iSCSI Volume

iSCSI enabled SVM in NetApp ONTAP and mount to Windows and ESXI host Steps 

Login to ONTAP using cluster IP

Expend Storage -> Select SVMs


Click Create


Enter SVM Name

Data Protocol -> Select iSCSI

Security Style -> Drop down and select NTFS

Root Aggregate -> Drop down and select Aggregate


Under Data LIF configuration

Target Allias -> iSCSI host name

Before assigning host name create host record to reserve it with static IP

LUN Size -> Assign LUN size

Assign IP Address -> Without a subnet

One page will open separately to assign IP address

Host Initiator -> Assign iSCSI initiator

For Windows server below steps to capture iSCSI initiator details

Login to Server and search iSCSI Initiator

Click  Configuration

Copy Initiator details from Initiator Name


Once Initiator details capture click Submit and Continue


Under SVM Administrator details

Enter Administrator Password

check mark Create a new LIF for SVM management

Assign IP Address drop down and select with subnet


Enter IP Address

Enter Netmask

Press OK


Now click Browse

Select Ethernet port -> OK

Click Submit and Continue


Click OK


To check SVM configuration

Select SVM -> Setting

Select iSCSI -> check servce status

iSCSI service

iSCSI target alias


Now login to windows server

Open iSCSI initiator

Click Target -> Enter Target name (iSCSI server IP or Name)

Click quick connect


Now you can see Progress report

it showing Login Succeeded it means working fine.

Open Disk management and bring it online

Done with iSCSI enabled SVM in NetApp ONTAP


Featured Post

HPE MSA 2040 configuration step by step

HPE MSA 2040 configuration Default IP range for HP SAN storage MSA 2040 is 10.0.0.1/2 You need to connect your laptop and storage with...