Microsoft Certificate Server Migration to 2K19 with
same Hostname and IP Step by Step
- Run pkiview on the CA server to make sure all AIA and CDP locations are working fine.
Before we do the migration, please do a system state backup on the CA server, in case we want to rollback.--->Backup Roles need to enable on CA server to take system state backup.

- Then we can try to migrate to CA. First we need to do a full CA database backup using the following command:
CERTUTIL -f -p <password> -backup <backup path like C:\CABackup>
Note: Please remember the <password> that you specify in the command above, it will be used when installing the CA later.

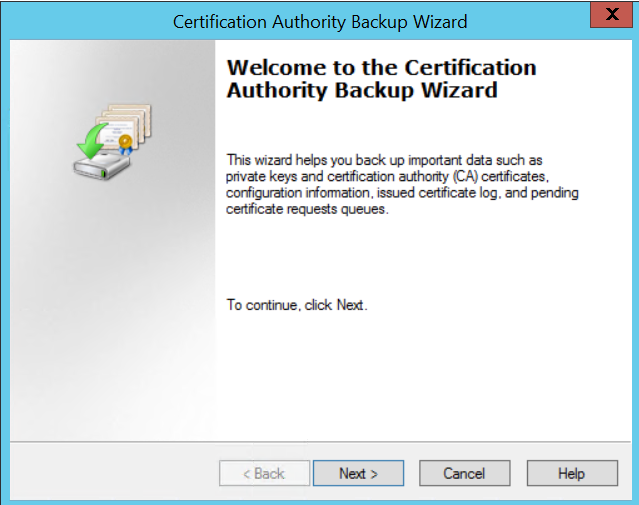
1) Use CA administrator to log on to the destination server by using an account that is a CA administrator.
2) Start the Certification Authority snap-in.
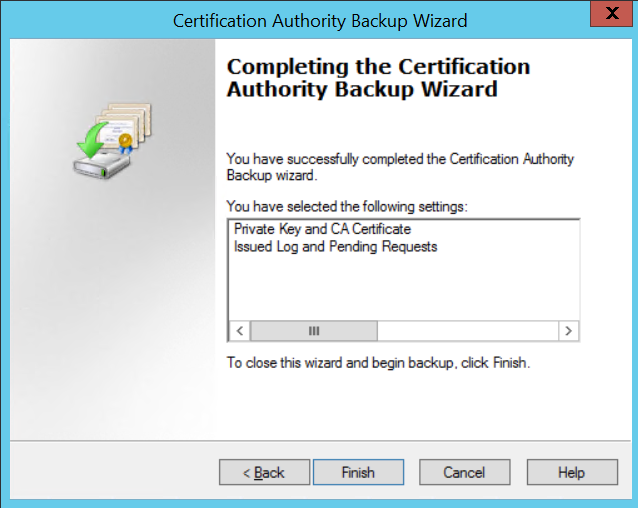
3) Right-click the node with the CA name, point to All Tasks, and then click Backup CA. Click Next
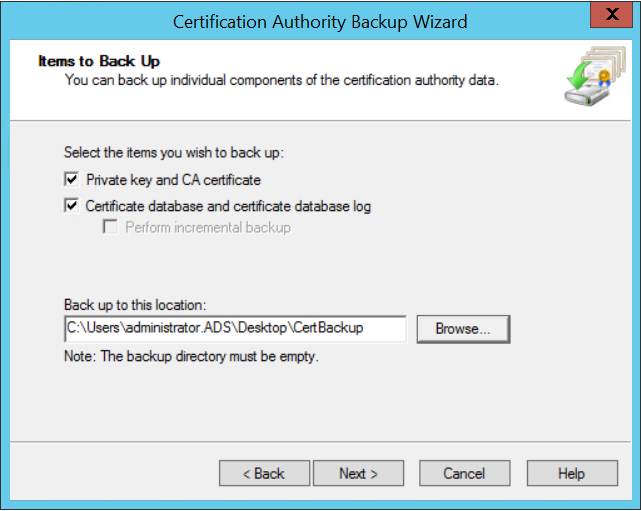
4) Select Private Key and CA Certificate and Certificate database and certificate database log
Browse and give the path where you want to save backup file.
5) Give the password and keep it remember because the password will be use during restore.


- Backup The CA service registry key:
REG export HKLM\SYSTEM\CurrentControlSet\Services\CertSvc\Configuration C:\CABackup\RegBak.reg

In the CA console, right click on the Revoked Certificates->All Tasks->Publish->New CRL
Then you will have an additional week CRL for the current certificate to use during the migration.
<Manually publish the certificate revocation list>
http://technet.microsoft.com/en-us/library/cc778151(WS.10).aspx


Backup CAPolicy.inf:
If your source CA is using a custom CAPolicy.inf file, you should copy the file to the same location on the destination server as the source CA backup files.
The CAPolicy.inf file is located in the %SystemRoot% directory, which is usually C:\Windows.
If you didn’t find this file, you may ignore this step.
Backup CA templates list:
Open a Command Prompt window.
Type certutil.exe -catemplates > catemplates.txt and press ENTER.
Verify that the catemplates.txt file contains the templates list.

Recording a CA's signature algorithm and CSP ------ no need to import in destination machine if you are not using Vendor CSP but take backup and keep it in new server
During CA installation on the destination server, you can specify the signature algorithm and CSP used by the CA or accept the default configuration.
If your source CA is not using the default configuration, then you should complete the following procedure to record the CSP and signature algorithm.
If an HSM is used by the source CA, follow procedures provided by the HSM vendor to determine the HSM CSP.
certutil.exe -getreg ca\csp\* > csp.txt and press ENTER.
Copy everything data out and shutdown the CA server.
Please install the new CA server on the new hardware with the same computer name.
Register the IP address, configure DNS server and some other network settings if required.
If this is the Issuing CA, please join this server into domain using Domain Admin account, then it will build up the secure channel to overwrite the computer object of the original CA server in AD.
(The secure channel with the old CA server will be broken after the new CA server joins the domain with the same hostname.)
Copy the CA backup folder to the new installed server.
Import the CA certificates:
Start the Certificates MMC snap-in for the local computer account.
In the console tree, double-click Certificates (Local Computer), and click Personal.
On the Action menu, click All Tasks, and then click Import to open the Certificate Import Wizard. Click Next.
Locate the <CAName>.p12 file created by the CA certificate and private key backup on the source CA, and click Open.
Note-: Same certificate that you have taken backup using cli “CERTUTIL -f -p <password> -backup <backup path like C:\CABackup> ” need to import. Once you will import here then during CA backup restoration Import existing certificate will not prompt.
If you are not importing here, then during restoration also you can import.
Type the password in the first step and click OK.
Click Place all certificates in the following store.
Verify Personal is displayed in the Certificate store. If it is not, click Browse, click Personal, and click OK.
If the imported certificate fails to bind with the private key, please copy the Serial Number of each CA certificate and run the following command to repair the private key:
certutil -repairstore My “SerialNumber”

- Adding the CA role service by using Server Manager on the new installed server:
Start Server Manager.
In the console tree, click Manage, then Add Roles and Features.
If the Before you Begin page appears, click Next.
On the Installation Type page, select Role-based or feature-based installation.
On the Server Selection page, keep the option Select a server from the server pool, then select the local server itself, and click Next.
On the Server Roles page, select the Active Directory Certificate Services check box, and click Next, in the Add Roles and Feature Wizard prompt window, click Add Feature, and click Next.
On the Features tab, click Next.
On the AD CS page, click Next.
On the Role Services page, click the Certification Authority check box, and click Next.
Note: If you plan to install other role services on the destination server, you should complete the CA installation first, and then install other role services separately. - Installation procedures for other AD CS role services are not described in this guide.
On the Confirmation page, click Install.
When installation finishes, click Configure Active Directory Certificate Services on the destination server.
On the Credentials page, specify the Domain Admin account, configure the role services, and click Next.
On the Role Services page, click Certification Authority, and click Next.
On the Setup Type page, specify either Enterprise or Standalone, to match the source CA, and click Next.
On the CA Type page, specify either Root CA or Subordinate CA, to match the source CA, and click Next.
On the Private Key page, select Use existing private key and Select a certificate and use its associated private key.
In the Existing Certificate list, click the imported CA certificate, and then click Next.
On the Certificate Database page, specify the locations for the CA database and log files.
Note-: In my source CA server we are using custom path for CA database and log files
D:\CertLog give the same path
Also compare in regedit.
On the Confirm Installation Selections page, review the messages, and then click Install.
Restore the CA database from the backup:
Use a CA administrator to log on to the destination server by using an account that is a CA administrator.
Start the Certification Authority snap-in.
Right-click the node with the CA name, point to All Tasks, and then click Restore CA. If prompted, click OK to stop the CA service.
On the Welcome page, click Next.
On the Items to Restore page, select Certificate database and certificate database log.
Click Browse, and locate the Database directory that contains the CA database files created during the CA database backup.
NOTE: Do not select the Database directory. Select its parent directory.
Type the password that you used to back up the CA database on the source CA.
Click Finish, and then click Yes to restart the CA service.
Import the original CA service registry key:
Stop the Certificate service: net stop certsvc.
Locate the registry file that you saved in the backup folder, and then double-click it to import the registry settings.
Open Regedit, in the console tree, locate the key HKEY_LOCAL_MACHINE\SYSTEM\CurrentControlSet\services\CertSvc\Configuration, and click Configuration.
In the details pane, double-click DBSessionCount.
Click Hexadecimal. In Value data, type 64, and then click OK.
Verify the locations specified in the following settings are correct for your destination server, and change them as needed to indicate the location of the CA database and log files.
DBDirectory
DBLogDirectory
DBSystemDirectory
DBTempDirectory
Start CA service: net start certsvc
Restore the Certificate Template list:
Open a command prompt window.
Type certutil -setcatemplates +<templatelist> and press ENTER.
NOTE: Replace <templatelist> with a comma-separated list of the template names that are listed in the catemplates.txt file created during Step 6. For example, certutil -setcatemplates +Administrator,User,DomainController.
If there are any additional Steps needed by HSM vendor in their Migration White Paper, please add them into it between Step 13 and 17.---- Private key need to check stored in same server or any external storage
Confirm permission on the AIA and CDP containers in AD (only for Intermediate CA):
Log on as a member of the Enterprise Admins group to a computer on which the Active Directory Sites and Services snap-in is installed.
Click Start, point to Run, type dssite.msc, and then click OK.
In the console tree, click the top node.
On the View menu, click Show services node.
In the console tree, expand Services, expand Public Key Services, and then click AIA.
In the details pane, right-click the name of the Intermediate-CA, and then click Properties.
Click the Security tab, confirm the CA server has Full Control permission here.
In the console tree, expand CDP, and then click the name of the CA server.
In the details pane, right-click each cRLDistributionPoint item of the list, and then click Properties.
Click the Security tab, confirm the CA server has Full Control permission here.
Open pkiview from the target new CA server, confirm the CDP and AIA status are OK.
Note: As your PKI has additional http CDP and AIA URLs like below, you might need install and configure the same in IIS of the new CA server, - to make sure all those URLs in PKIVIEW are accessible.
Request test cert from this CA server to make sure everything’s fine.
Keep the old CA server in shutdown status, monitor a few days to make sure everything’s fine.
Here are official step by step article:
http://technet.microsoft.com/en-us/library/ee126170(WS.10).aspx
Recording a CA's signature algorithm and CSP -> Need to check
During CA installation on the destination server, you can specify the signature algorithm and CSP used by the CA or accept the default configuration.
If your source CA is not using the default configuration, then you should complete the following procedure to record the CSP and signature algorithm. If an HSM is used by the source CA,
follow procedures provided by the HSM vendor to determine the HSM CSP.
Log on with local administrative credentials to the CA computer.
Open a Command Prompt window.
Type certutil.exe –getreg ca\csp\* > csp.txt and press ENTER.
Verify that the csp.txt file contains the CSP details


No comments:
Post a Comment