Steps to customize windows start layout and taskbar using group policy
To prepare a Start layout for export, you simply customize the Start layout on a test computer.
To prepare a test computer
Set up a test computer on which to customize the Start layout. Your test computer should have the operating system that is installed on the users’ computers. Install all apps and services that the Start layout should display.
Create a new user account that you will use to customize the Start layout.
To customize Start
Sign in to your test computer with the user account that you created.
Customize the Start layout as you want users to see it by using the following techniques:
Pin apps to Start. From Start, type the name of the app. When the app appears in the search results, right-click the app, and then click Pin to Start.
To view all apps, click All apps in the bottom-left corner of Start. Right-click any app, and pin or unpin it from Start.
Unpin apps that you don’t want to display. To unpin an app, right-click the app, and then click Unpin from Start.
Drag tiles on Start to reorder or group apps.
Resize tiles. To resize tiles, right-click the tile and then click Resize.
Create your own app groups. Drag the apps to an empty area. To name a group, click above the group of tiles and then type the name in the Name group field that appears above the group.
Initial start layout and task manager setting on my test machine “Database”
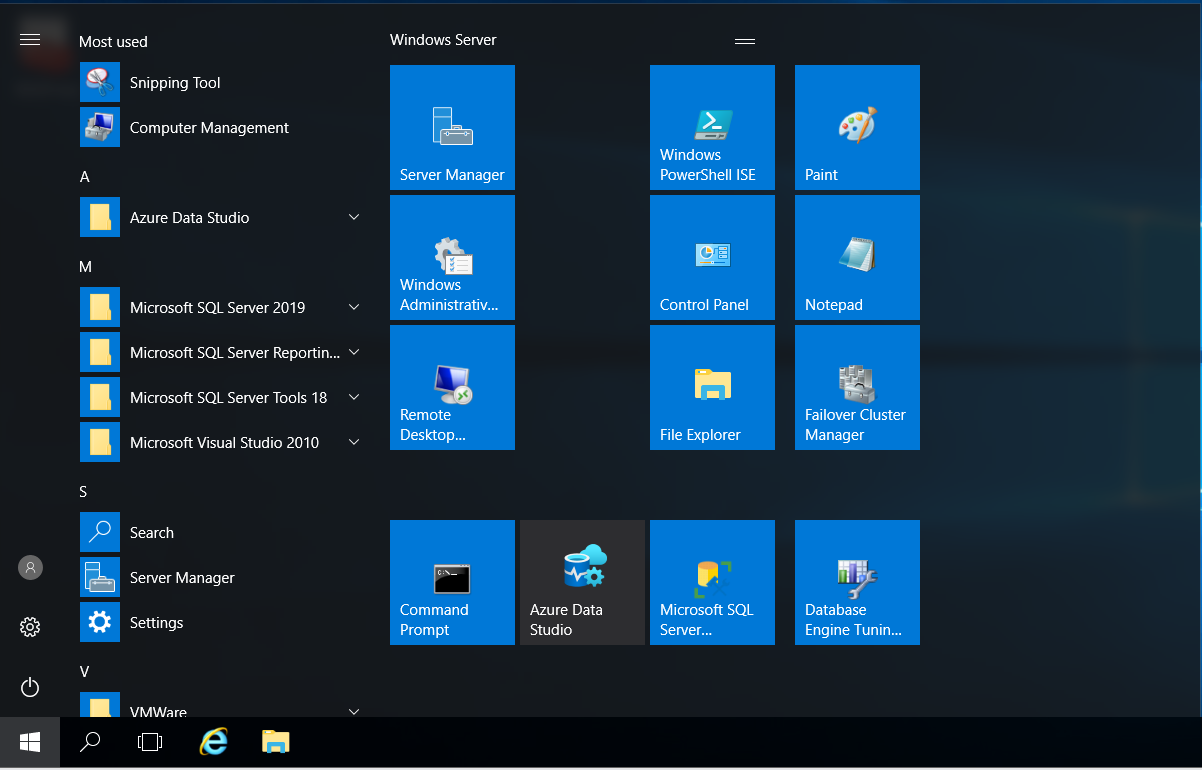
Now you need to pin/unpin from start and taskbar as per your requirements.
Here I have pined application in start menu and taskbar as per my requirement in my test machine “Database”

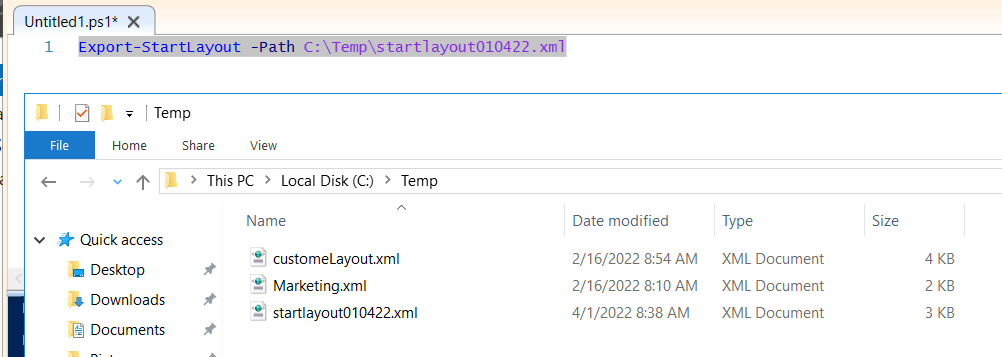
Now launch PowerShell
Run below command to generate start layout .xml file
You can export application path using
“AppUserModelID or DesktopApplicationLinkPath”
It depends on the OS where you are running this script.
Export-StartLayout -Path C:\Temp\startlayout010422.xml
Now go to machine open gpedit.msc
Local Computer Policy -> Computer Configuration ->Administrative Templates -> Start Menu and Taskbar ->
Double click on Start Layout -> Enable and enter .xml file path

If you want to configure for User only then you need to select User configuration -> Administrative Templates -> Start Menu and Taskbar ->
Double click on Start Layout -> Enable and enter .xml file path
Run Gpupdate /force and restart the machine and try with any local user.
Once this policy is implemented, users can’t customize the Start layout.
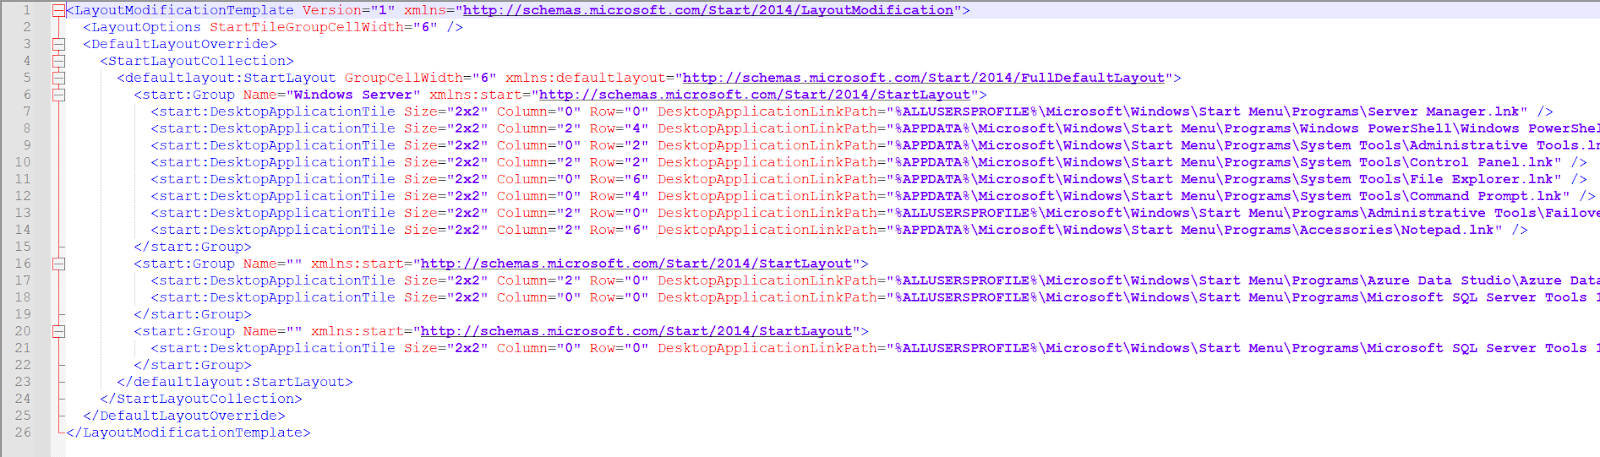
To configure taskbar in windows you need to do some modification in existing .xml file
Add xmlns:taskbar="http://schemas.microsoft.com/Start/2014/TaskbarLayout" to the first line of the file, before the closing >
Like below

Use below layout setting between
</DefaultLayoutOverride>
</LayoutModificationTemplate>
And add DesktopApplicationLinkPath with application name .ink in between like below
<CustomTaskbarLayoutCollection>
<defaultlayout:TaskbarLayout>
<taskbar:TaskbarPinList>
<taskbar:UWA AppUserModelID="Microsoft.MicrosoftEdge_8wekyb3d8bbwe!MicrosoftEdge" />
<taskbar:DesktopApp DesktopApplicationLinkPath="%APPDATA%\Microsoft\Windows\Start Menu\Programs\System Tools\File Explorer.lnk" />
</taskbar:TaskbarPinList>
</defaultlayout:TaskbarLayout>
</CustomTaskbarLayoutCollection>

Save the .xml file and again run gpupdate /force and check with any local user.
Now the same taskbar and start layout will apply to all users.
Thanks!!!!


No comments:
Post a Comment