VMWare vSphere Site Recovery Manager SRM Post Deployment
Configuration
When you install site Recovery Manager you have to do Inventory Mappings from DC site to DR sire. Inventory mapping includes network mappings, Folder mappings, Resource mappings, Storage policy mappings. All of the mappings require for proper management and configuration of virtual machine at DR site.
1. Network Mapping -> Network Mappings is very important to provide the Network connectivity to virtual machines. In Network Mapping we specify the network to be mapped from protected site (DC site) to Recovery site (DR Site). So that if you do recovery of the virtual machines, your virtual machines will get access to the network
Steps to configure Network Mapping in SRM 8.3
Login to vCenter server.
Go to site recovery
Click on the new site pair
If you have not paired already. In my case I have already paired
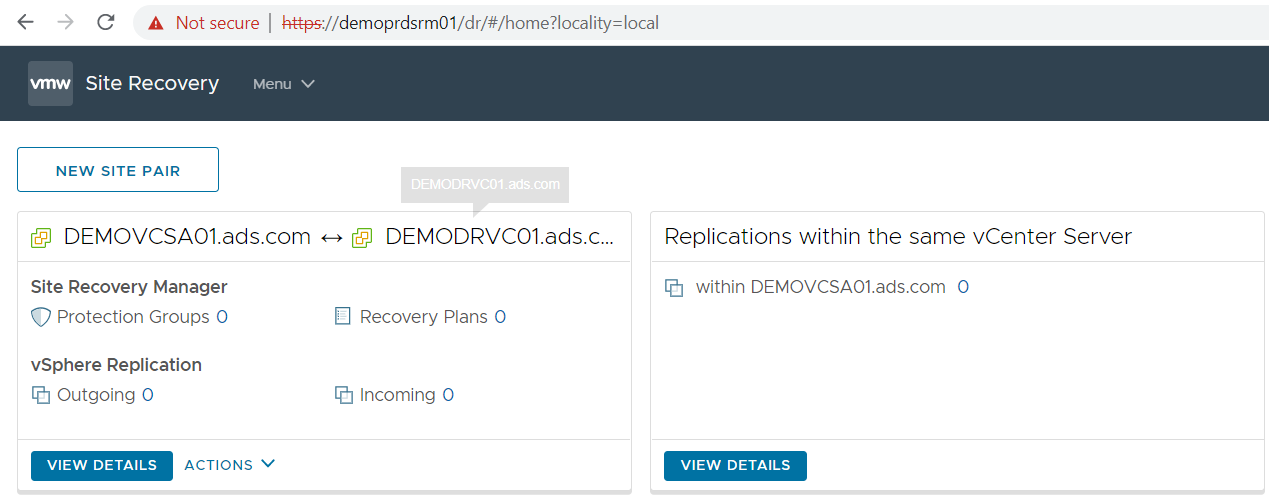
Click view details if you have already paired site
Under the configuration click network mapping.

Click new

Select creation mode either automatically or manually.
In my case I am selecting manually
Expand the network vDS and select the NIC in both vCenter that you want to configure for recovery network

Click Add mapping -> Next

Select portgroup that you want for Reverse mapping -> Next

Click change if you want to create an isolated network for specific portgroup or click next for default.

Click next
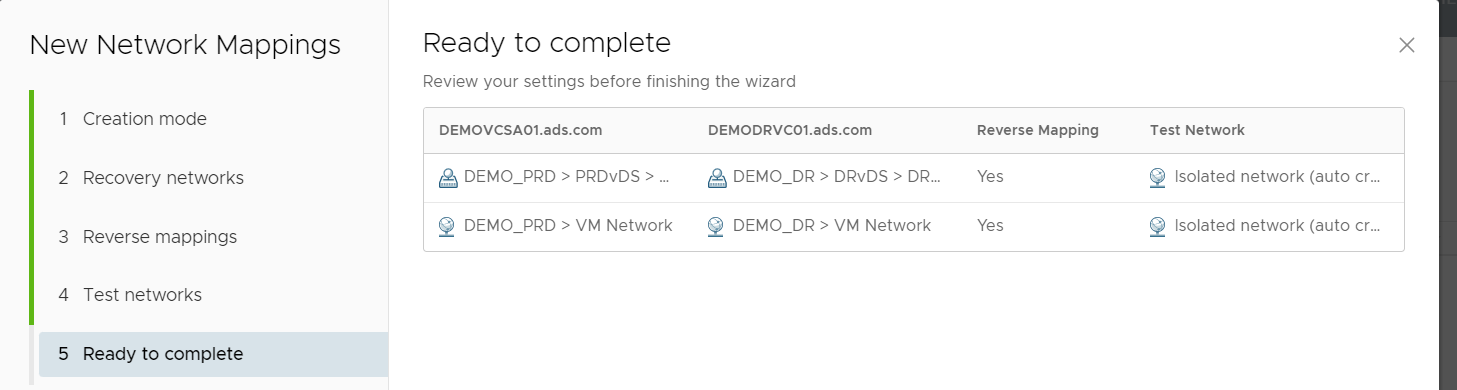
Click next

Now network mapping is created.
1. 2. Folder Mappings -: Folder Mappings is nice feature which helps you to organize Virtual
Machines in folders. You can Map the folders from Protected Site to the
Recovery site so you can make proper management of Virtual Machines. Before
starting with Folder Mappings make sure you create same folders at the Recovery
Site.
Steps to configure folder mapping in SRM 8.3
Create folder at both PRD and DR sites from vCenter console
Go to Site Recovery console
Under configuration -> Select Folder mappings
Click new

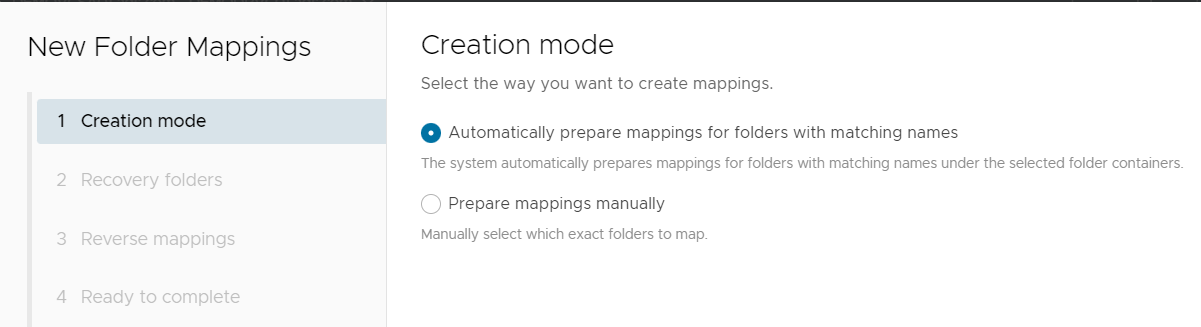
Select folder mapping mode
Select folder from list and click add mapping
Click next

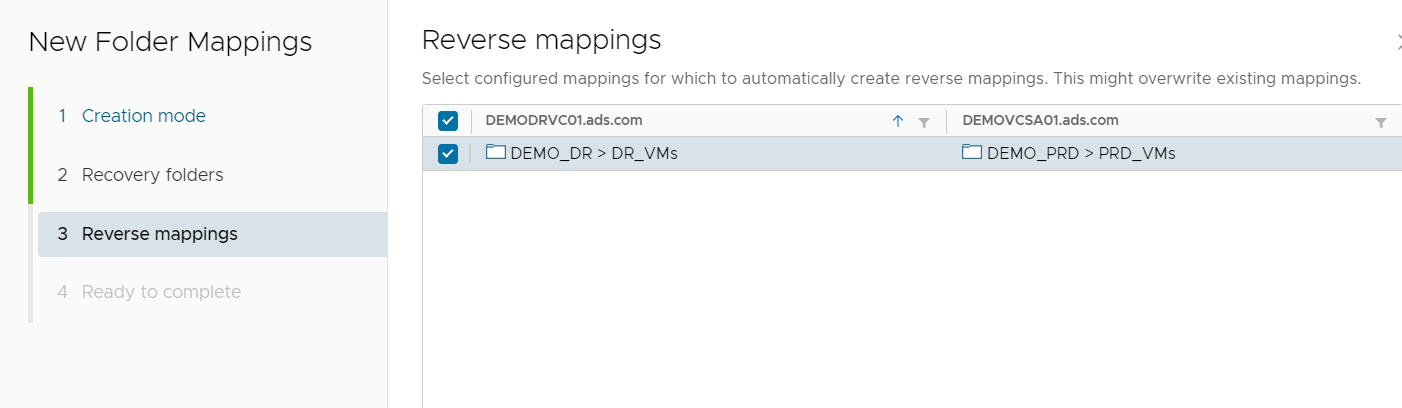
Enable reverse mapping
Click next
Click next
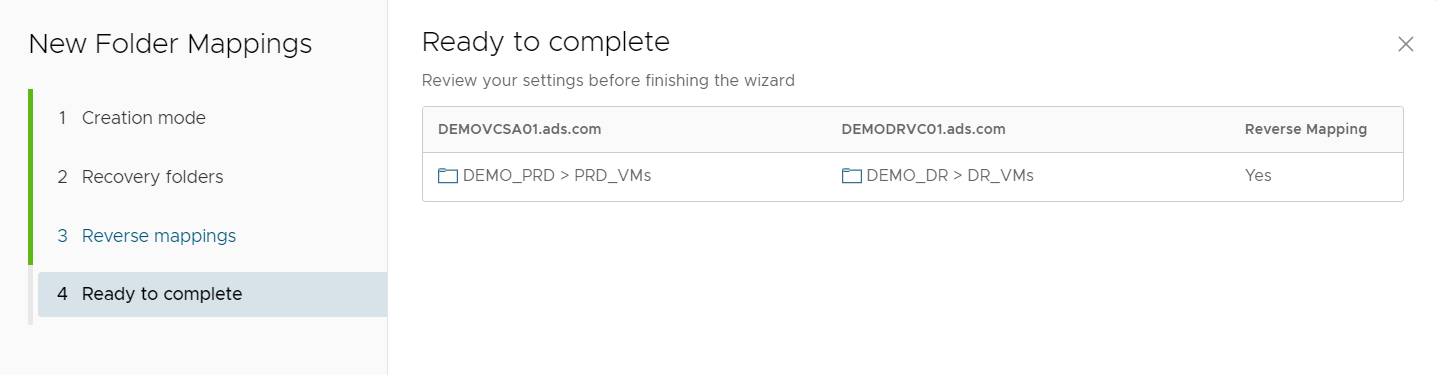
Finish
Now folder has mapped visible from both PRD and DR

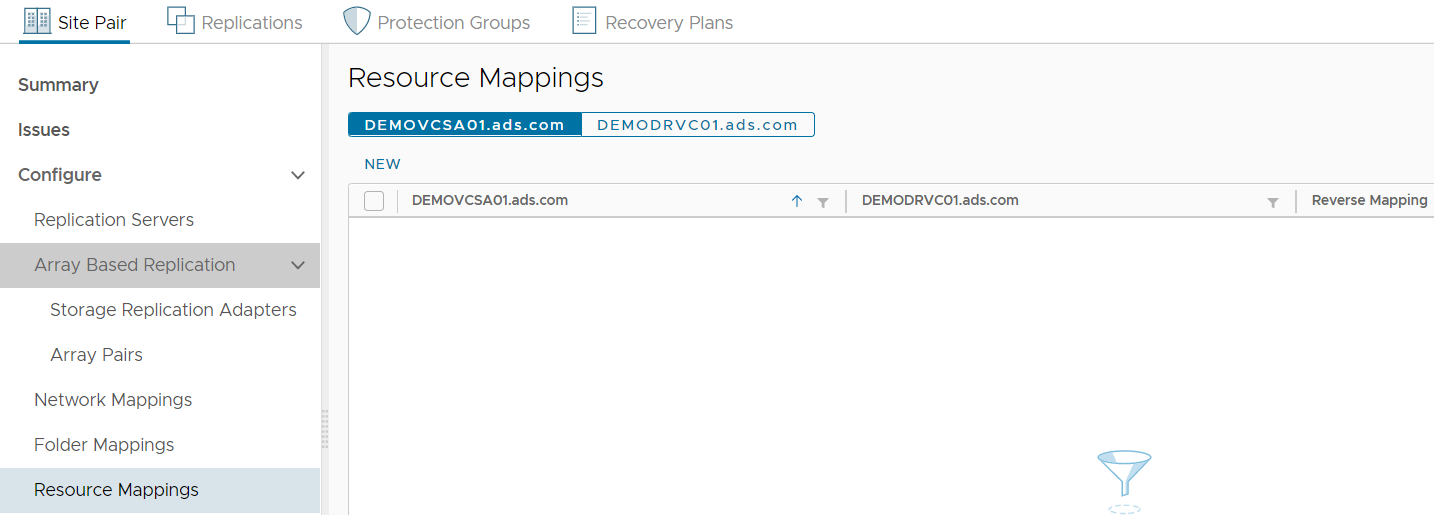
1. 3. Resource Mapping-: Resource mappings allow you to map the resources from protected site to
recovery site. You can map resource pools, standalone hosts, vApps or clusters
on the protected site to resource pools, standalone hosts, vApps, or clusters
on the recovery site. You can map any types of resource on one site to any types
of resource on the other site. It is useful when you are using resource pools
so that you can map resource to the recovery site for easy management.
You need to create same resource at both PRD and DR sites.
Go to Site Recovery console
Under configuration -> Select Resource mappings
Click new
Select resource from the list

Click add mapping

Enable reverse mappings -> click next
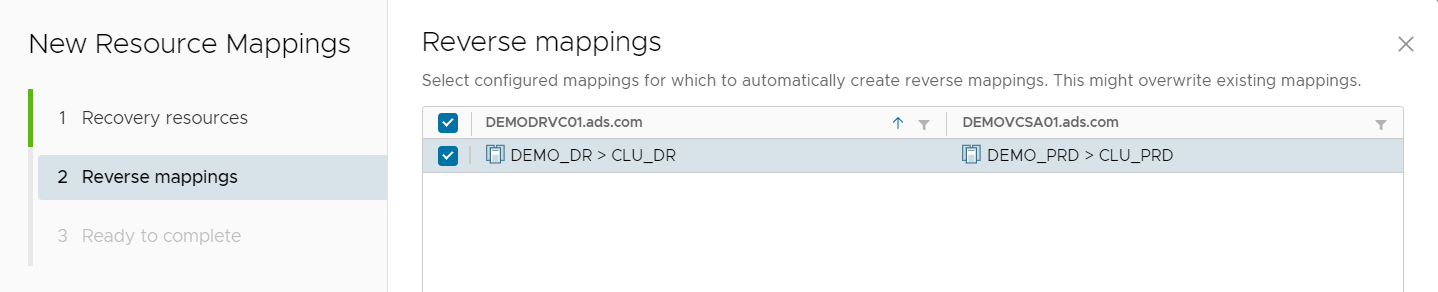

Click Finish
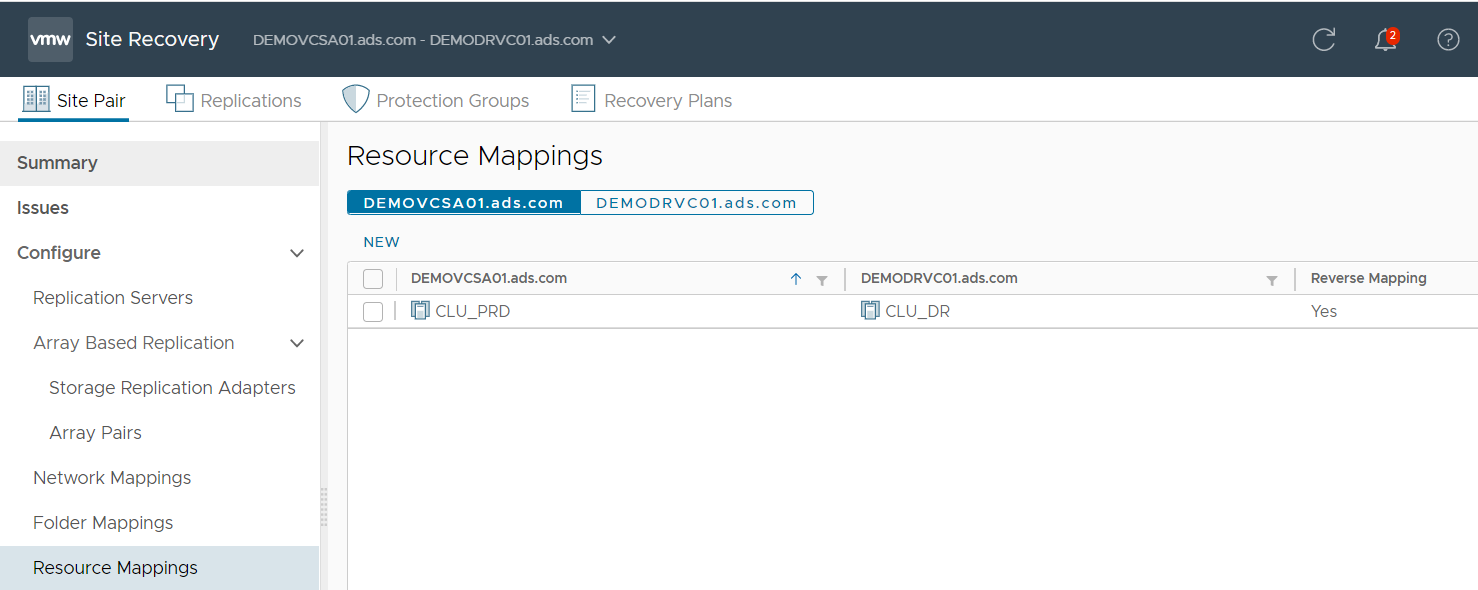
Now Resource mapping has been created.
Same you need to do for Placeholder Datastore


No comments:
Post a Comment